Specifications module workflow
In the Specifications Module, you will find 4 sections - Current set, Working set, Deliveries, and Approvals.
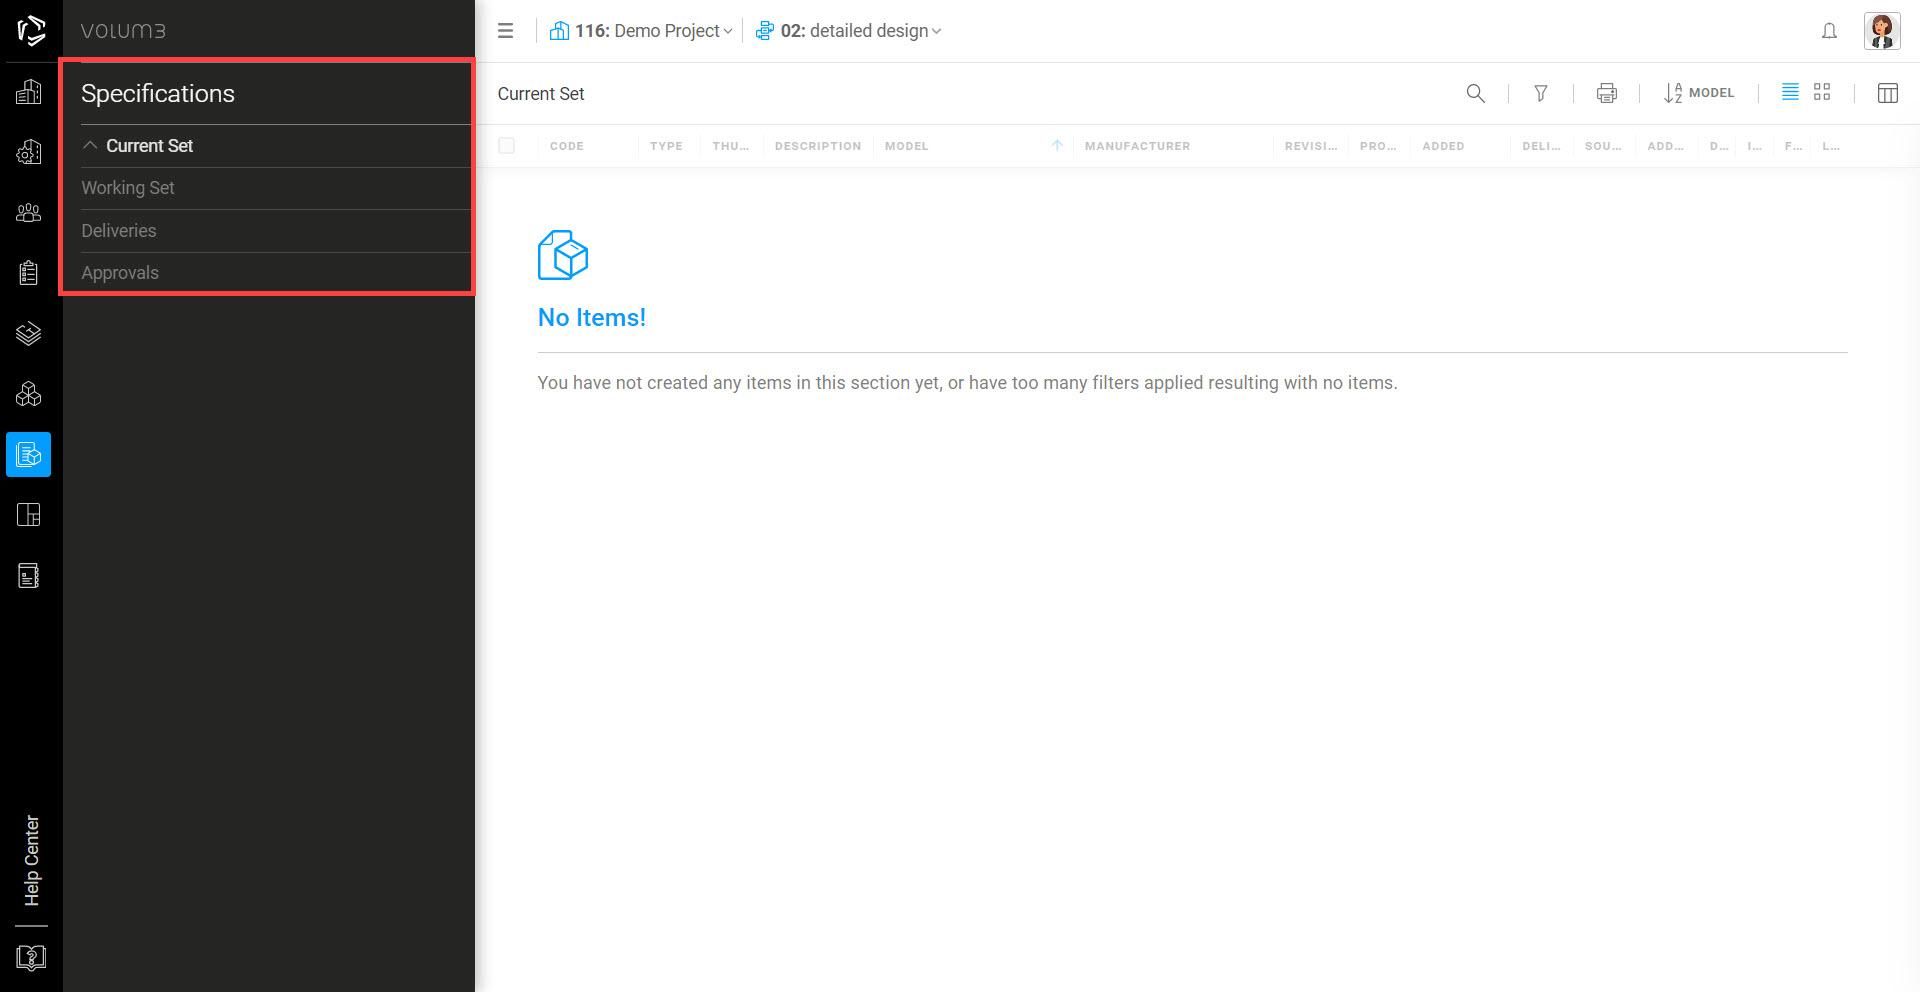
You can create and edit specifications in the Working set.
To send specifications to the Current set you have to use deliveries. You can add specifications one by one to a Delivery or add multiple at once. You can create and send a Delivery instantly, or you can simply create one to add more and more specifications within time and send it when the job is done.
Deliveries can be found in the Deliveries section. To reduce invalid specifications cluttering the Current set, there can be an Approver appointed for that Discipline to doublecheck the Delivery and Specifications within. In that case, check the status of the Delivery by clicking on the Approvals section.
Once approved, specifications will be delivered to the Current set.
To conclude, the flow starts in the Working set, then via Deliveries (and Approver if appointed) specifications get to the Current set.
Properties
In the specification flyout, under the Properties tab, you can edit specification details such as Manufacturer, Representative, Representative contact, etc. Some of the fields already have entries, which you have done in the previous step.
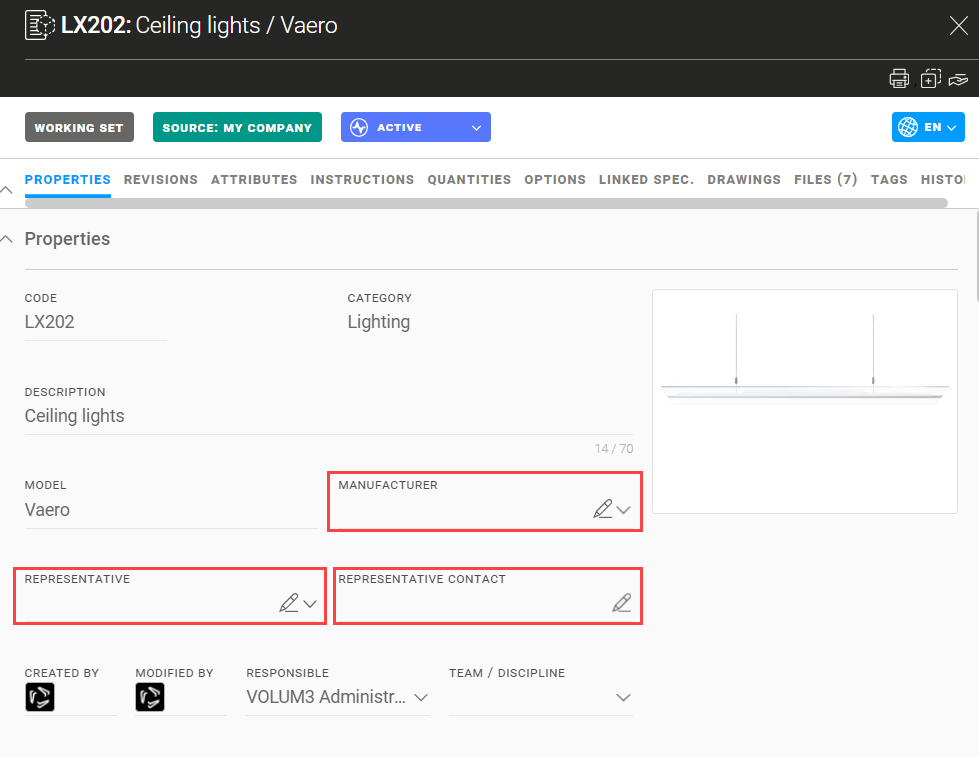
Manufacturer
To assign a Manufacturer to a specification, you have several choices.
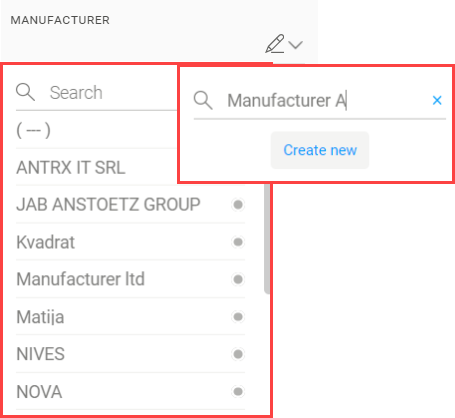
The dropdown menu on the right side of the Manufacturer's field will offer all Companies you have previously entered in your Address Book. By selecting one, the company will appear in the Manufacturers field.
You can choose not to specify the Manufacturer and select ( --- ) at the top of the dropdown menu.
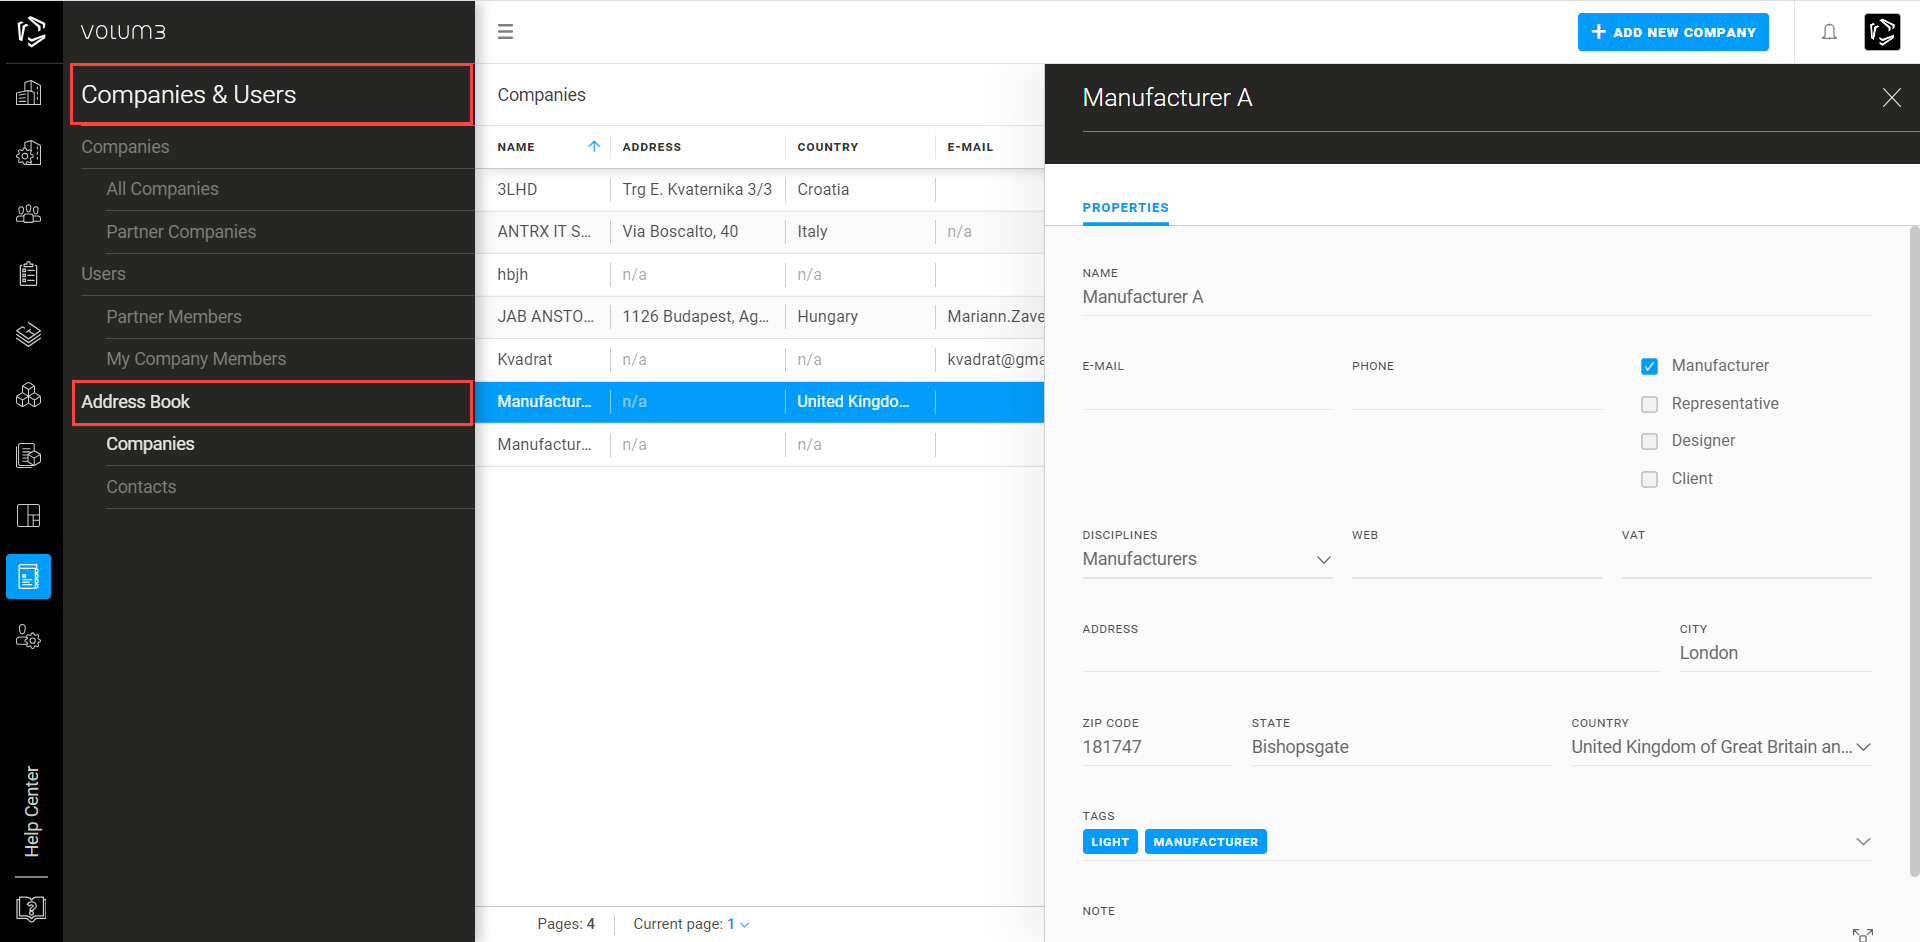
If you would like to enter a new company because you didn't find one in the dropdown menu, simply write the company name in the empty field and select Create new. The name will appear in the Manufacturers field. The next step should be to enter the Manufacturer's details. To do that, click on the Pen icon right next to the dropdown menu.
You will be transferred to Companies & Users / Address Book / Companies where you can simply Add and edit companies. After entering all relevant information, make sure to tick the Manufacturer checkbox.
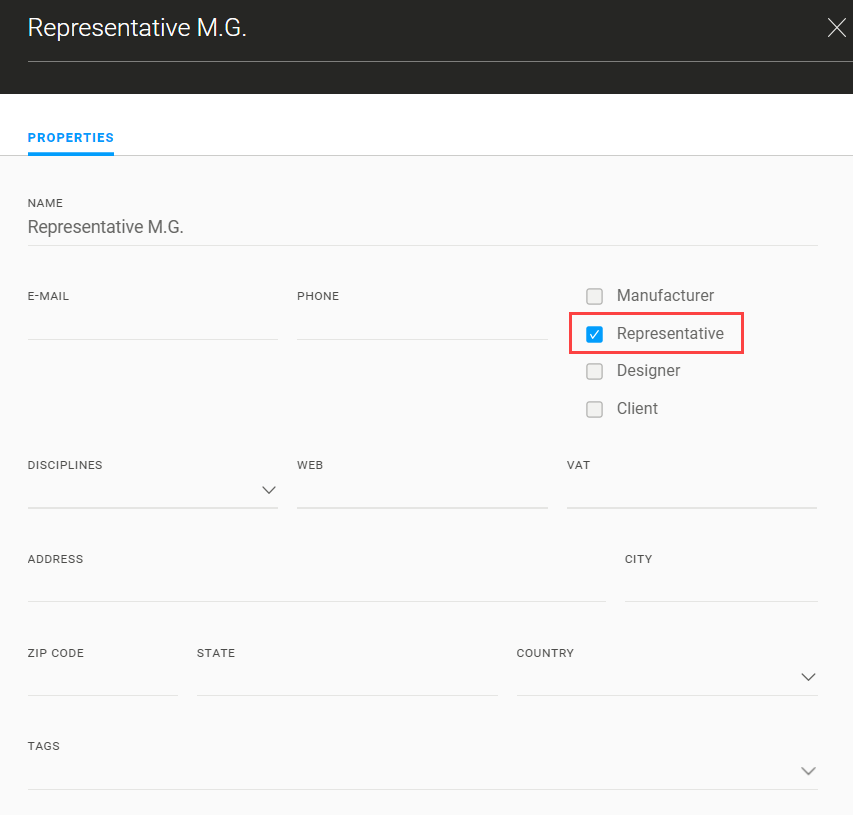
Representative as a Company
To assign a product representative, the process is the same as when adding a Manufacturer. After entering all relevant information, make sure you tick the Representative checkbox.
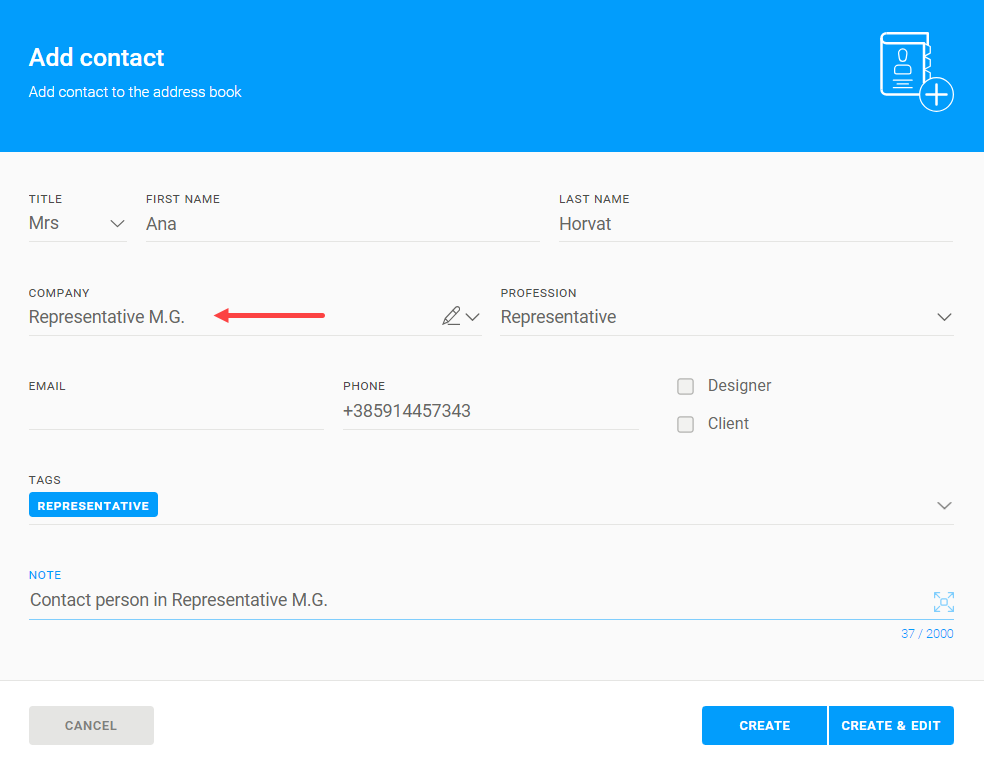
Representative as a Person
To add a Representative Contact, follow the previously mentioned steps for Manufacturer and Representative. While entering all relevant information, make sure to link the Contact with the right Company.
Revisions
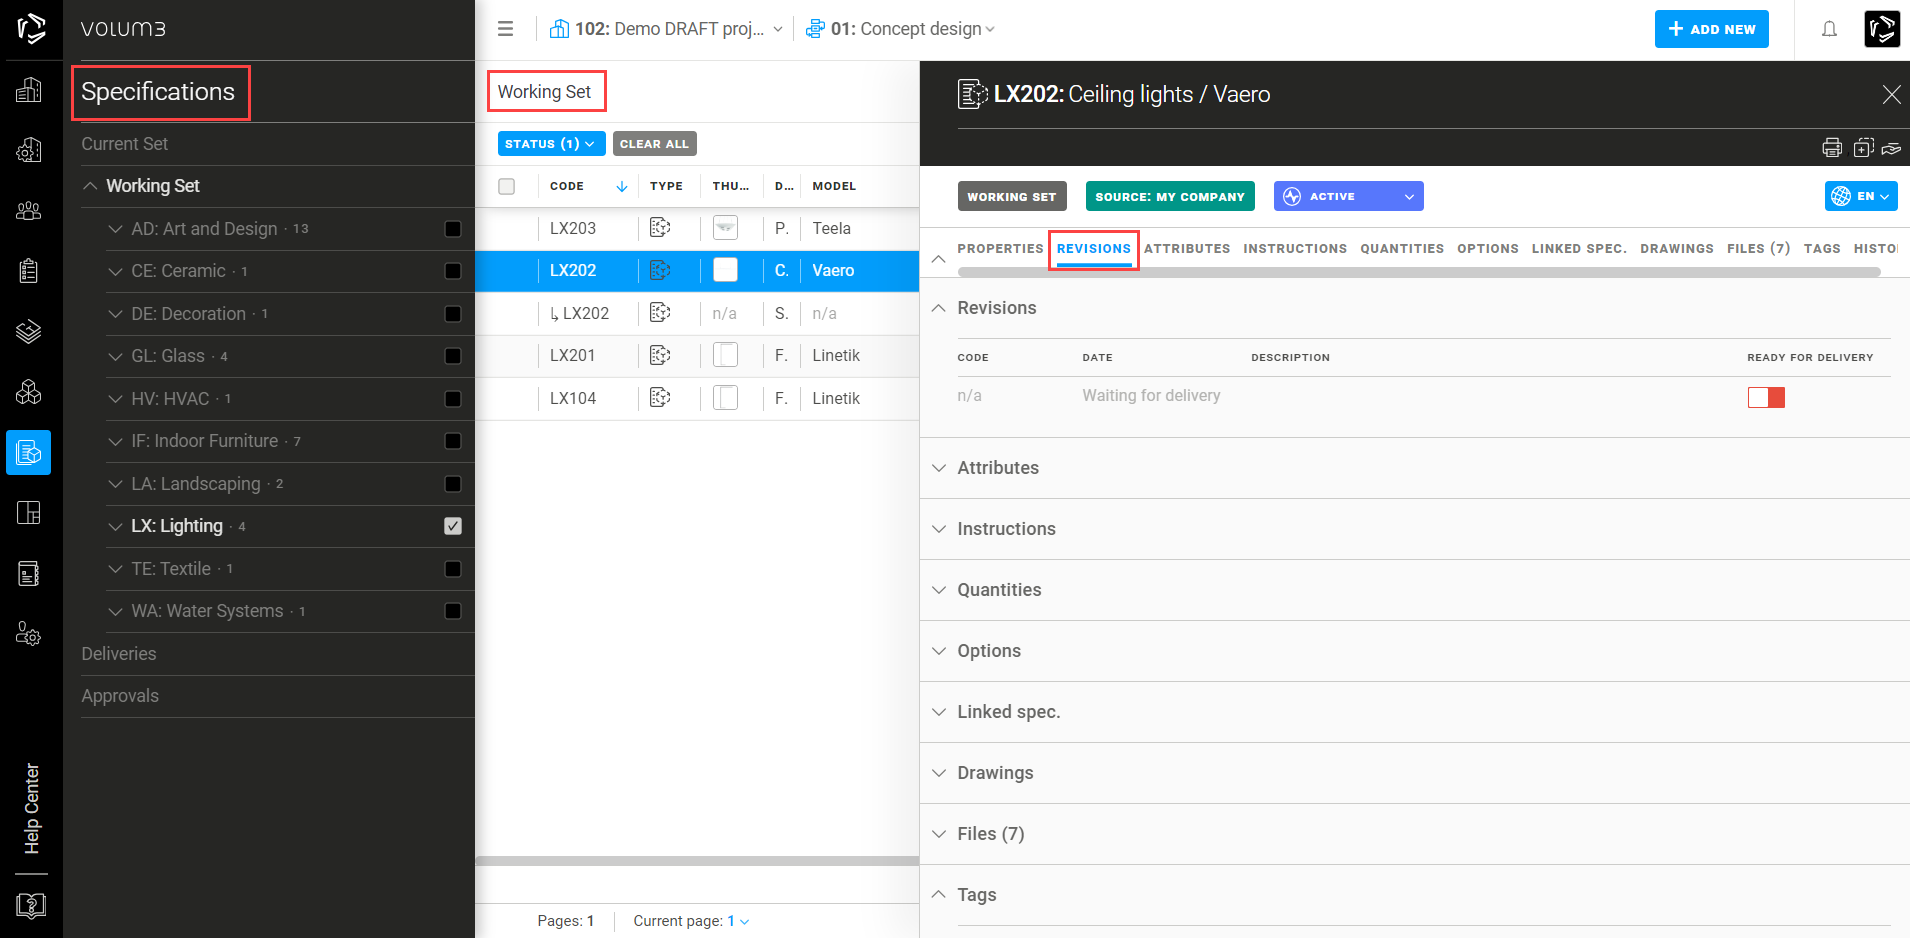
Specification Status: Ready for Delivery
When you are finished editing the specification and would like to send it to the Current set, you will be advised to switch the specification Ready for delivery status from red to green, if you haven't done it before.
When green, Ready for delivery status confirms that you checked the entire specification and that no more editing is needed. If so, you can add the specification to delivery.
Revisions
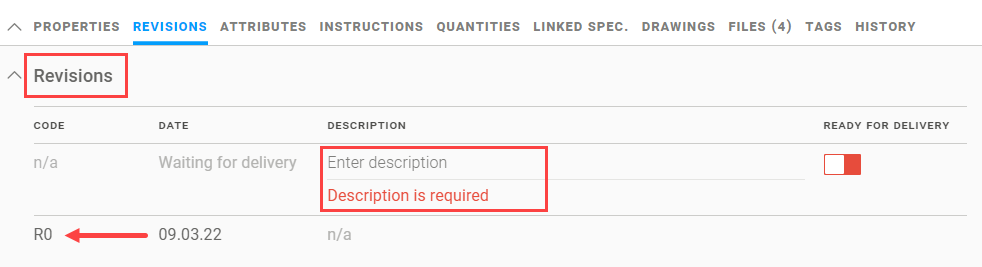
Under the Revisions tab, after adding a specification to delivery, important data will be filled in:
CODE (automatically) - First-time specification delivery will be marked as R0, and the first revision of the R0 will be marked as R1, R1 > R2, R2 > R3, and so on.
DATE (automatically) - The date of adding a specification to delivery will be noted for each revision (RO, R1, R2, R3).
DESCRIPTION (manual) - A description of a first-time specification delivery is not required. However, when making changes and wishing to deliver the first revision (R1) of the specification R0, this is the moment to shortly describe the reasons for the change. The description of each revision (R1, R2, R3..) will be obligatory to fill in, in order to switch the Ready for delivery status from red to green.
Filter specifications with Ready for Delivery filter
You can use the Ready for delivery (yes/no) filter to easily distinguish which specifications you have prepared for delivery and which are not yet ready. This status on the specification will be annulled the moment it is visible in the Current set.
Attributes
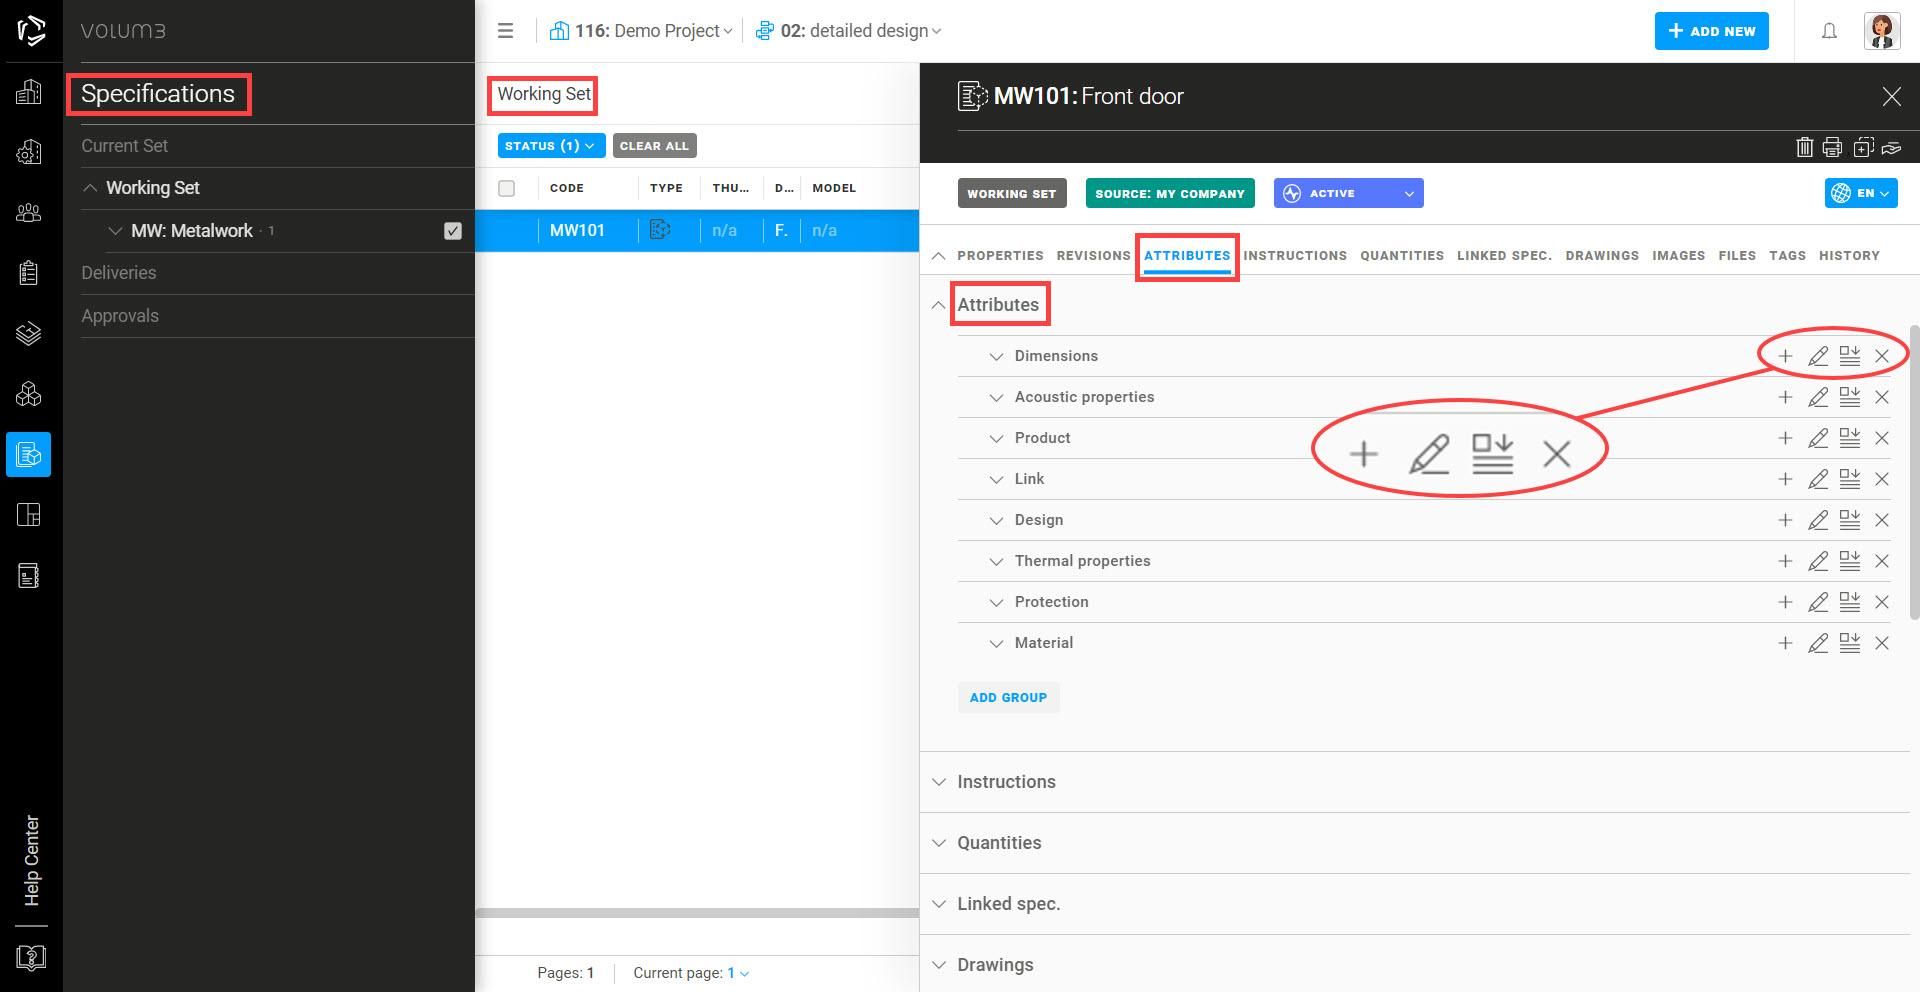
Find the instructions on how to:
edit/add attribute groups,
edit/add attributes,
custom attribute types,
create your own attributes group template under the Products section.
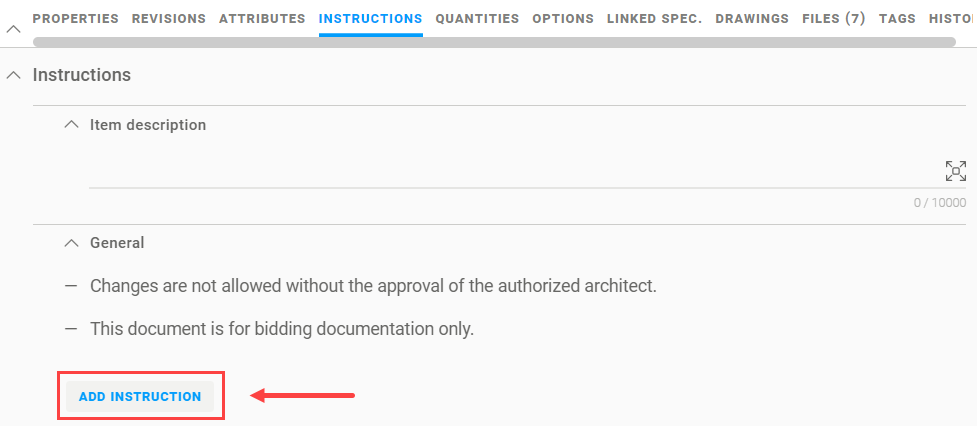
Instructions
Specification instructions are a set of guidelines that play a critical role in architecture and design, ensuring that all elements meet the necessary standards and requirements for quality, performance, and functionality.
Specification Instructions are available in the specification flyout under the Instructions tab.
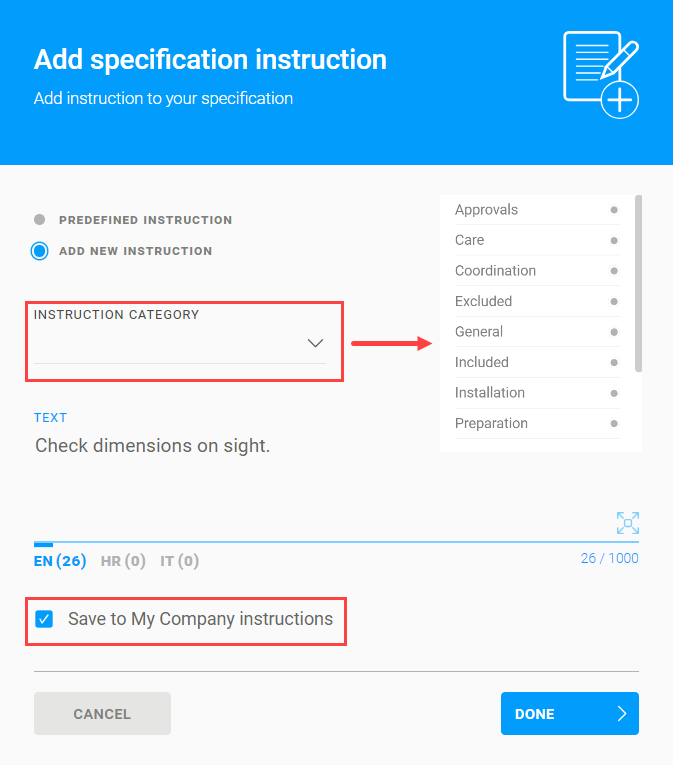
You can easily select and add predefined Specification Instructions provided by System, use any specification instruction made by your Company's team, customize it, or create your own.
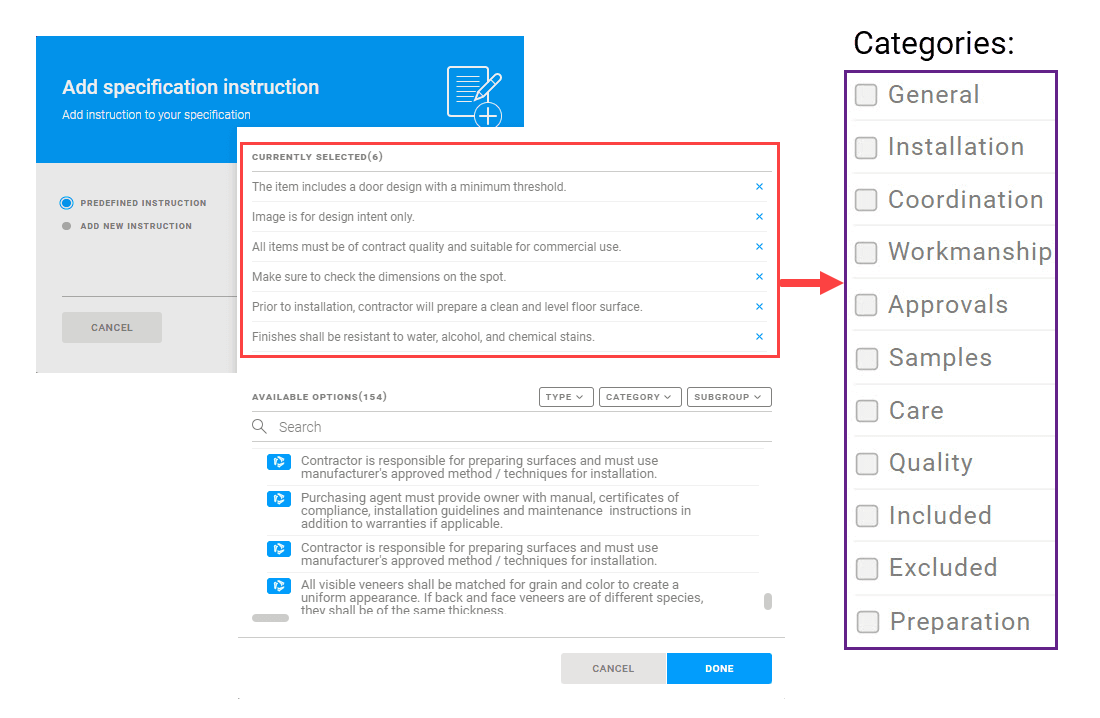
When you want to add a New instruction, select the category from the dropdown menu and enter the instruction text. By clicking Done, the instruction will be added to the Specification instructions, under the selected category.
If you would like to save the notifications so other members of your team can use them on that project, check the box Save to My Company instructions.
When you want to add a Predefined Instruction, the Subgroup smart filter will be activated and will list only instructions that were used by your Company on specifications with the same subgroup.
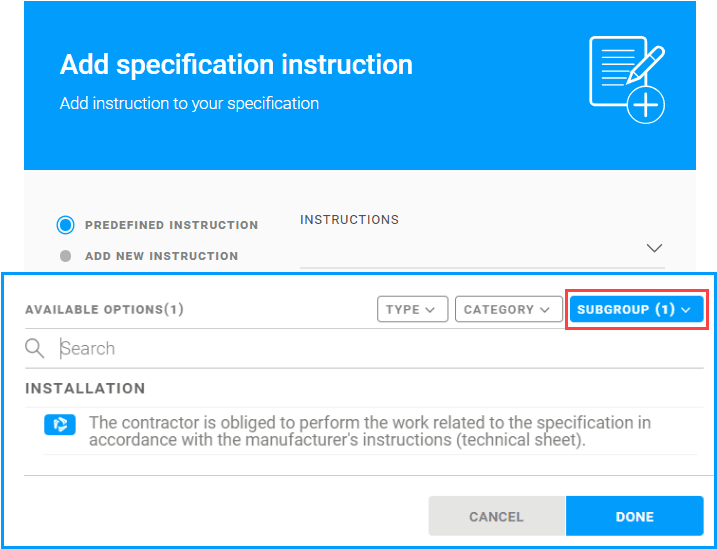
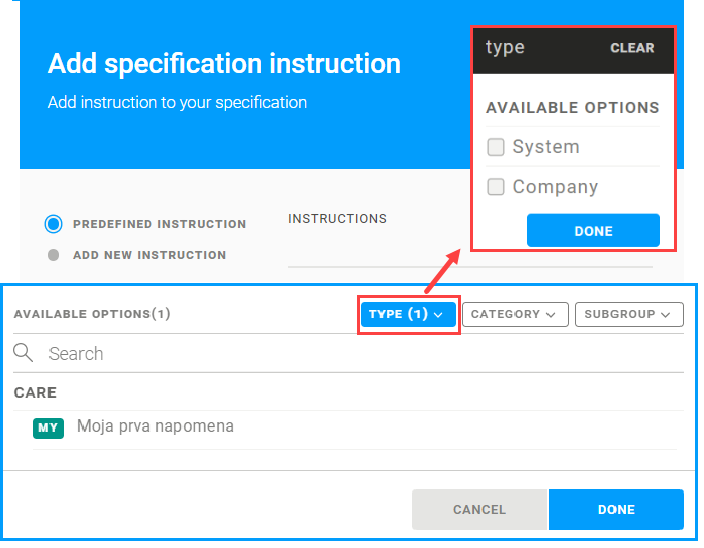
If you want to filter the instructions further, you can use Type and Category or clear the filters to show all available instructions.
Filter instructions by Type and select System or your Company instructions.
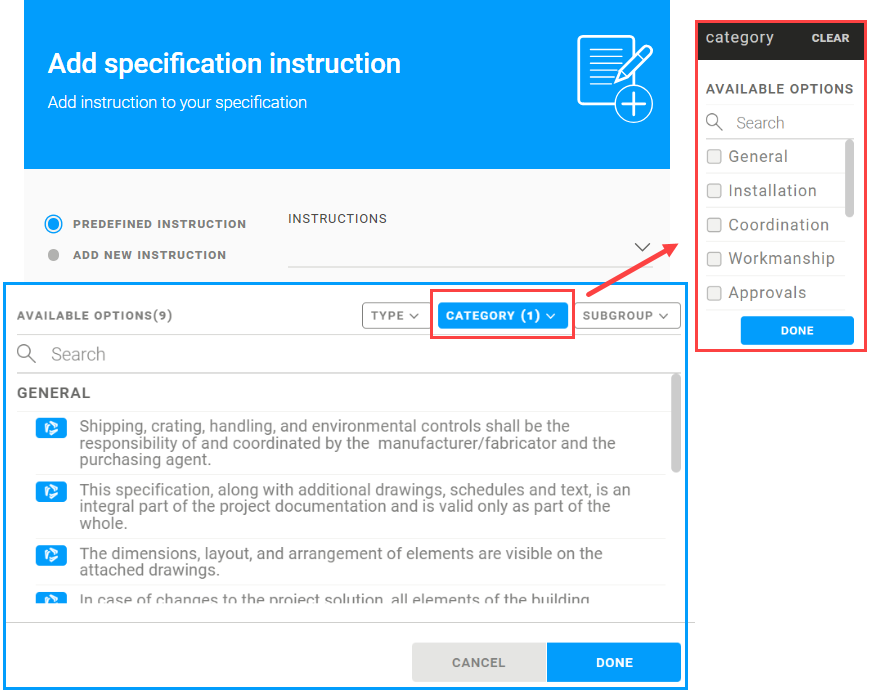
Filter instructions by Category using predefined System categories*, such as General, Installation, Coordination, etc.
*SPECIFICATIONS / Working set / Create new specification
When creating a new specification in the Working set, predefined System Instructions will be added automatically from chosen Specification Category and Subgroup.
WORKING WITH INSTRUCTIONS
It is possible to select multiple instructions and add them at once. They will be added to the specification flyout and categorized accordingly.
It is possible to reorder instructions within the category in the specification flyout by using the drag & drop option. You can reorder the instruction categories in the same way.

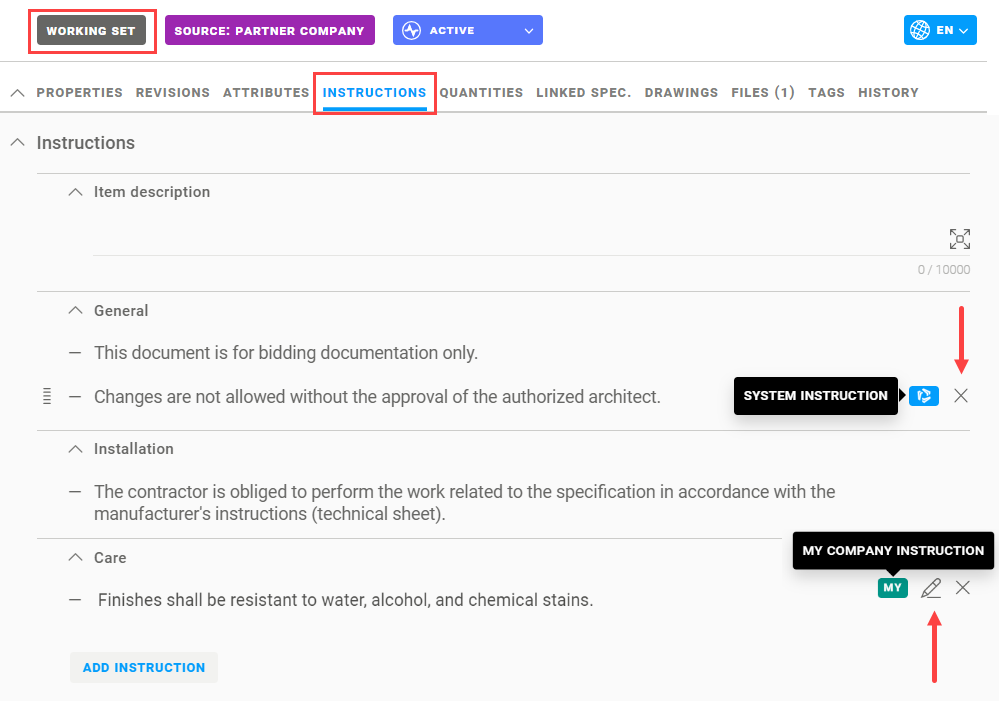
You can remove instructions from the specifications Instructions. When you hover over the instruction with your mouse, click on the remove button (X icon) appearing on the right side.
You can edit any of your Company instructions by clicking on the edit (pen icon) appearing on the right side of the instruction.
It is not possible to edit System Instructions.
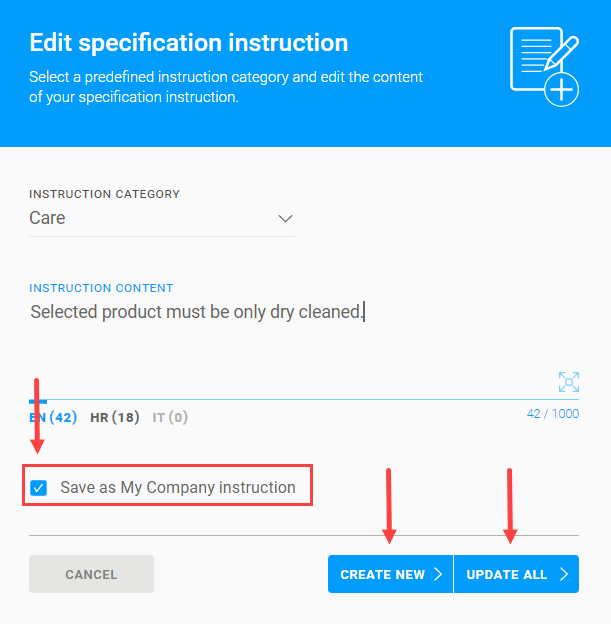
EDITING MY COMPANY INSTRUCTIONS
UPDATE ALL - The Update all option will change existing instructions and should be used with caution, as it will apply changes to all instances of the instructions on your company specifications.
CREATE NEW - If only one specific instruction needs to be changed, it is recommended to use the Create new option, which will create a new version of the instruction, preserving the original.
SAVE AS MY COMPANY INSTRUCTION - If you would like the new version to be visible and available to your colleagues, save the instruction as your Company instruction.
All instructions added to the specification will be printed in PDF and follow the order respectively. All changes will be recorded in the History tab.
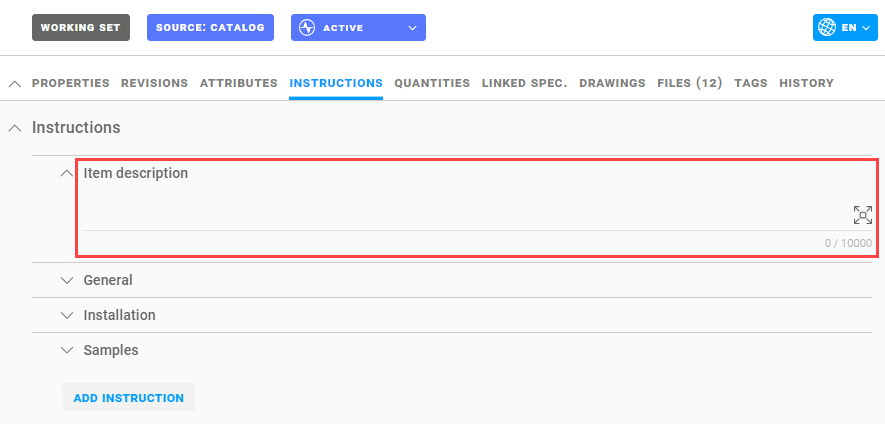
ITEM DESCRIPTION
Item description box should contain general information about the specification. The specification PDF printout will include this description and all the other instructions.
NOTE: Changes made on Specification Instructions are not immediately visible in the Current set. To update the specification in the Current set it is necessary to send a delivery.
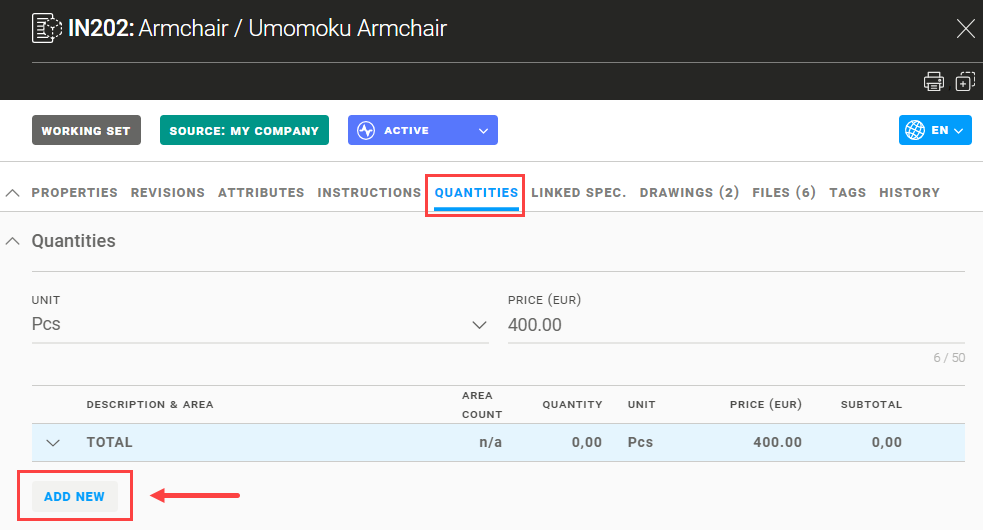
Quantities
In the Quantities tab you are able to keep track of the budget for a specification used on a project. To do that, you will need to click on the Add new button and insert needed information.
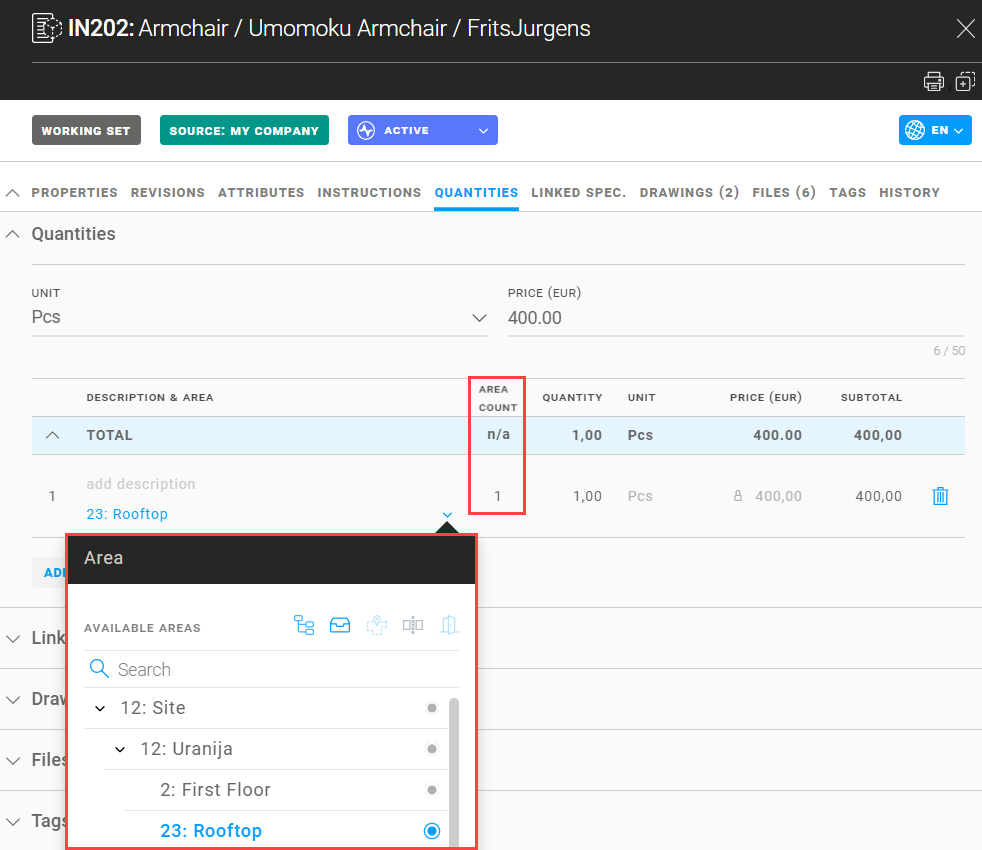
Each time you use a specification on a different area you will need to click on the Add new button. Available areas are Rooms and Room Types created on the project. After selecting the area, the Area count box will automatically display a number indicating how many rooms of that same kind there are.
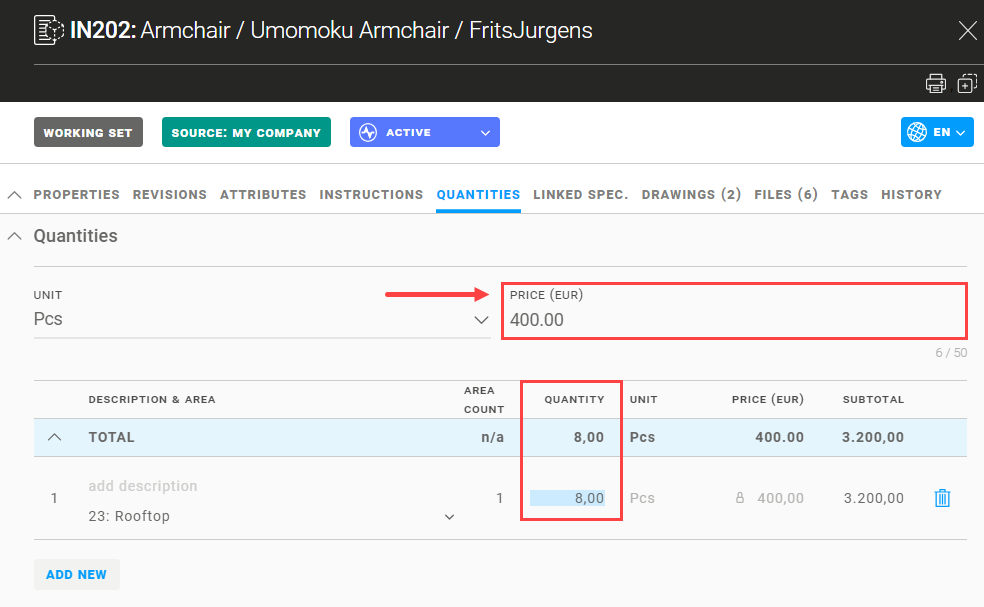
The only editable box is the Quantity box, in which you input the number of the specification amount needed. The Price box displays a number you input in the Price field above the table and it can be changed anytime.
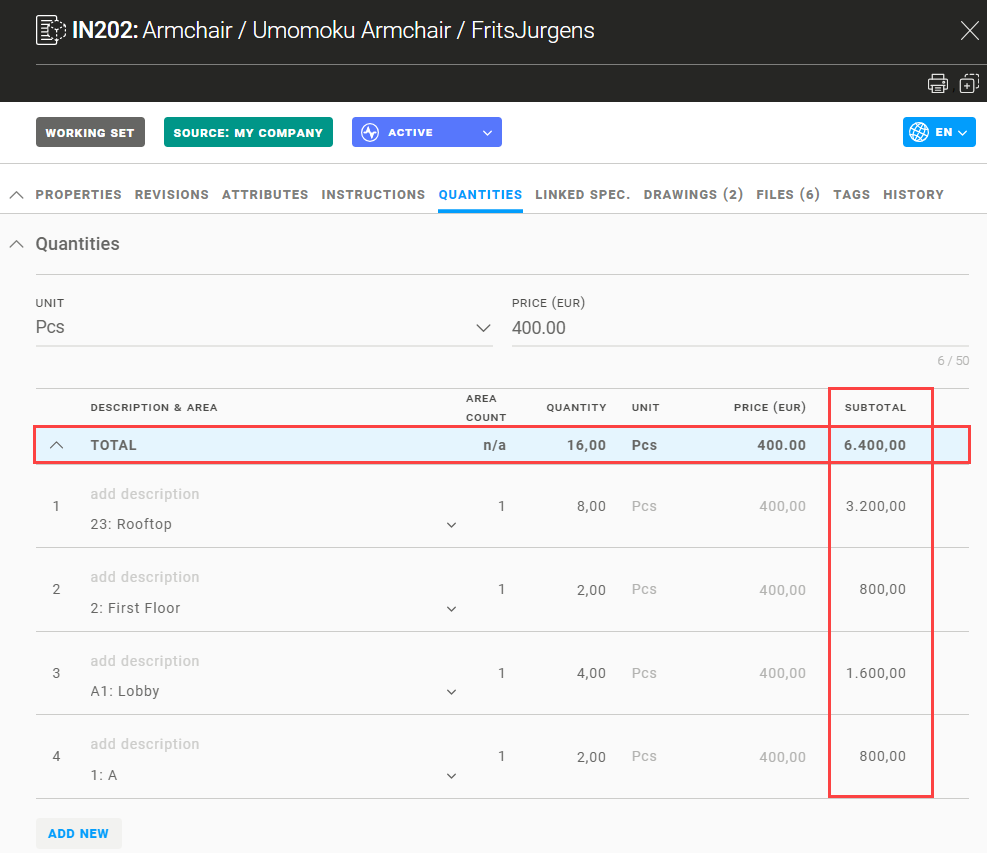
After inputting all the information, a sum (Quantity x Price) will be displayed in the Subtotal box, calculating the price for the specification used in this specific area. In the row Total, you will find the whole budget needed for this specification.
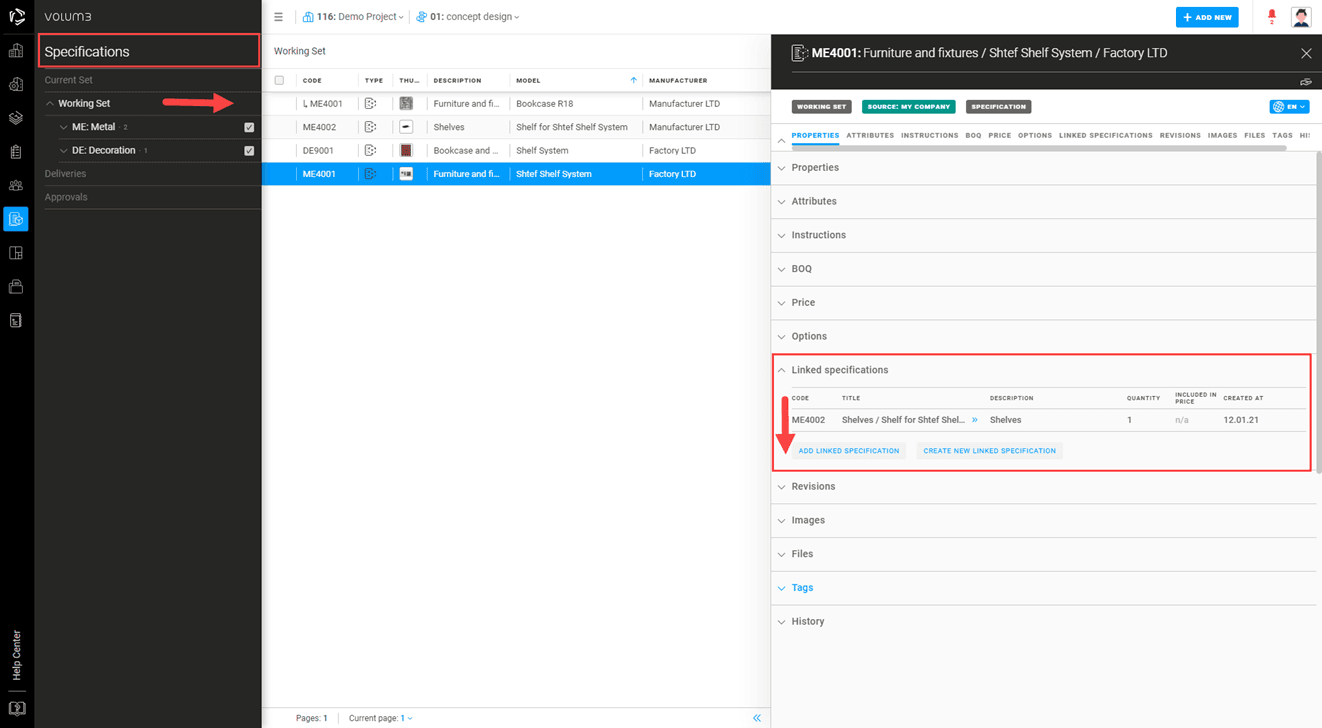
Linked specifications
An option to link two or more specifications is here to help us distinguish separated products but still to merge them on the project. Each linked specification must be an entity on its own - afterward, they can be linked.
Example:
MAIN spec. - Door
--> LINKED spec. no. 1 - Door lock
--> LINKED spec. no. 2 - Door fittings
___________
Link Existing Specification
Click Add linked specification to attach existing products/specifications to the main spec.
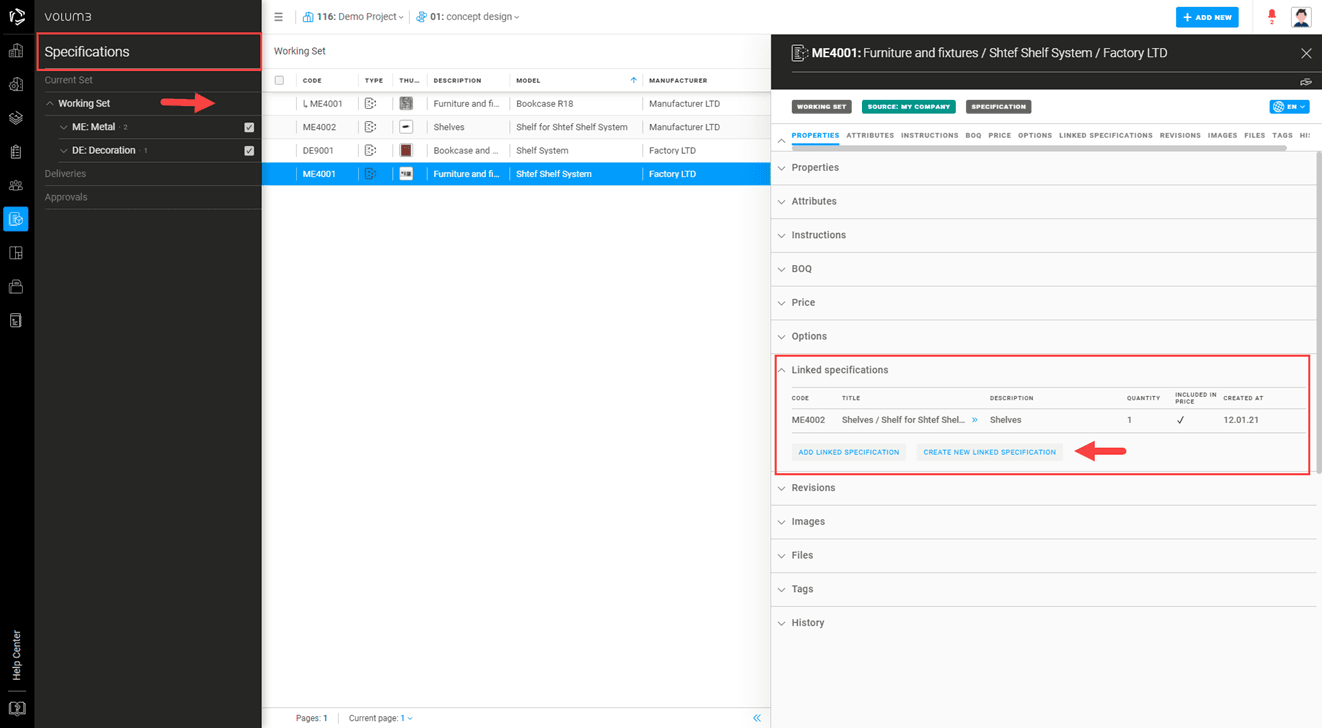
Create New Linked Specification
Click Create new linked specification and link it automatically with the main one.
As a reminder on how to create a specification, check the paragraph Create your own specification.
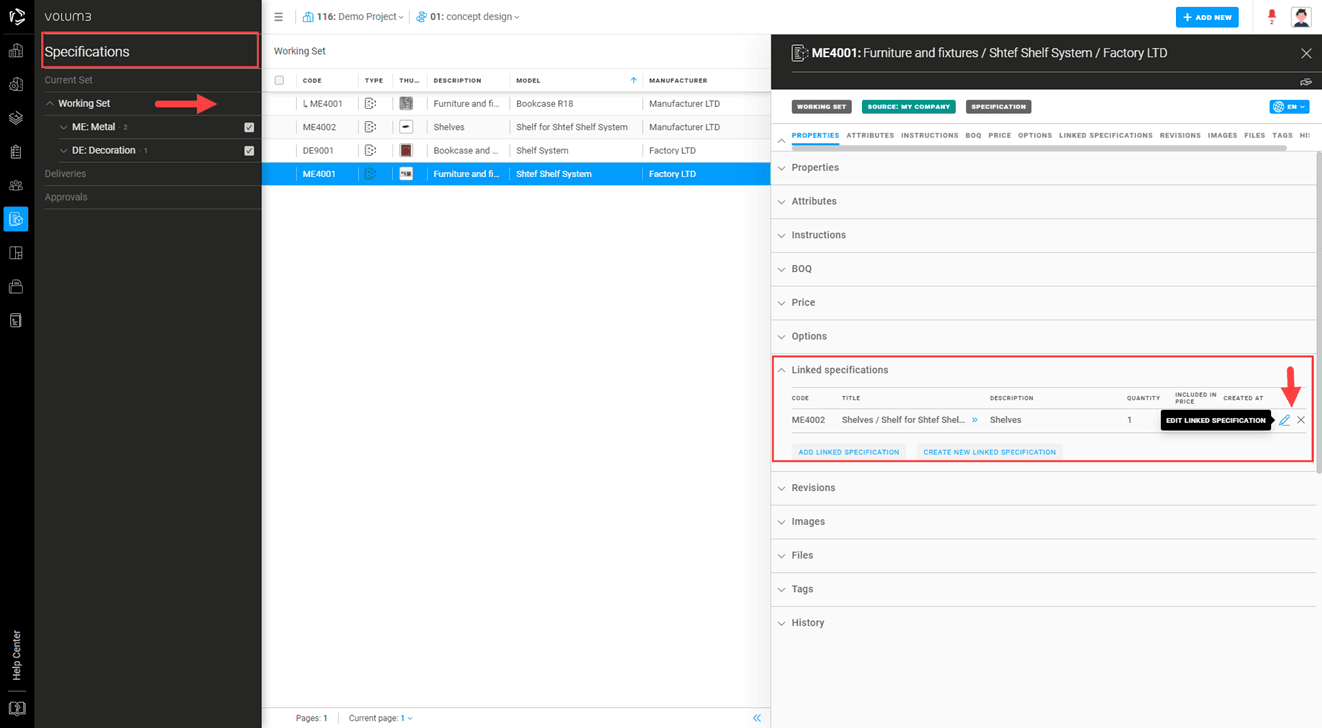
Each linked specification can be edited by switching the current linked specification with the other ones or by simply unlinking it from the main specification.
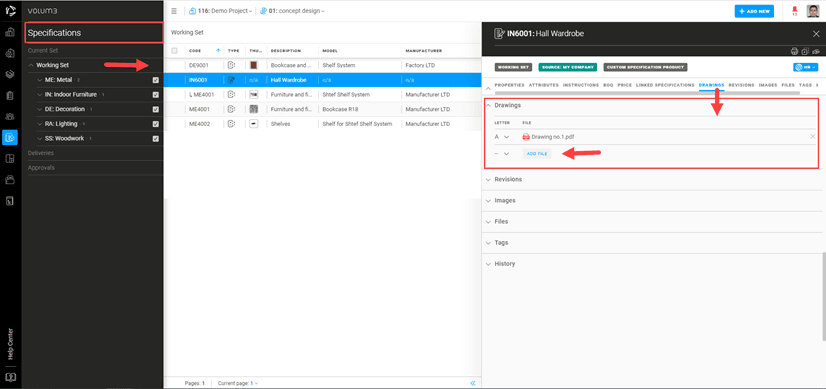
Drawings
In tab Drawings simply attach the drawing to the specification.
Whatever the drawing format is, you will be able to download/print it along with the specification.
Create specifications from products
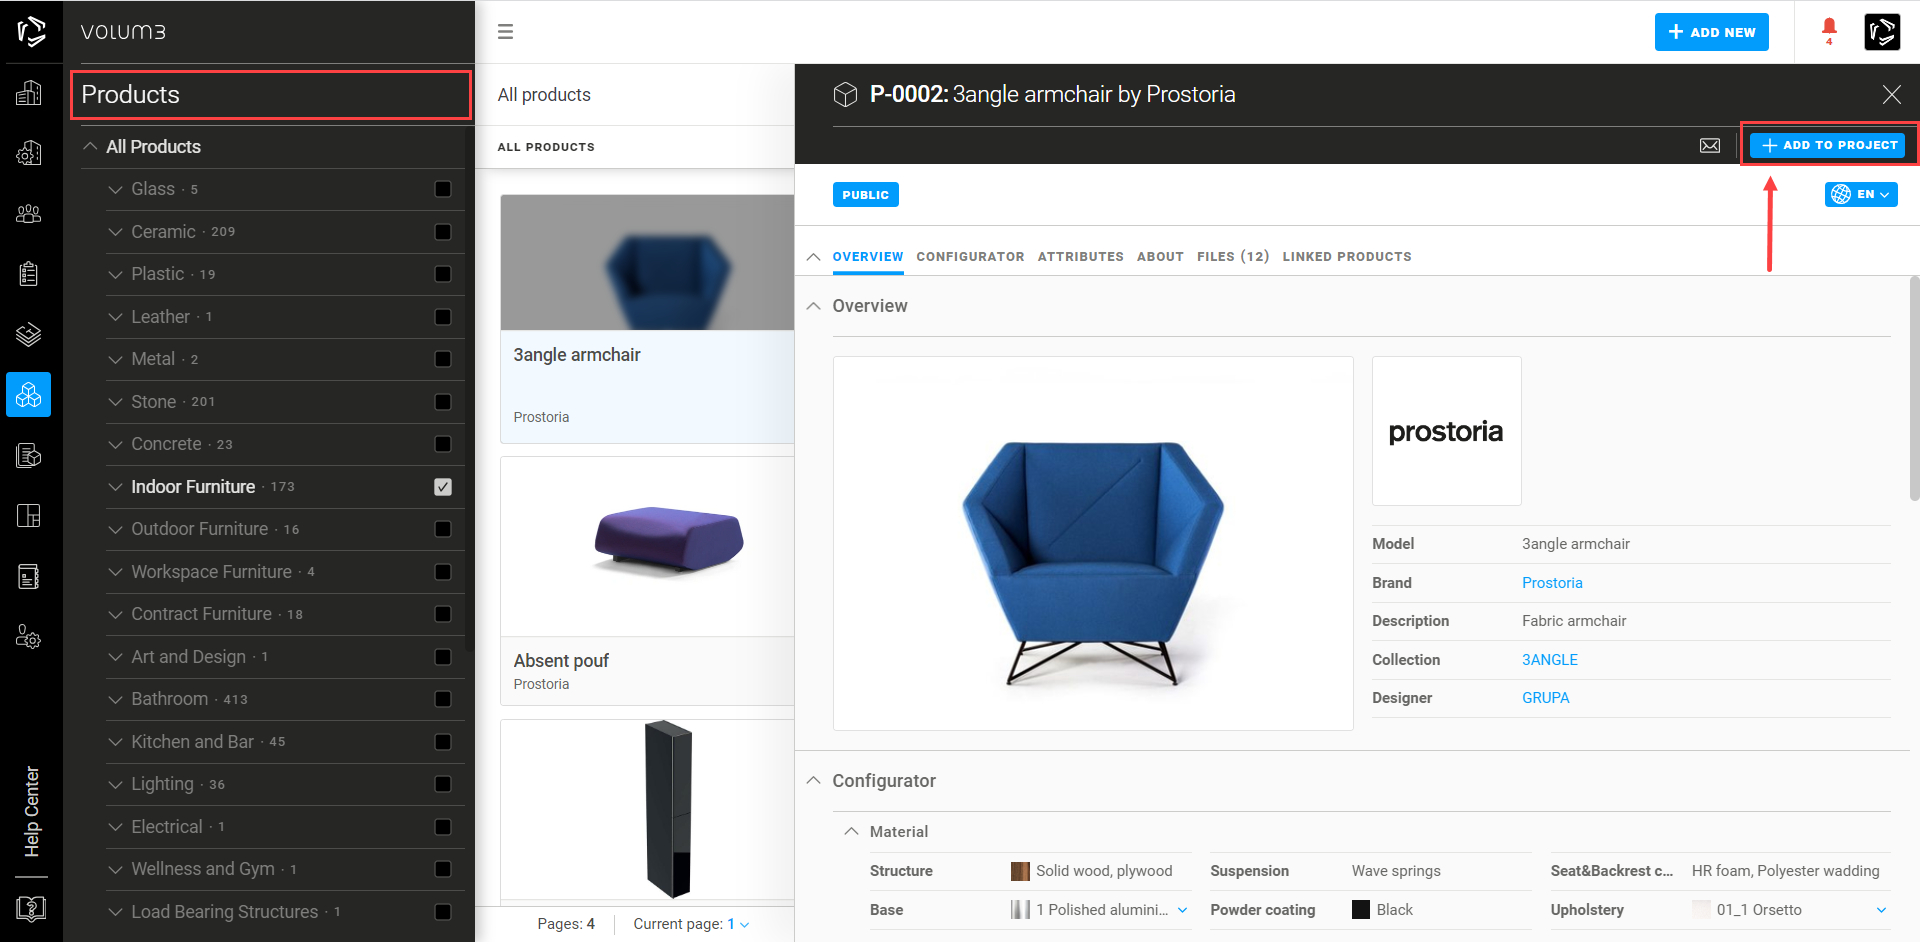
In the Products Module, you can search for brands and ready-made products you want to use on projects. You don't have to specify the product from scratch because the Manufacturer has done it for you. Each product is well described and instantly added to your Working set Specifications, saving you plenty of time.
Use filters and search options. Pin the most frequently used filters to the toolbar.
Once you find the desired product, click Add to Project.
All product characteristics added by the Manufacturer will be copied to your project, waiting for your finishing touches in the Working set of the Specifications Module.
Once there, you can modify the product characteristics and adjust them to your preferences.
Note: A product can have related product parts or accessories. If one of those products gets added to a project, attributes of the product parts and accessories will become the main product's group of attributes.
Create your own specifications
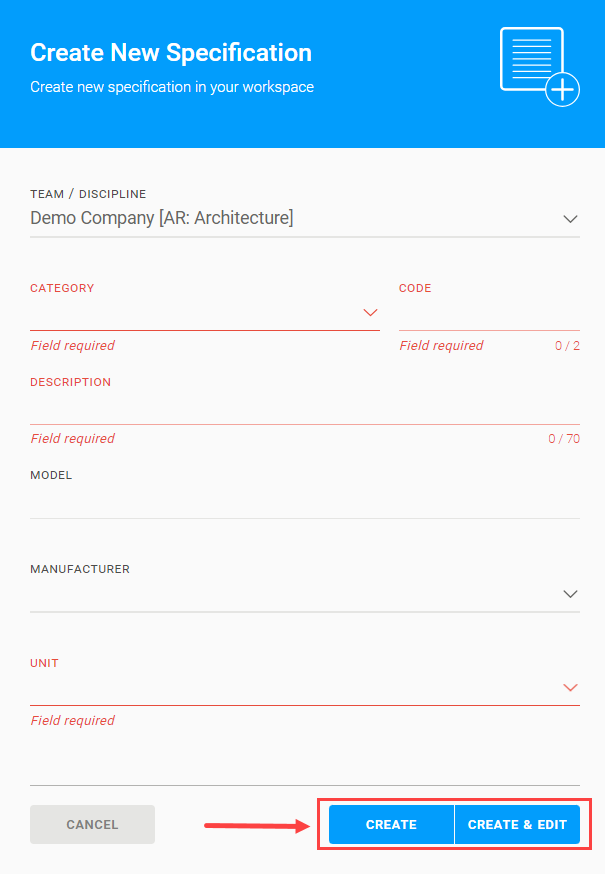
In the Working set of the Specifications Module, you can create your own specification by clicking on Add new.
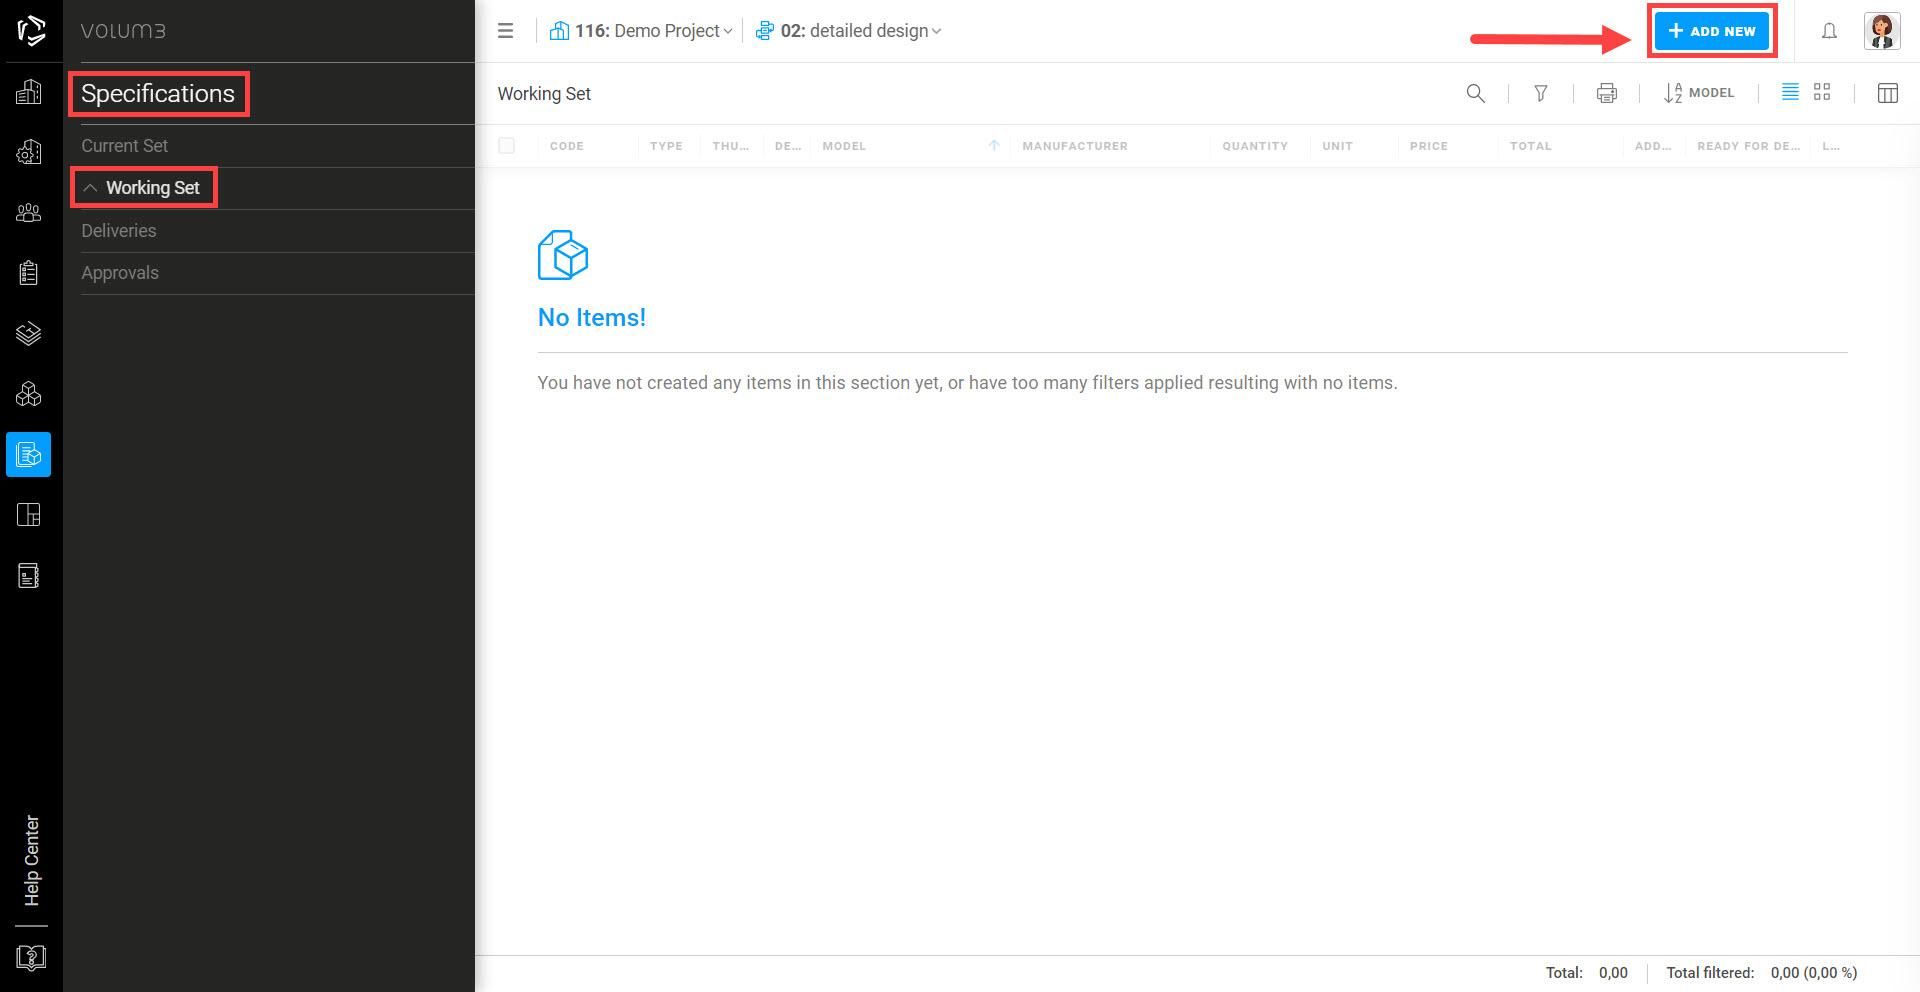
Fill in the required fields and continue to edit the specification.
As assistance, while searching for the right category, check the paragraph Products and materials classification system.
Products and materials classification system
VOLUM3 comes with a predefined classification system for the products and materials used/chosen on the project.
For example, when equipping a hotel room, you might choose to add an indoor daybed/sofa. In VOLUM3, it will belong to a predefined category: IF:100 Sofas and daybeds.
That category/number can be changed/adjusted while the specification is still present in the Working set only (not sent to the Current set).
Every item is classified and, as such, perfectly organized. Architects, parties involved in the bill of quantities, facility management will be able to easily perform their role in the project.
Entire classification system you can open/download here.
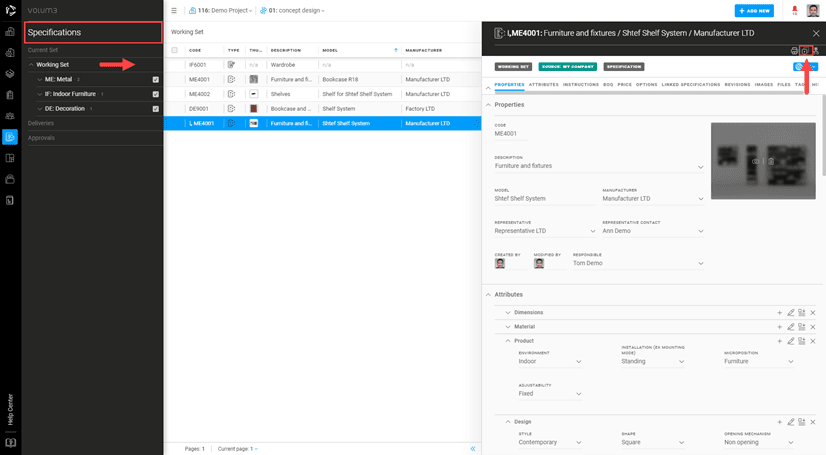
Flyout navigation
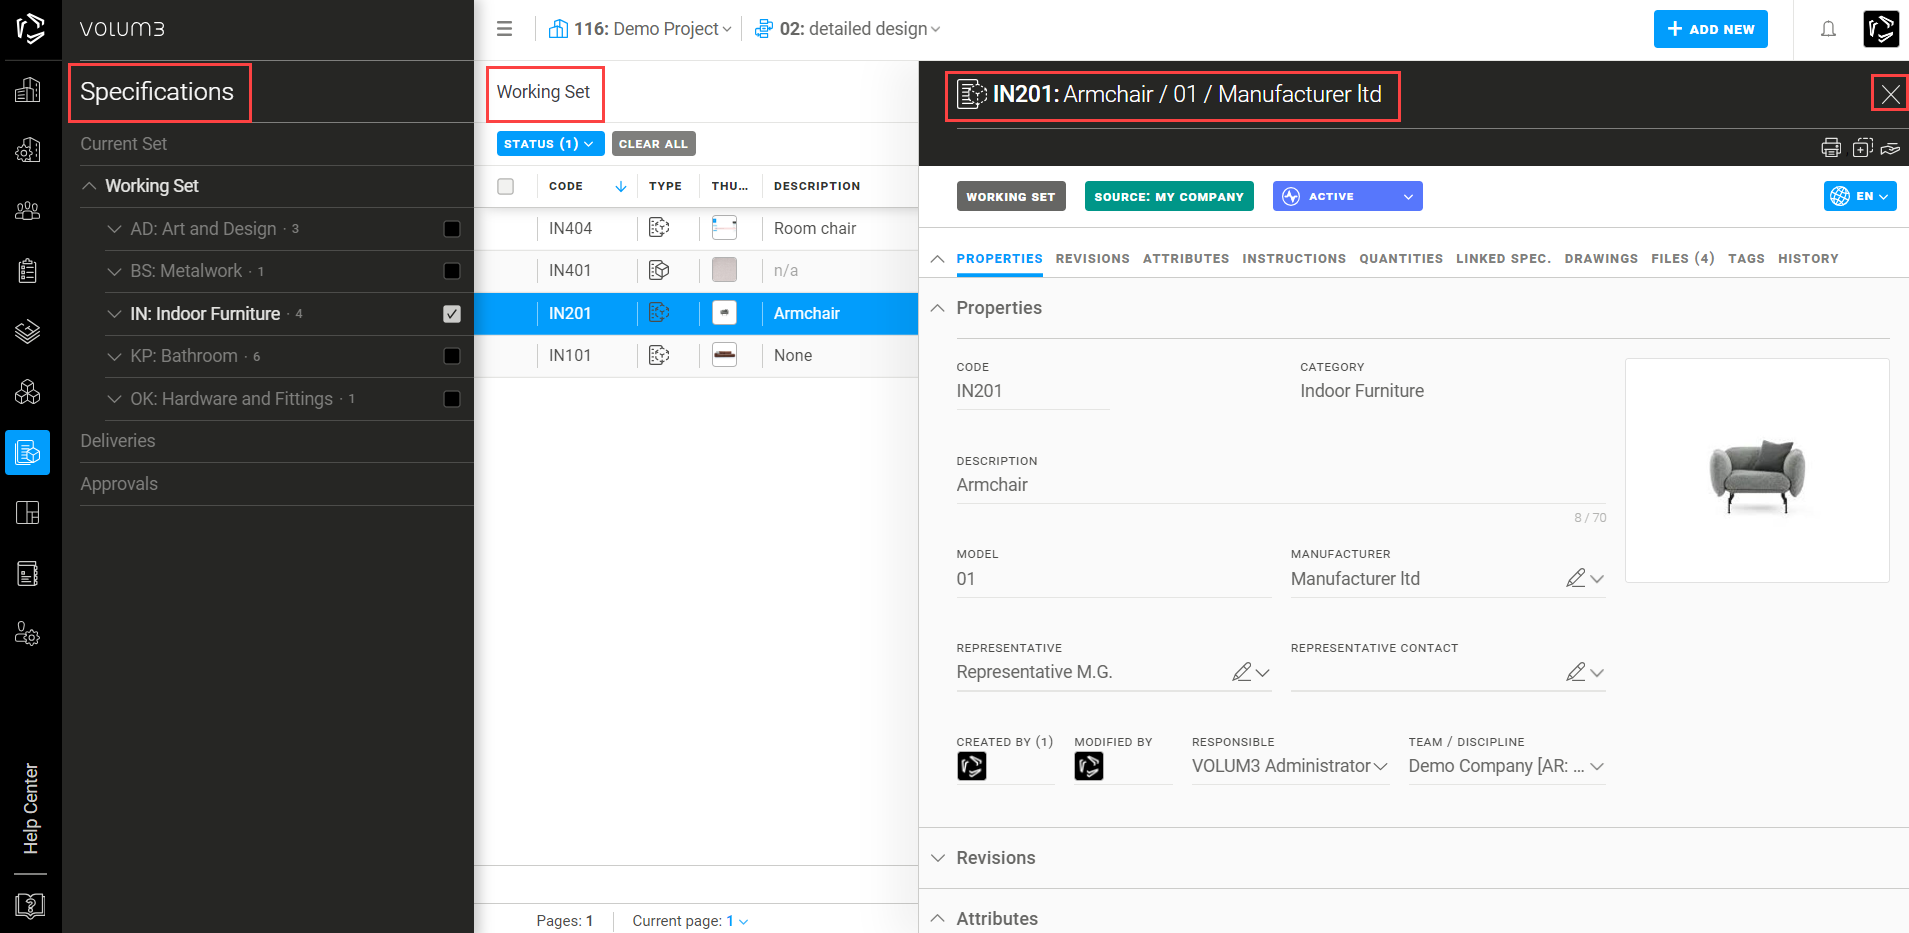
When you click on the specification, a specification flyout will appear.
In the flyout header you can find the code and the name of the specification that you chose while creating the specification. In the same line, on the right side, you can easily close the flyout by clicking on the X icon.
Throughout VOLUM3, there will be a tooltip appearing when you hover over something with the mouse pointer, just like in the image above.
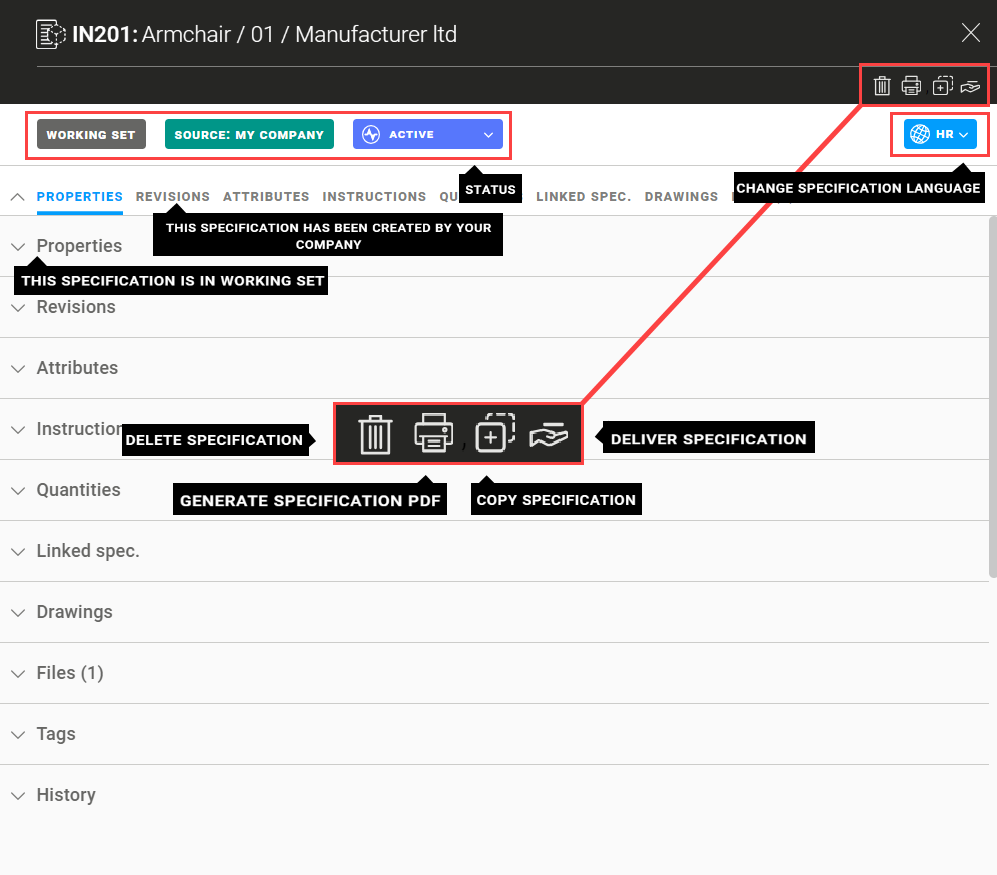
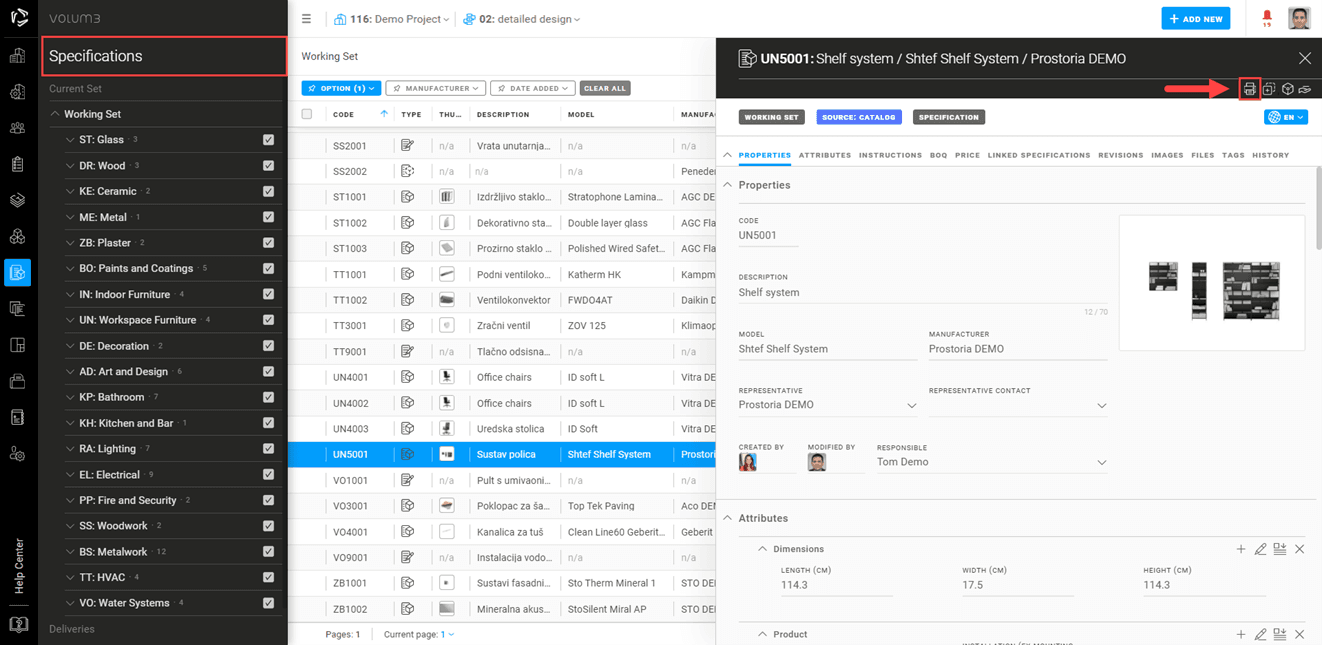
Here are explanations of the information or actions located in the header of the flyout:

DELETE SPECIFICATION - When a specification was only created and edited, but never delivered to the Current set, you can delete it. If delivered, you can only change the status of the specification (from active to canceled) in the Working set and send a delivery to update the Current set.
GENERATE SPECIFICATION PDF - When you would like to print your specification simply click on the print icon. In PDF settings, you can modify which information will be included in the specification PDF print by selecting or deselecting elements.
COPY SPECIFICATION - You can easily make a specification copy. The new version will automatically get a new specification CODE (each specification has a unique CODE).
DELIVER SPECIFICATION - When you would like to send a specification to the Current set, or simply add one to delivery, make sure your specification Ready for delivery status is on (green). The switch can be found in the Revisions tab.
Here are explanations of the information or actions located under the header, in the upper body of the specification flyout:

WORKING SET - This specification is in the Working set (not in the Current set).
SOURCE: MY COMPANY - This specification has been created by your Company (not added from the Products Module).
STATUS: ACTIVE (in use, not canceled)- When it is decided not to use a specification that was delivered to the Current set, the status of the specification should be changed from active to canceled. To update the specifications in the Current set with the status changes, it is necessary to send a Delivery.
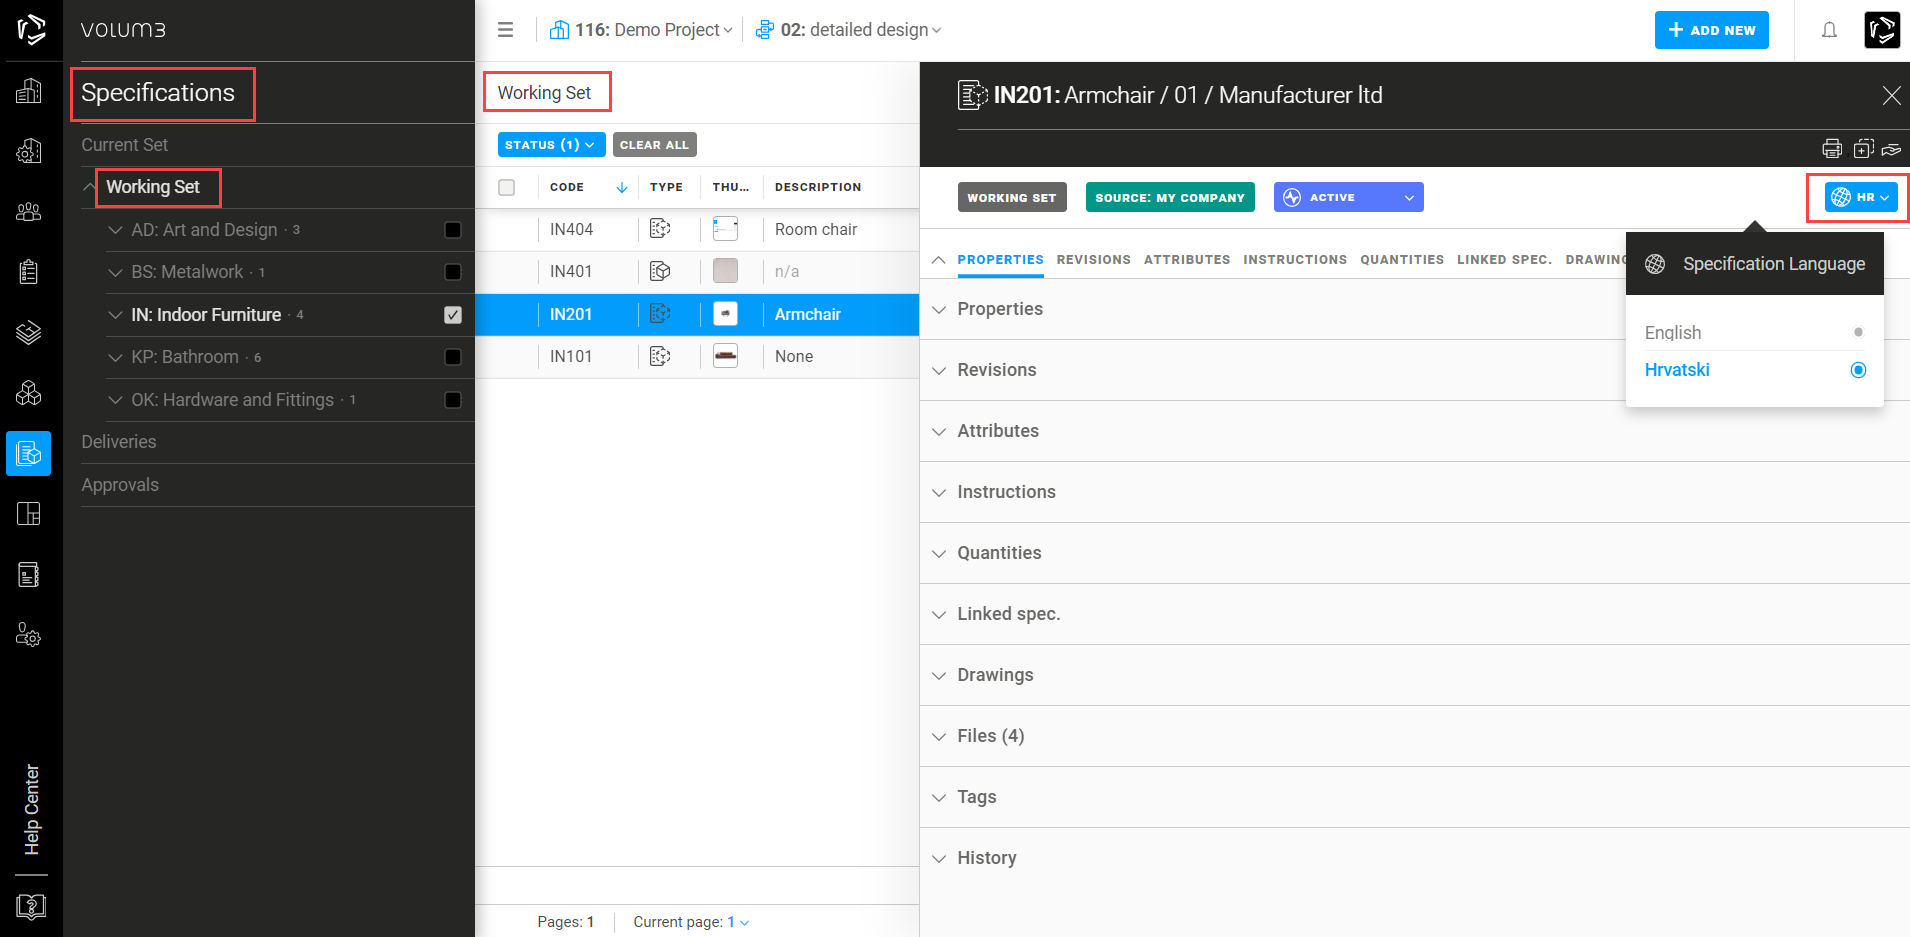
LANGUAGE: EN - If you have more Project languages, you can translate the content of the specification by switching to another language in the dropdown menu.
Edit/add attributes, instructions, price, images and files
Find the instructions on how to:
edit/add attribute groups,
edit/add attributes,
custom attribute type,
create own attributes group template,
define product price,
add files and images under the Product section.
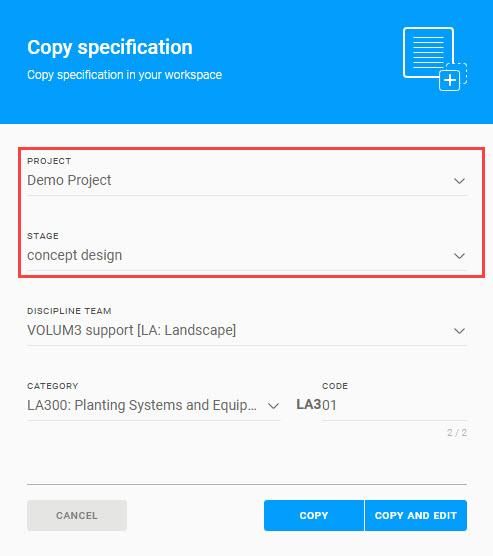
Copy specification
Open a specification you'd like to duplicate and click Copy specification.
Next, choose whether you would like to copy the specification on the existing or another project/stage.
Add more options of the product/specification
During the project, you might be considering 2 or more similar products for the same purpose, but you will likely choose only one of them. To do that, you can create more options and choose between them.
Go to Specifications - Working set – Add new.
Next, fill in all required fields and choose the same specification Category/Group and Code number
as they are on the specification you're creating a new option for.
Below the message ‘CODE XY201 already exists. Please choose an action’, you have two options:
- Add as new option (MAIN)
- Add as new option (OPTION)
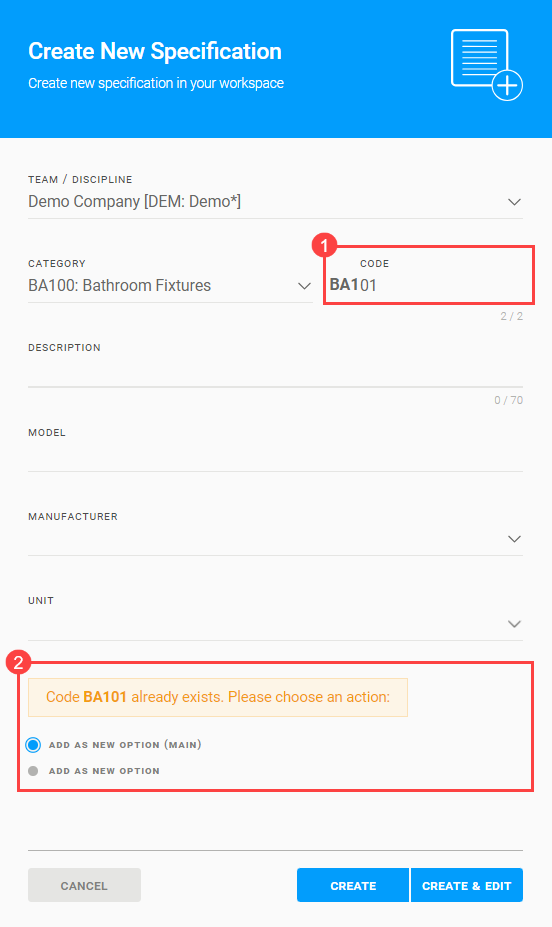
Depending on the choice, you will get a new Option or Main specification.
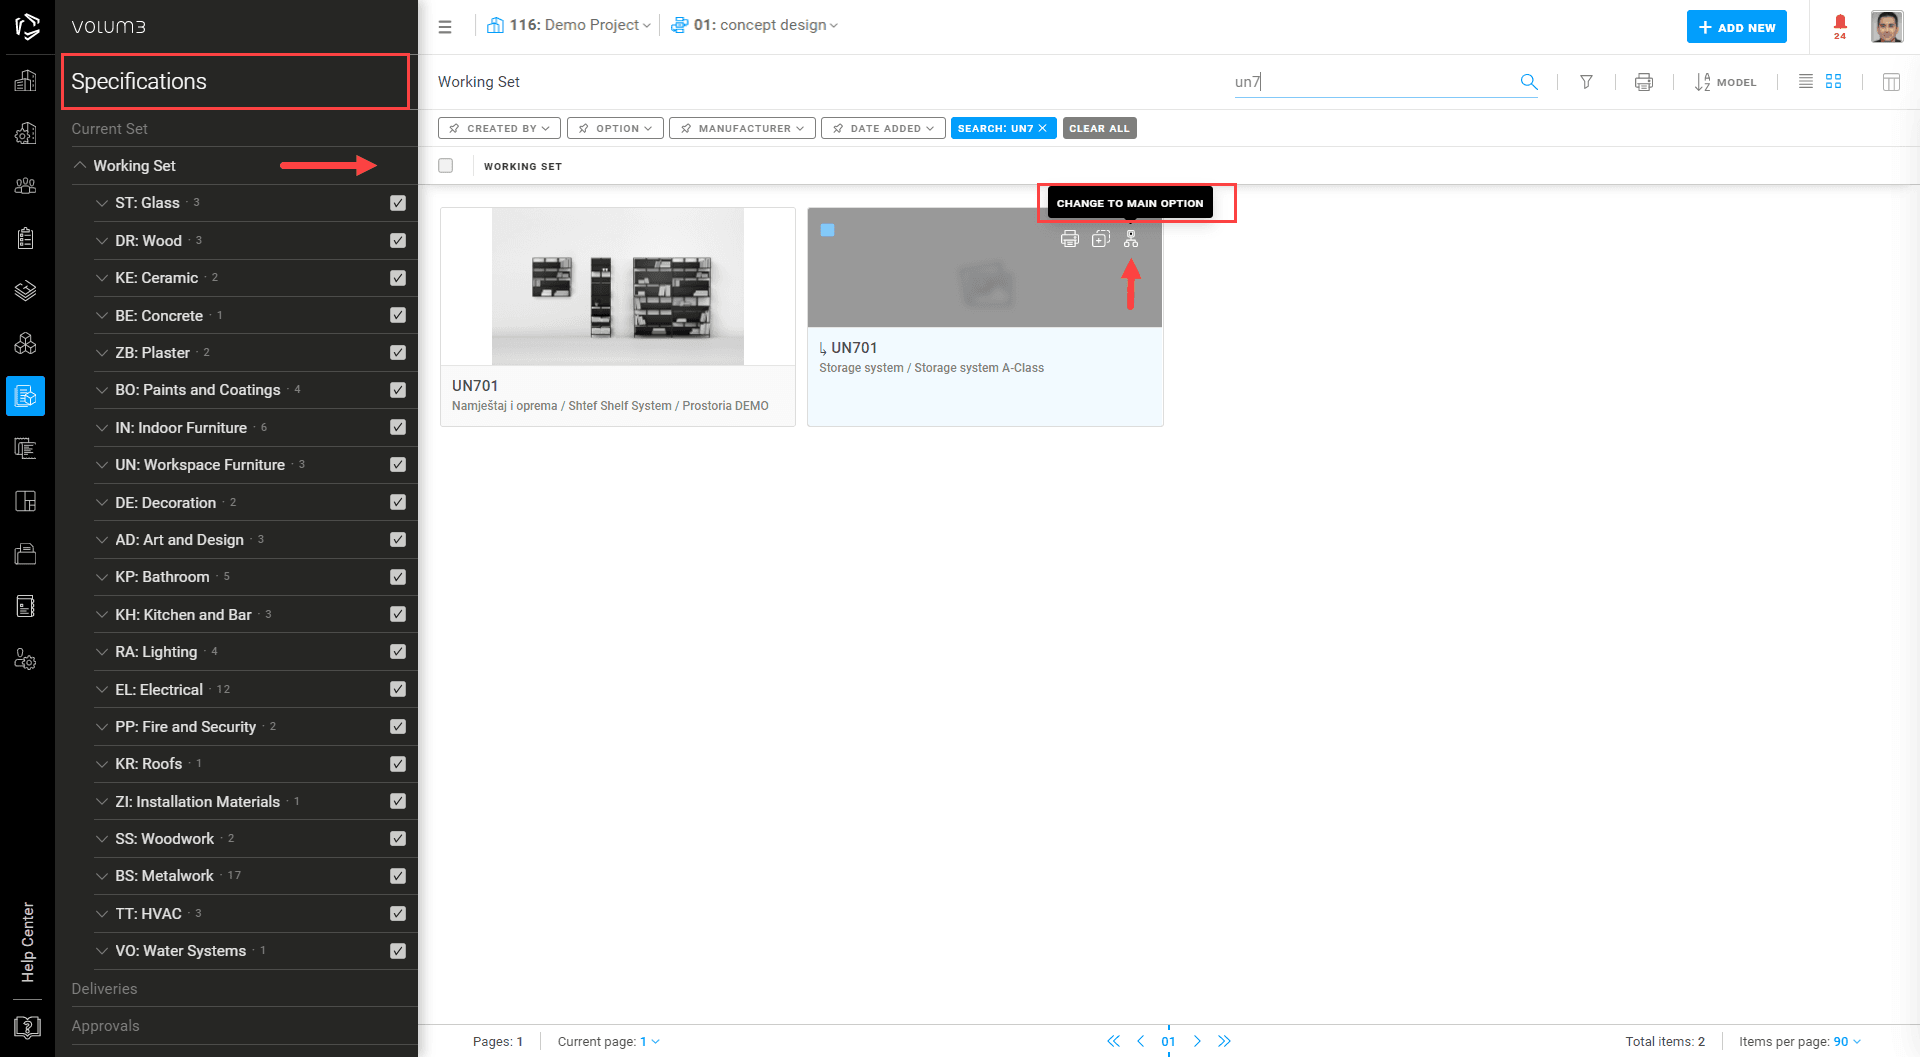
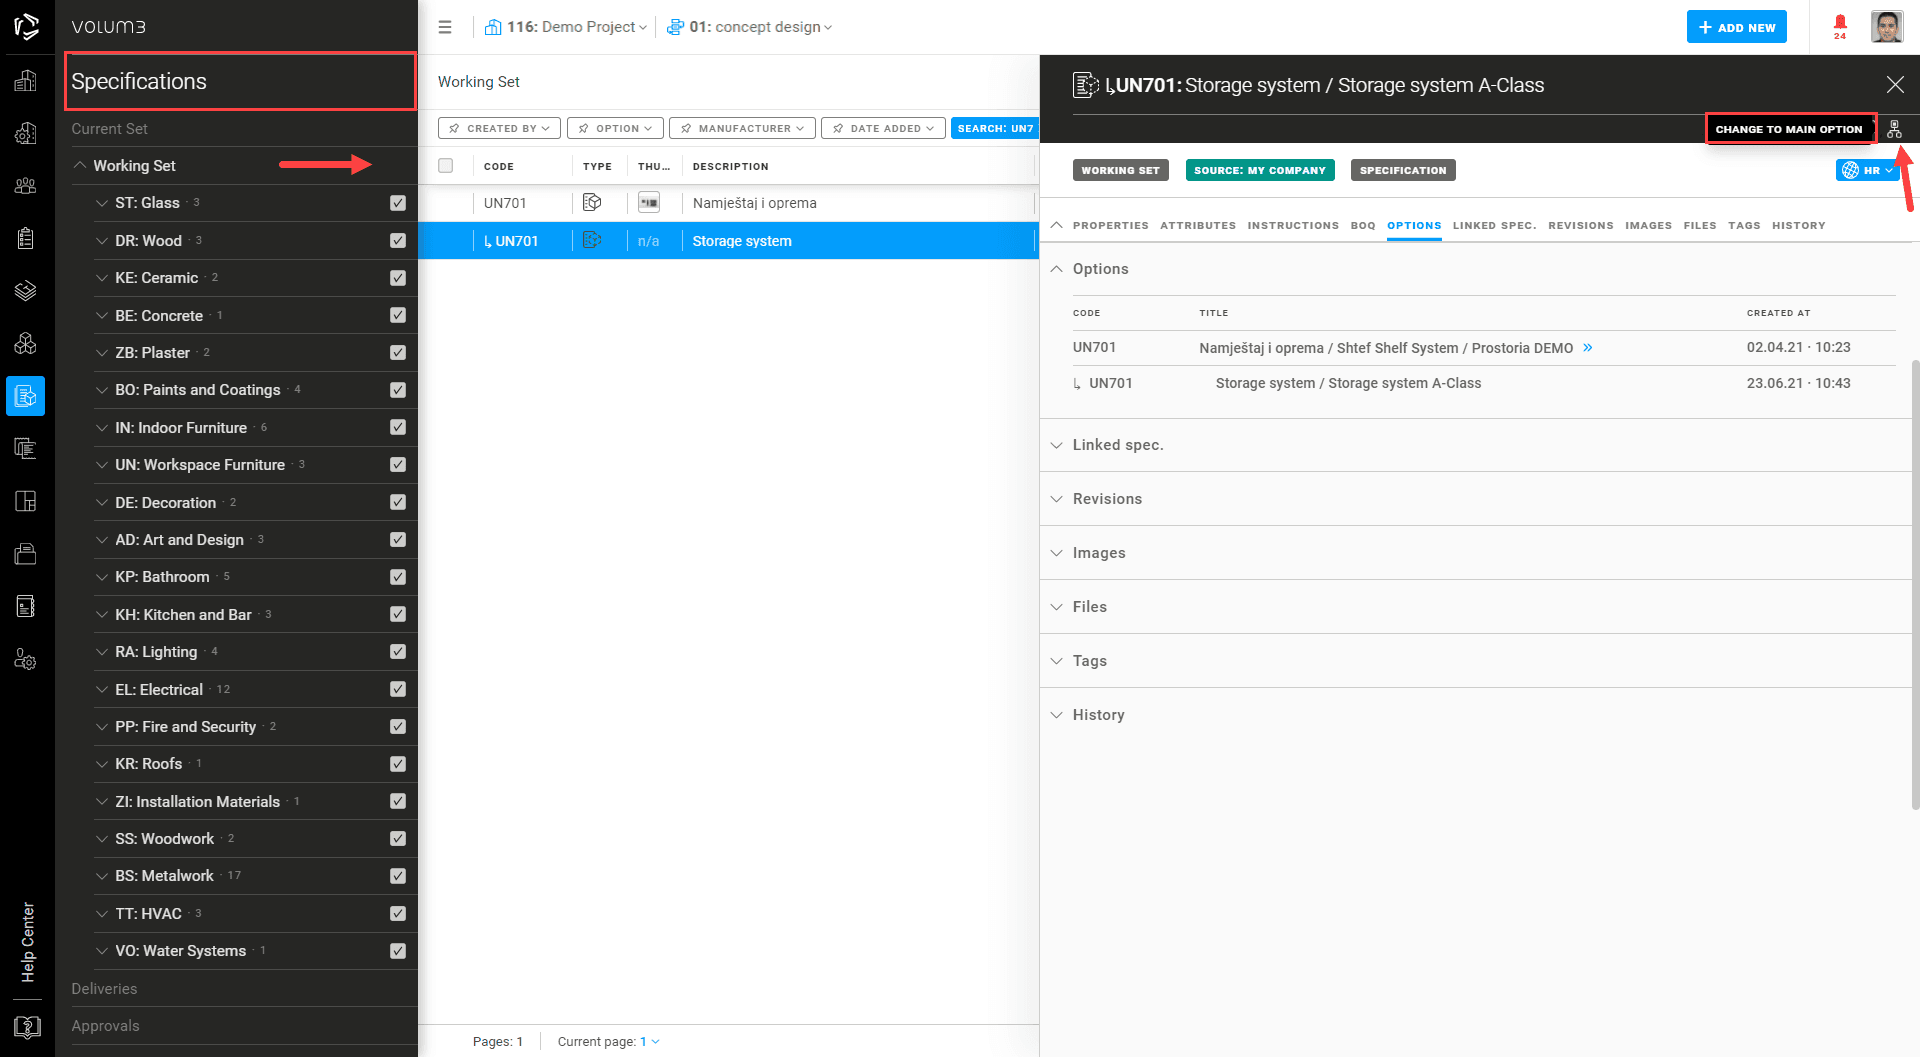
Results of this action are visible in specification flyout under tab Options. Where specification is Option, there will be an arrow next to its code and the possibility to switch Option to the Main specification.
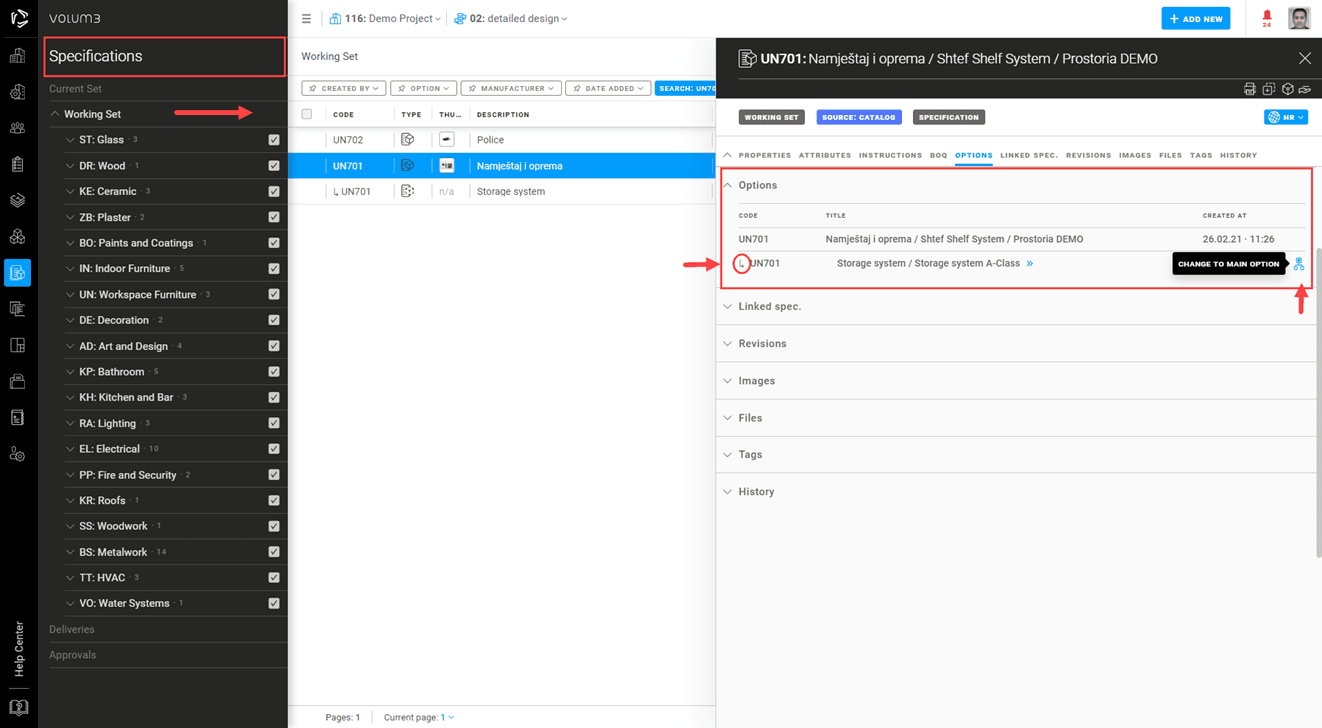
Choose the main specification among options
Once you decide, among all specification options, which one is the main and will be used on the project, make sure you define the Main specification.
2 possible ways:
- Go to the main specification and in its tab Options find the option you want to convert to main. Click on the action Change to Main Option.
- Go to the specification which is an Option and click on the action Change to Main Option.
By doing that, your current option will become the main spec, and the current main will become a new option.
None will be deleted, the system keeps both specifications.
Main Specification

Optional Specification
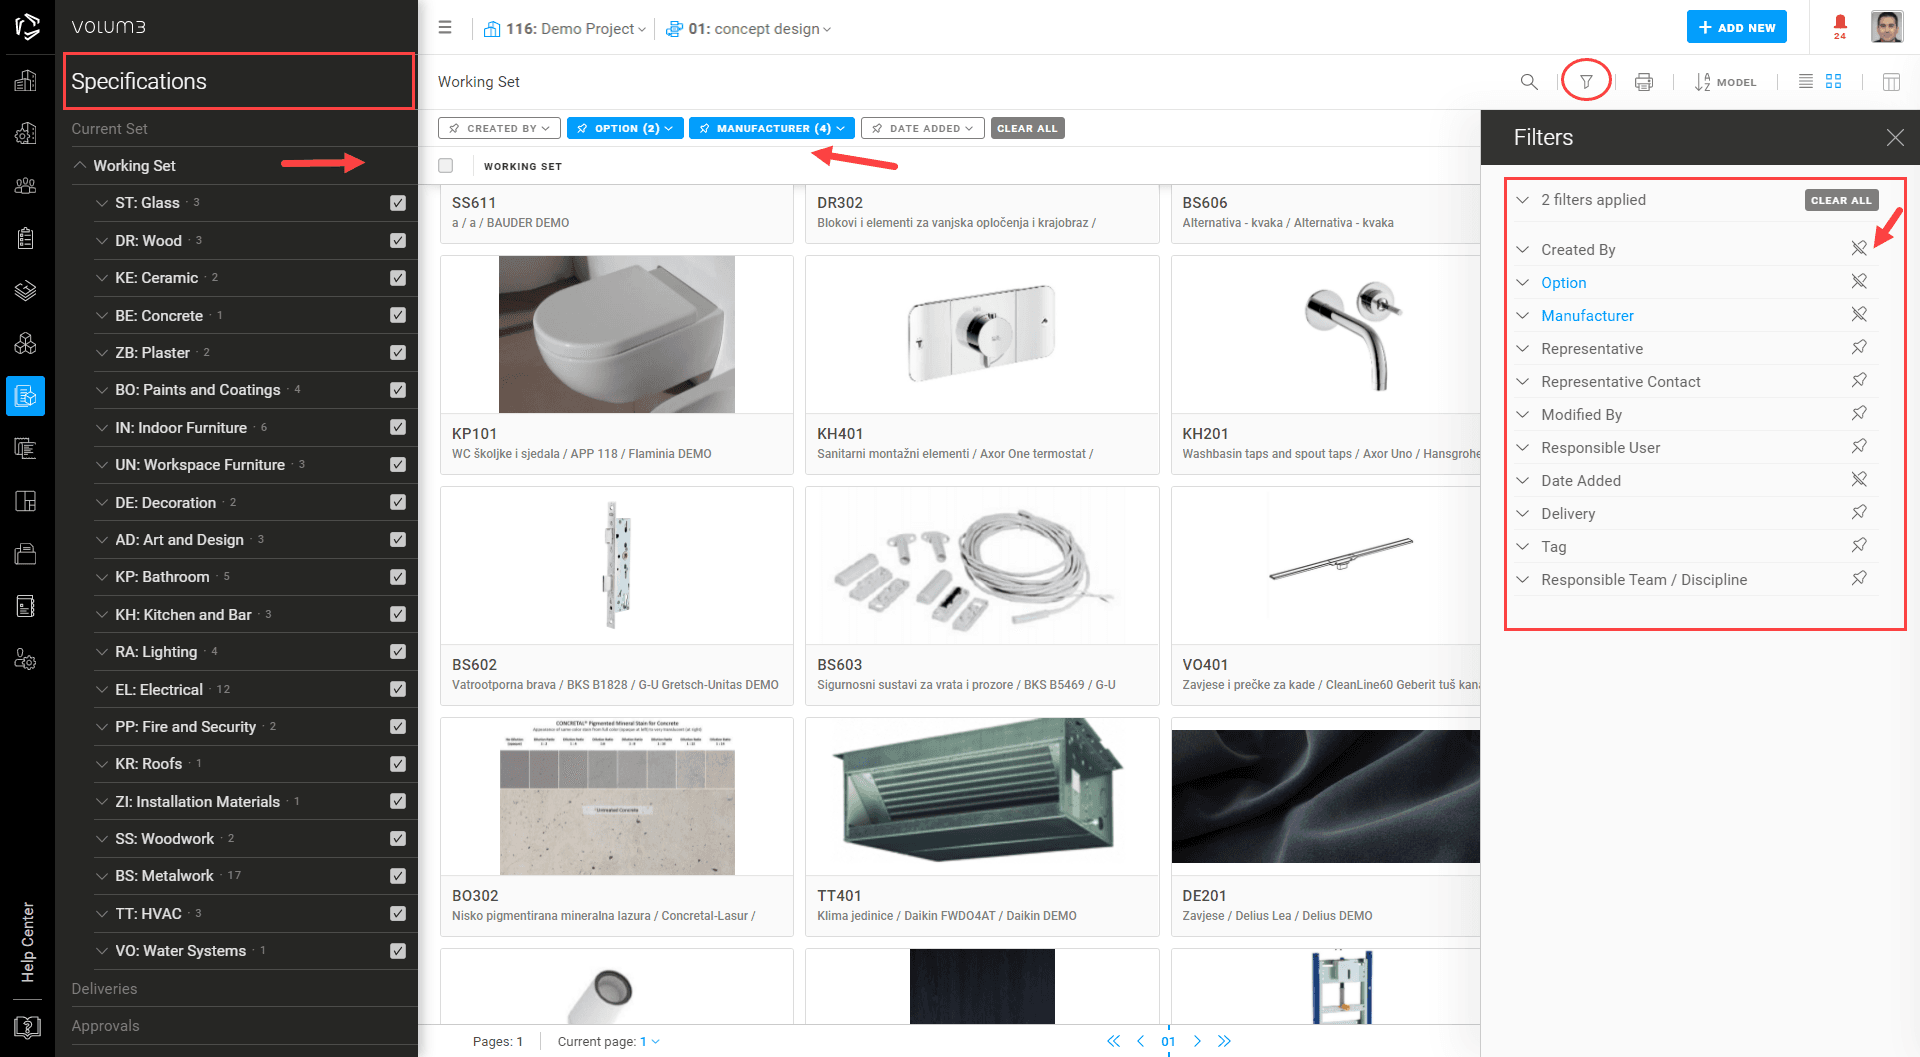
Filter specifications
Enable filters by clicking on the funnel icon. Choose between available options and filter the specifications to find the desired one. Pin the most frequently used filters to the toolbar.
Publish specifications on project / Deliver to current set
Delivery is a short process when you want to publish all main specifications on the project. Delivered specification becomes visible in the Current set to all project participants and you can not undo the delivery.
To deliver specification(s) to the Current set go to Specifications > Working set and select specification(s) you want to deliver.
Note: Only main specifications can be delivered to the Current set, Optional specifications can not be delivered. To distinguish the main spec. from optional, use the filter Options.
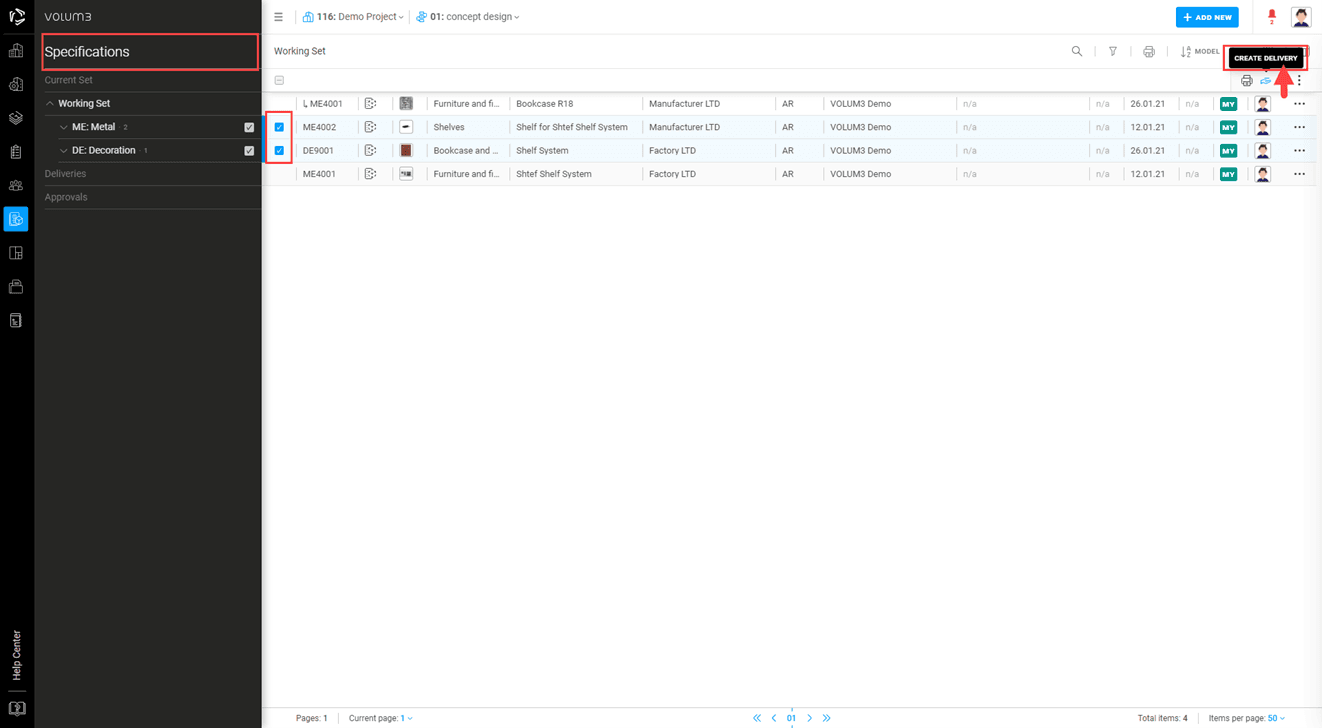
Then form a delivery. You can either create a new delivery or add a specification to the existing one.
New Delivery
Create new delivery and send it immediately (Create & Send) or keep it unsent to add more specifications later (Create).
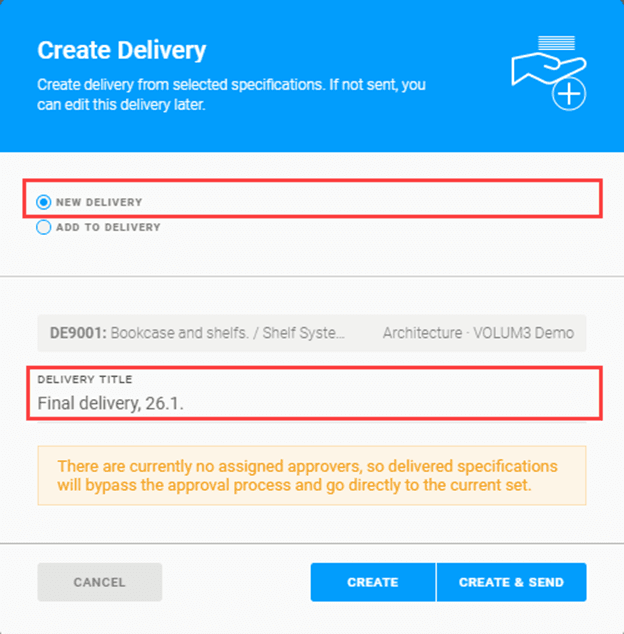
Existing Delivery
Add specification to an existing, unsent delivery.

When sending a delivery, if there is an official approver, specifications will be checked by the approver first. If there is no assigned approver, specifications will go directly to the Current set.
Create specification book / Print specifications
Specifications can be printed from the Working and Current set.
a – Print single specification
b – Print more specifications at once
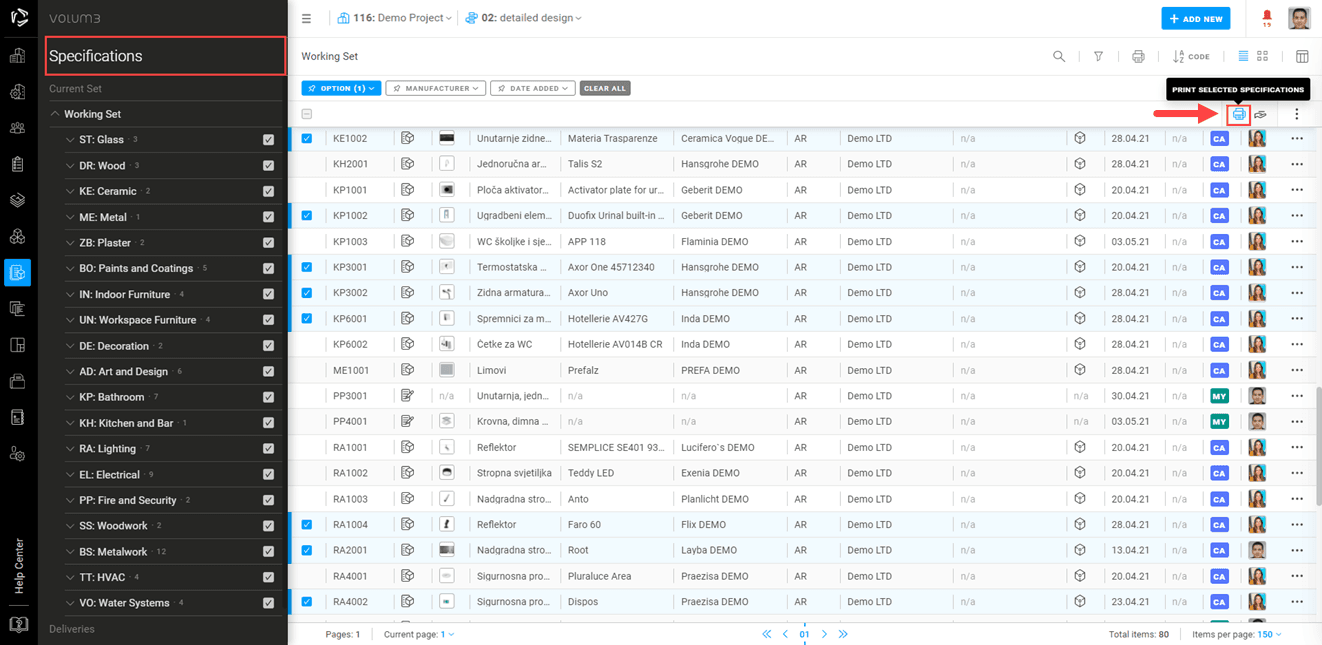
c – Print all specifications
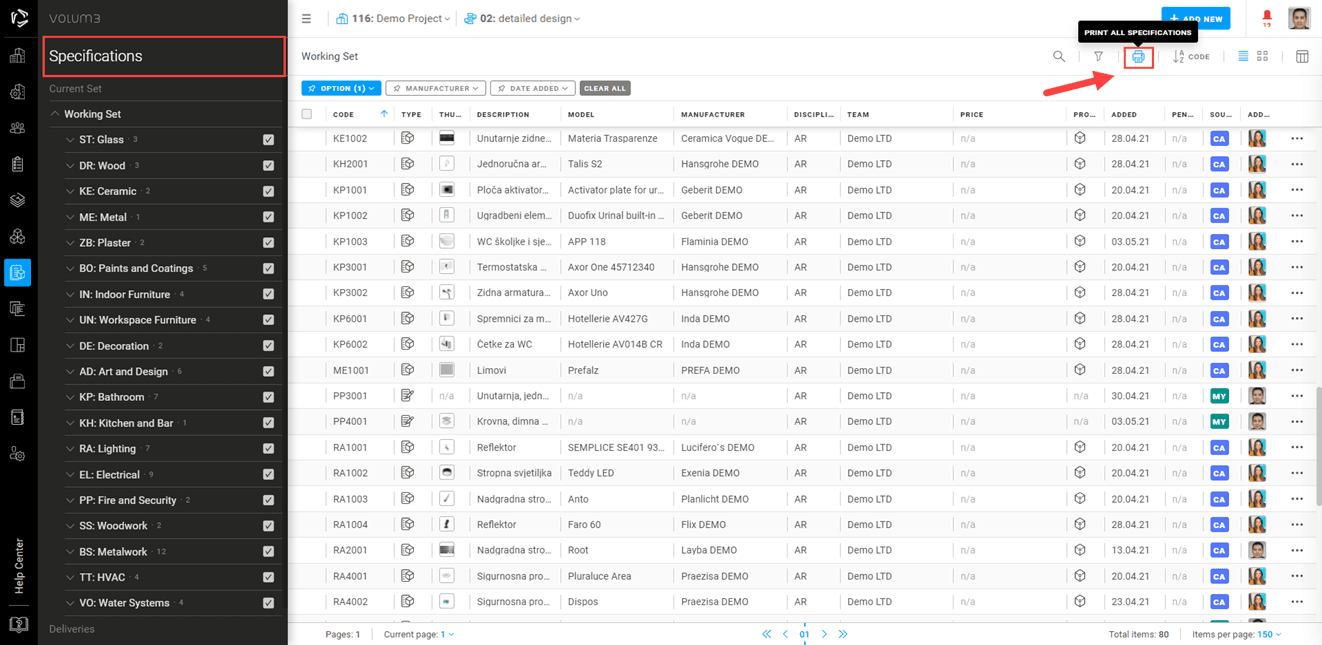
Define Specifications PDF details before printing. A link to download PDF will be available in Notifications and sent to your email.
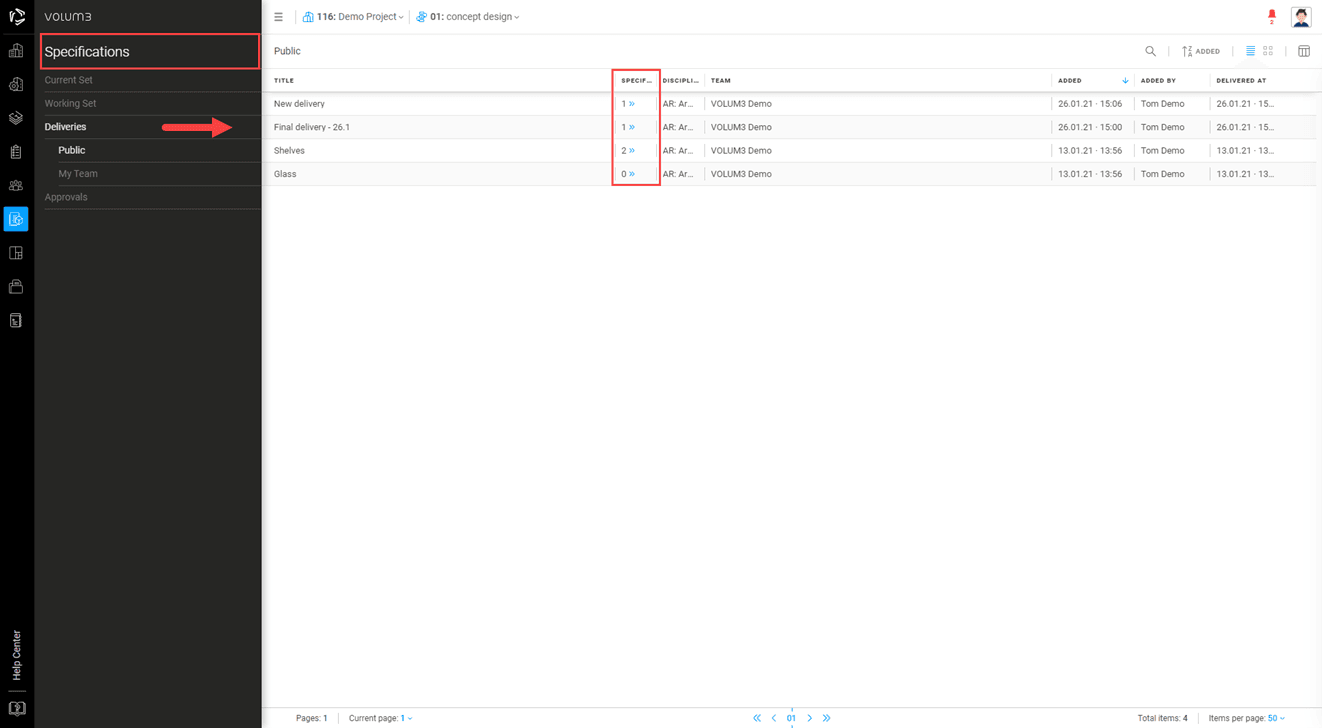
Check all deliveries
In Deliveries, you can find all deliveries sent during the project. By clicking on the link of the delivery in column Specifications, you can check all specifications sent in the delivery.
Public deliveries are the ones sent by all the teams on the project.
My team deliveries are the ones sent only by your team.
Check (not) approved deliveries
When sending a delivery, if there is an official approver, specifications will be checked by the approver first. The approver can check pending specifications in Specifications > Approvals.
PENDING – yet not approved by the approver.
APPROVED – deliveries approved by the approver
REJECTED – deliveries rejected by the approver

Specifications