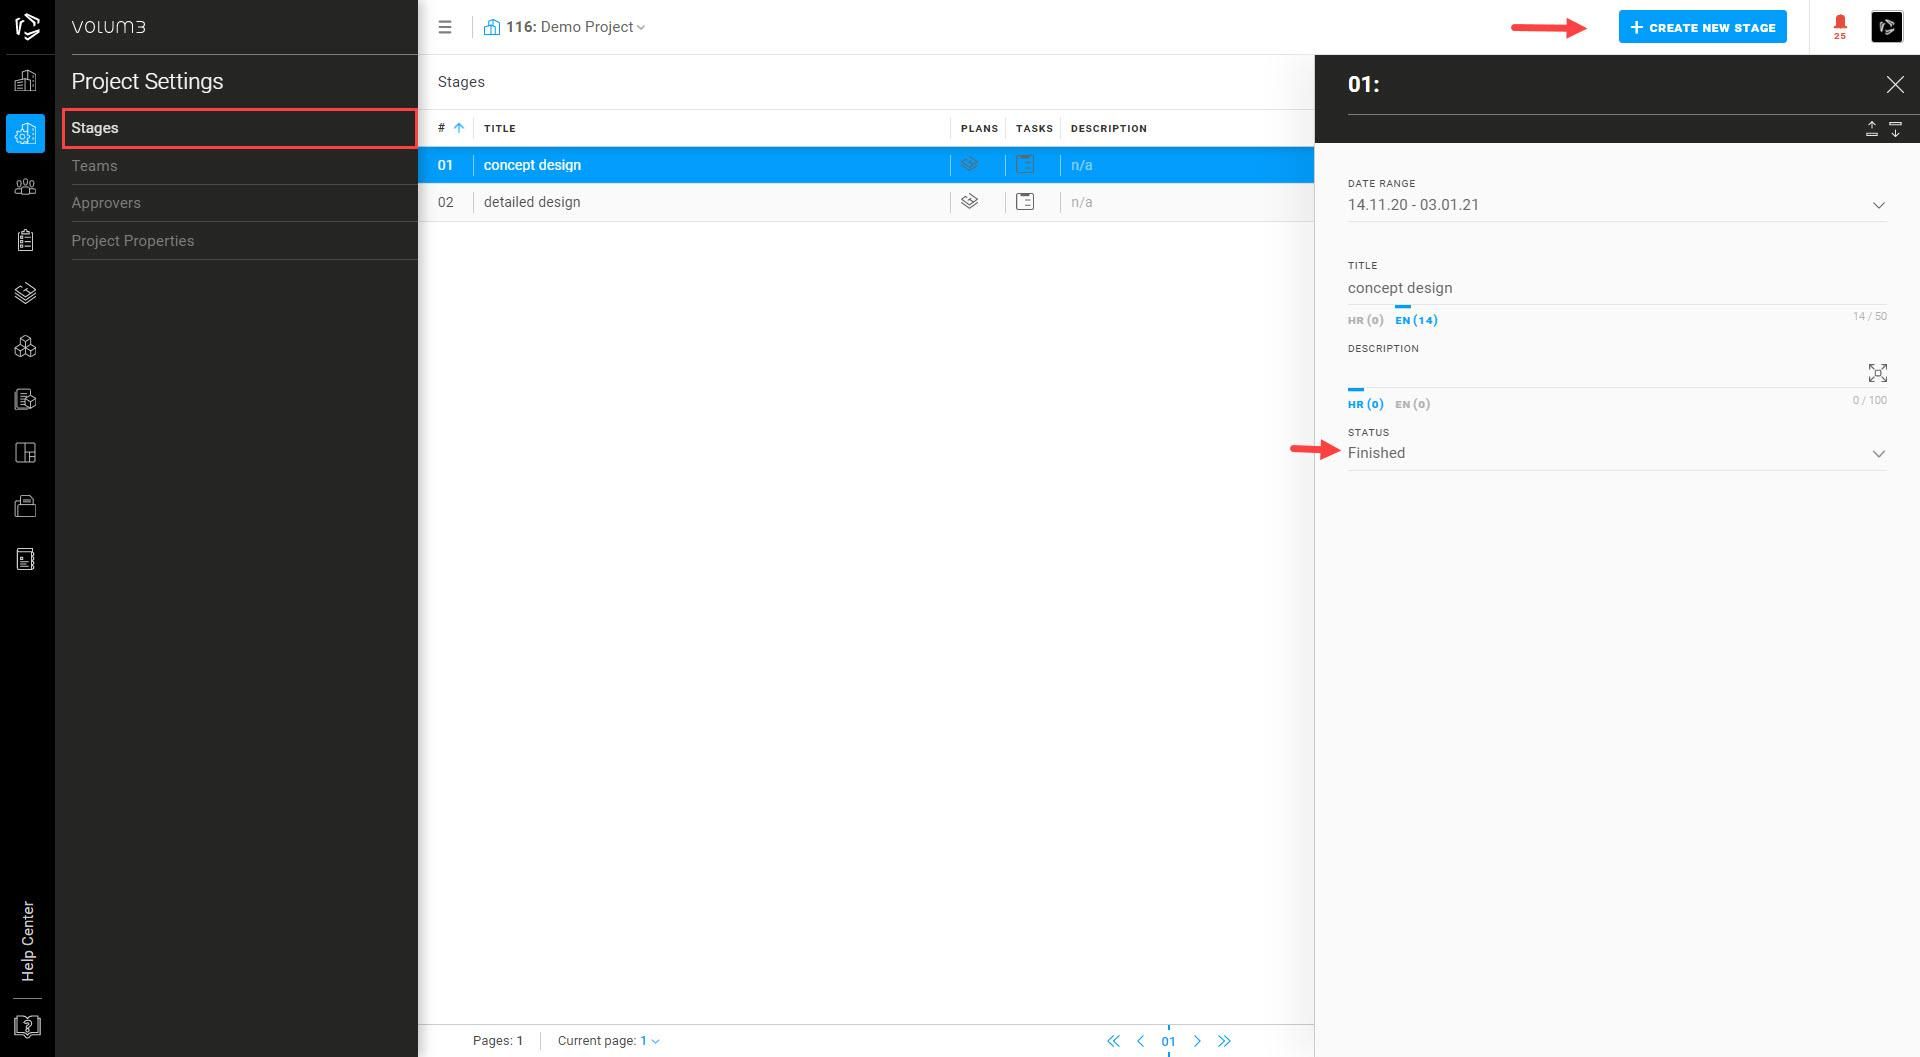
Stages
You can add as many project stages as you need by clicking on + Create New Stage. You can also add them later as the project evolves.
By clicking on a specific stage in the main window, a flyout menu will appear where you can see all details. You can change the stage status in the drop-down menu under the label status.
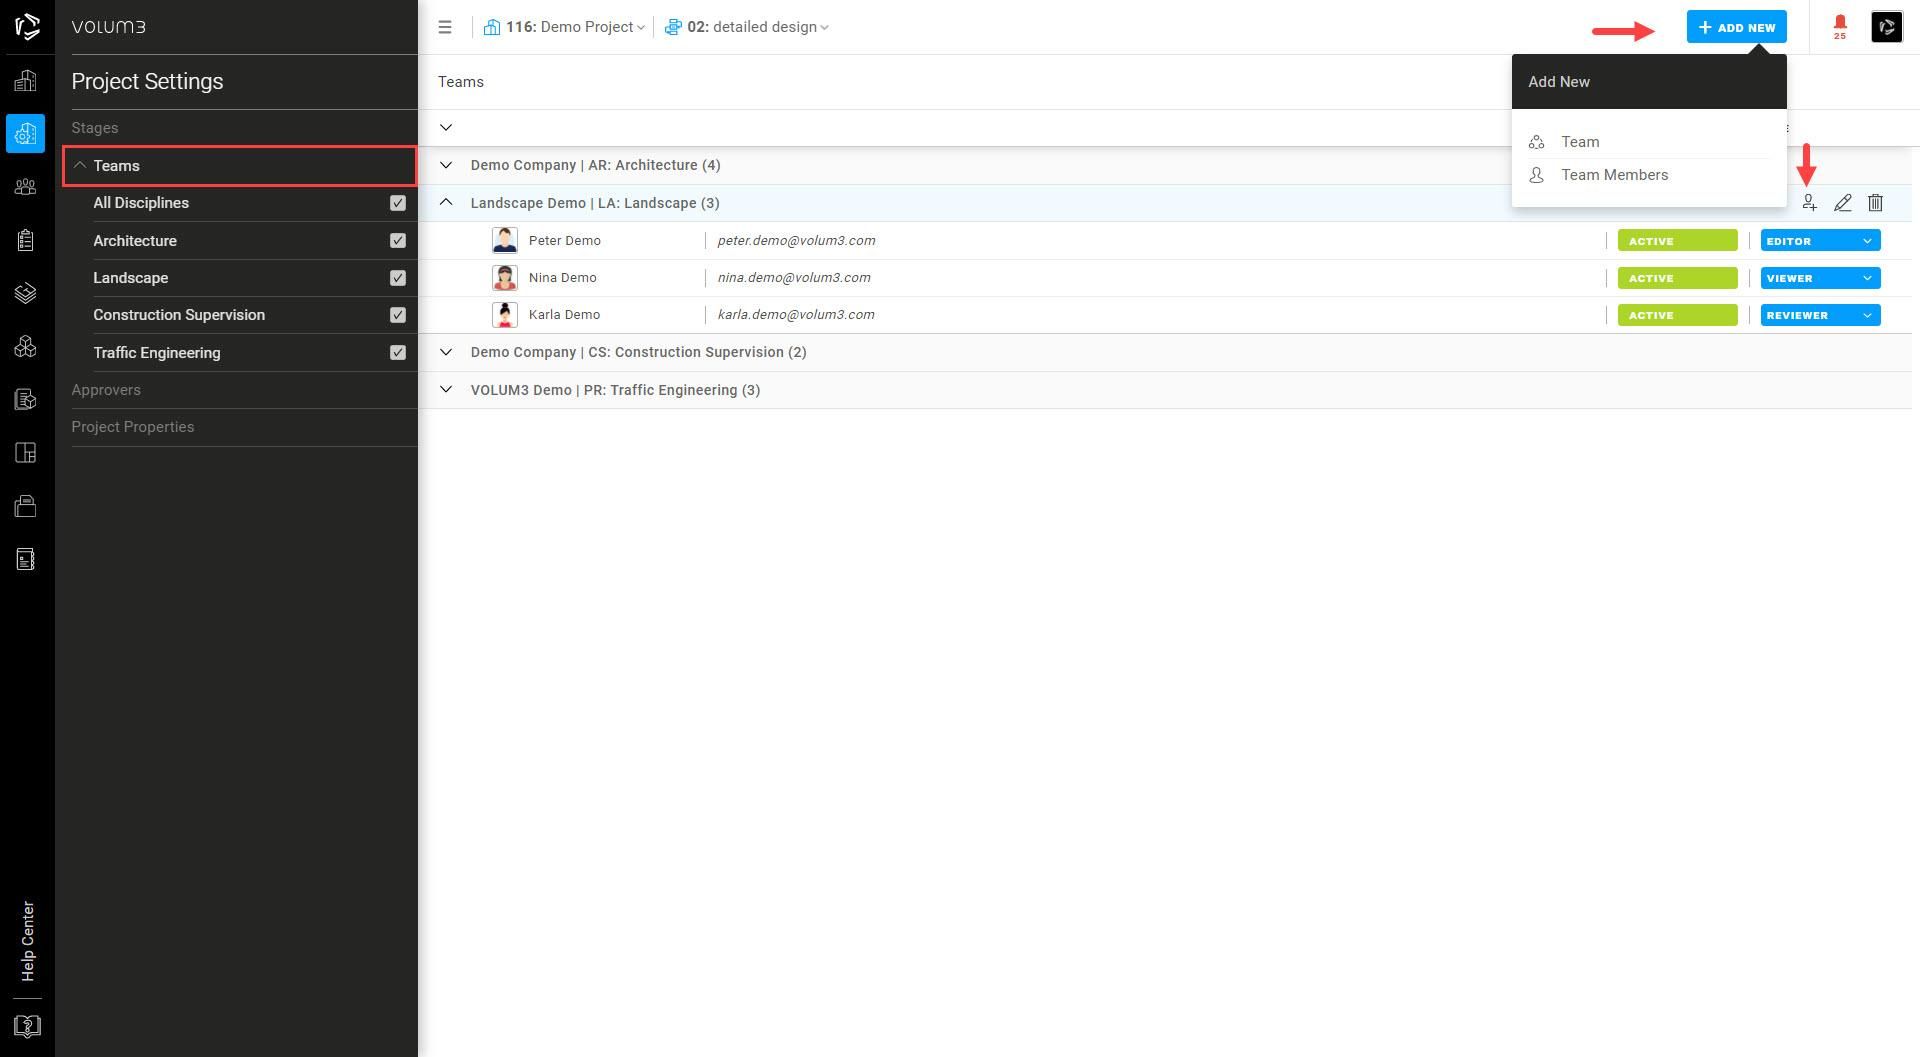
Teams
You can add new teams and team members by clicking on + Add New or on the user icon directly in the team.
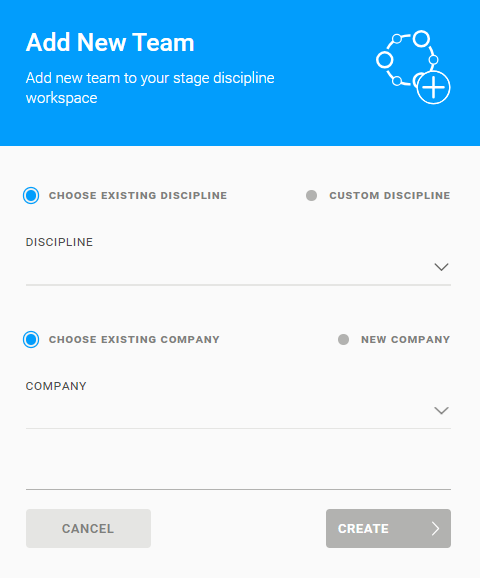
In the drop-down menu, you can choose between existing disciplines and existing companies, or create custom disciplines and invite new companies to join.
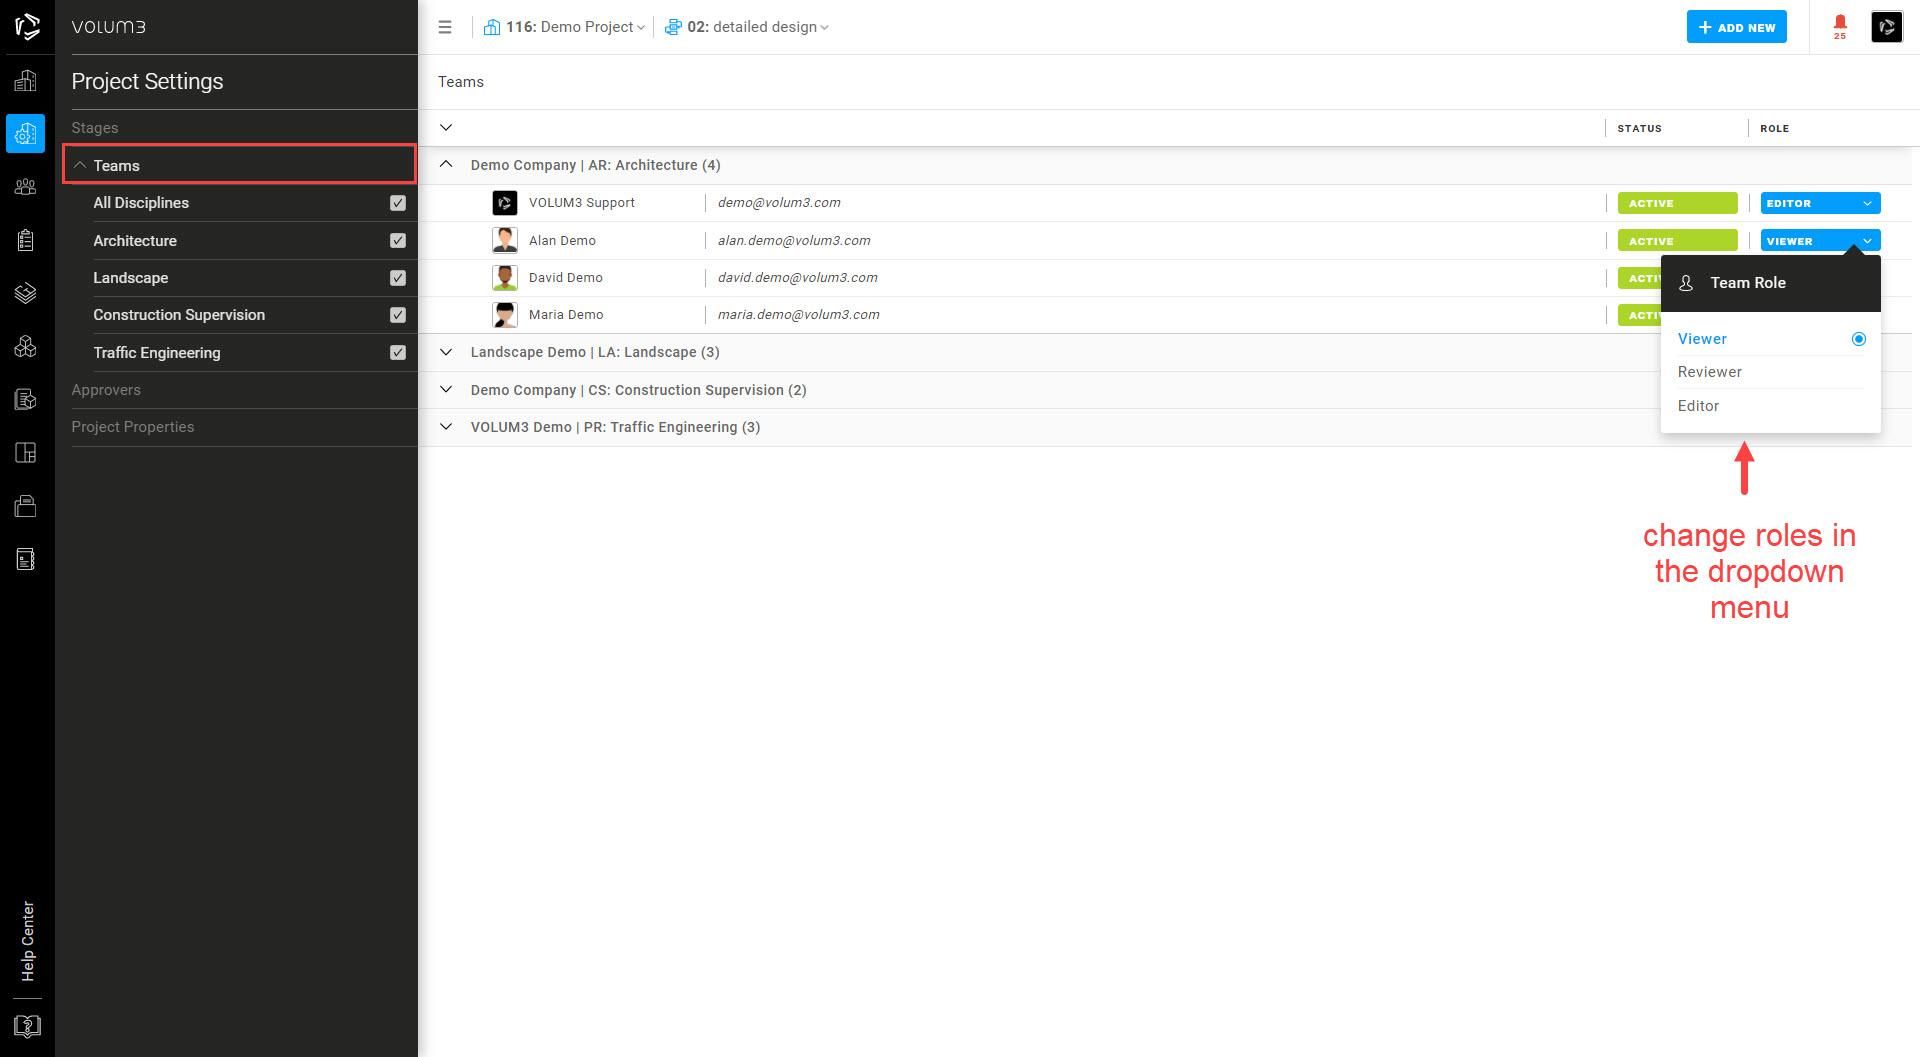
New team members will be marked as pending until they accept your invitation. You can change their role on the project before they accept it. The default role is the viewer. For more information, go to User Roles.
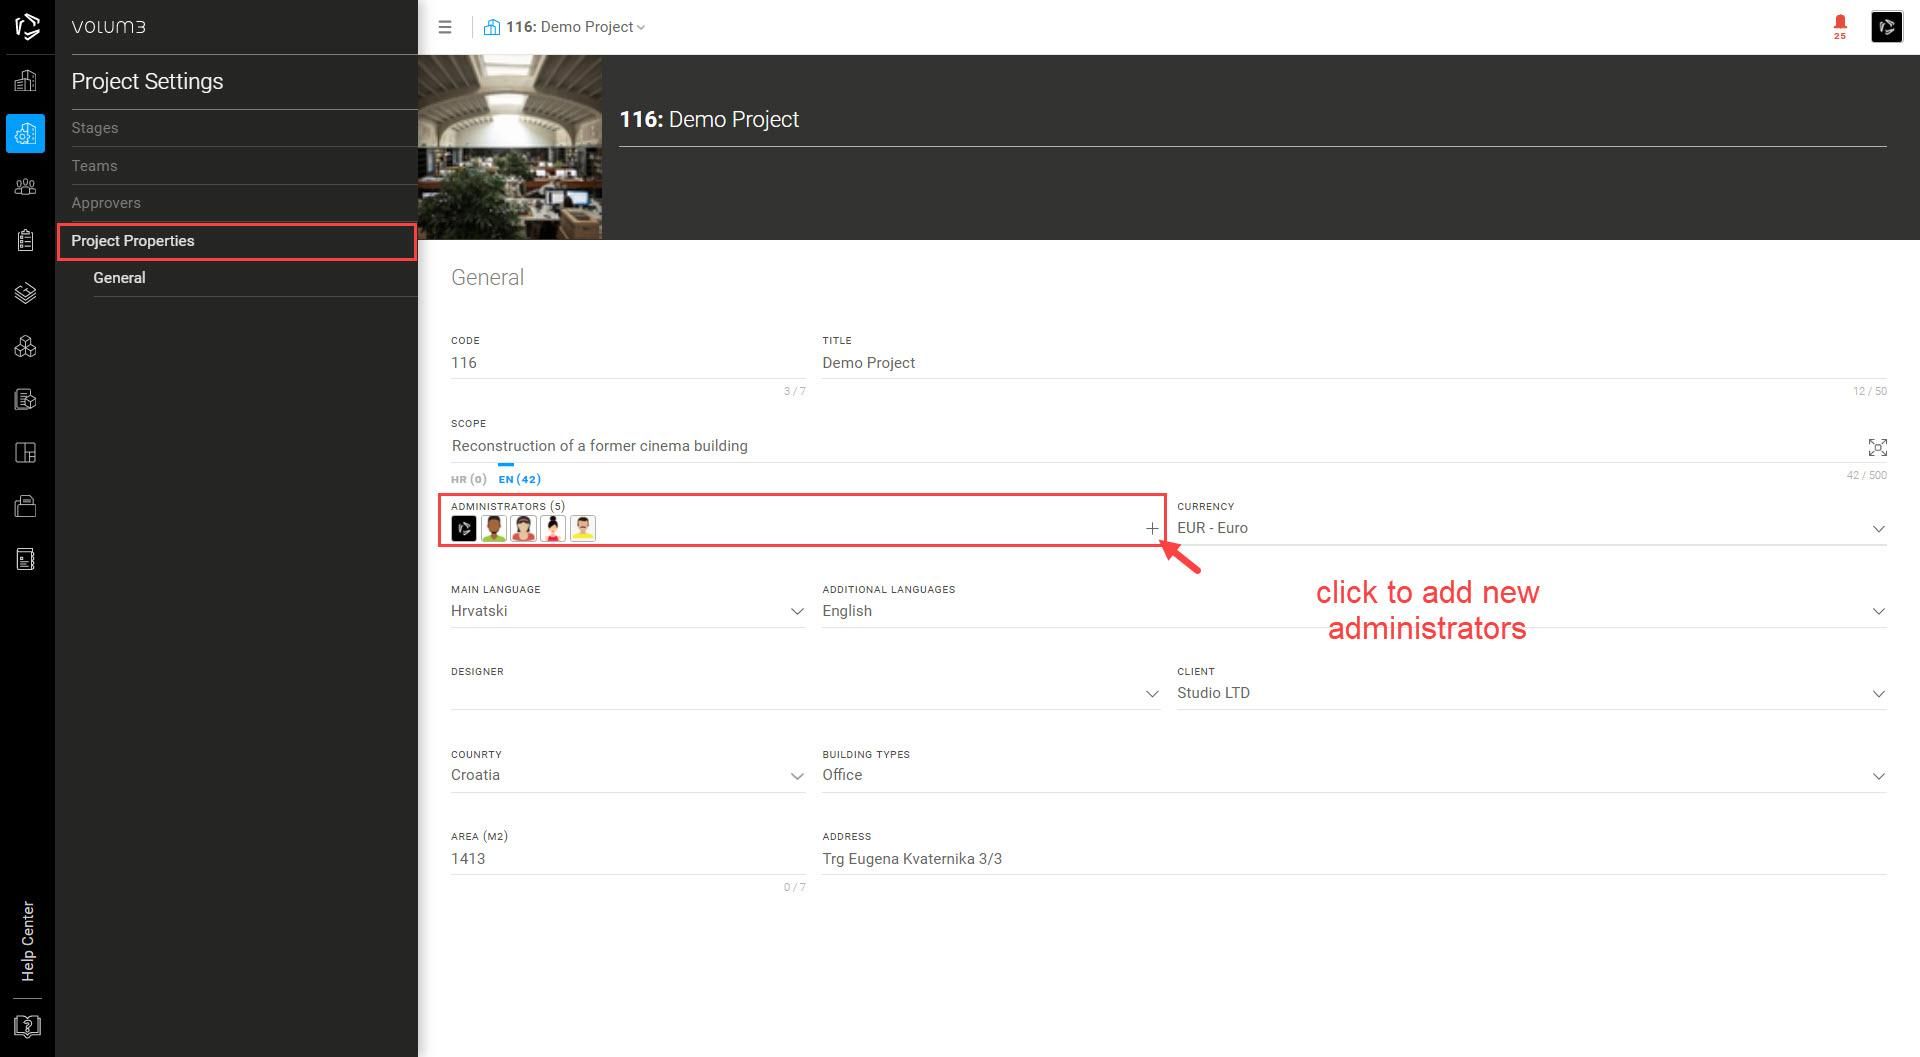
Project properties
You can edit your project properties as it's displayed in the picture below. You can also add project administrators to the project properties. For more information, go to User Roles.
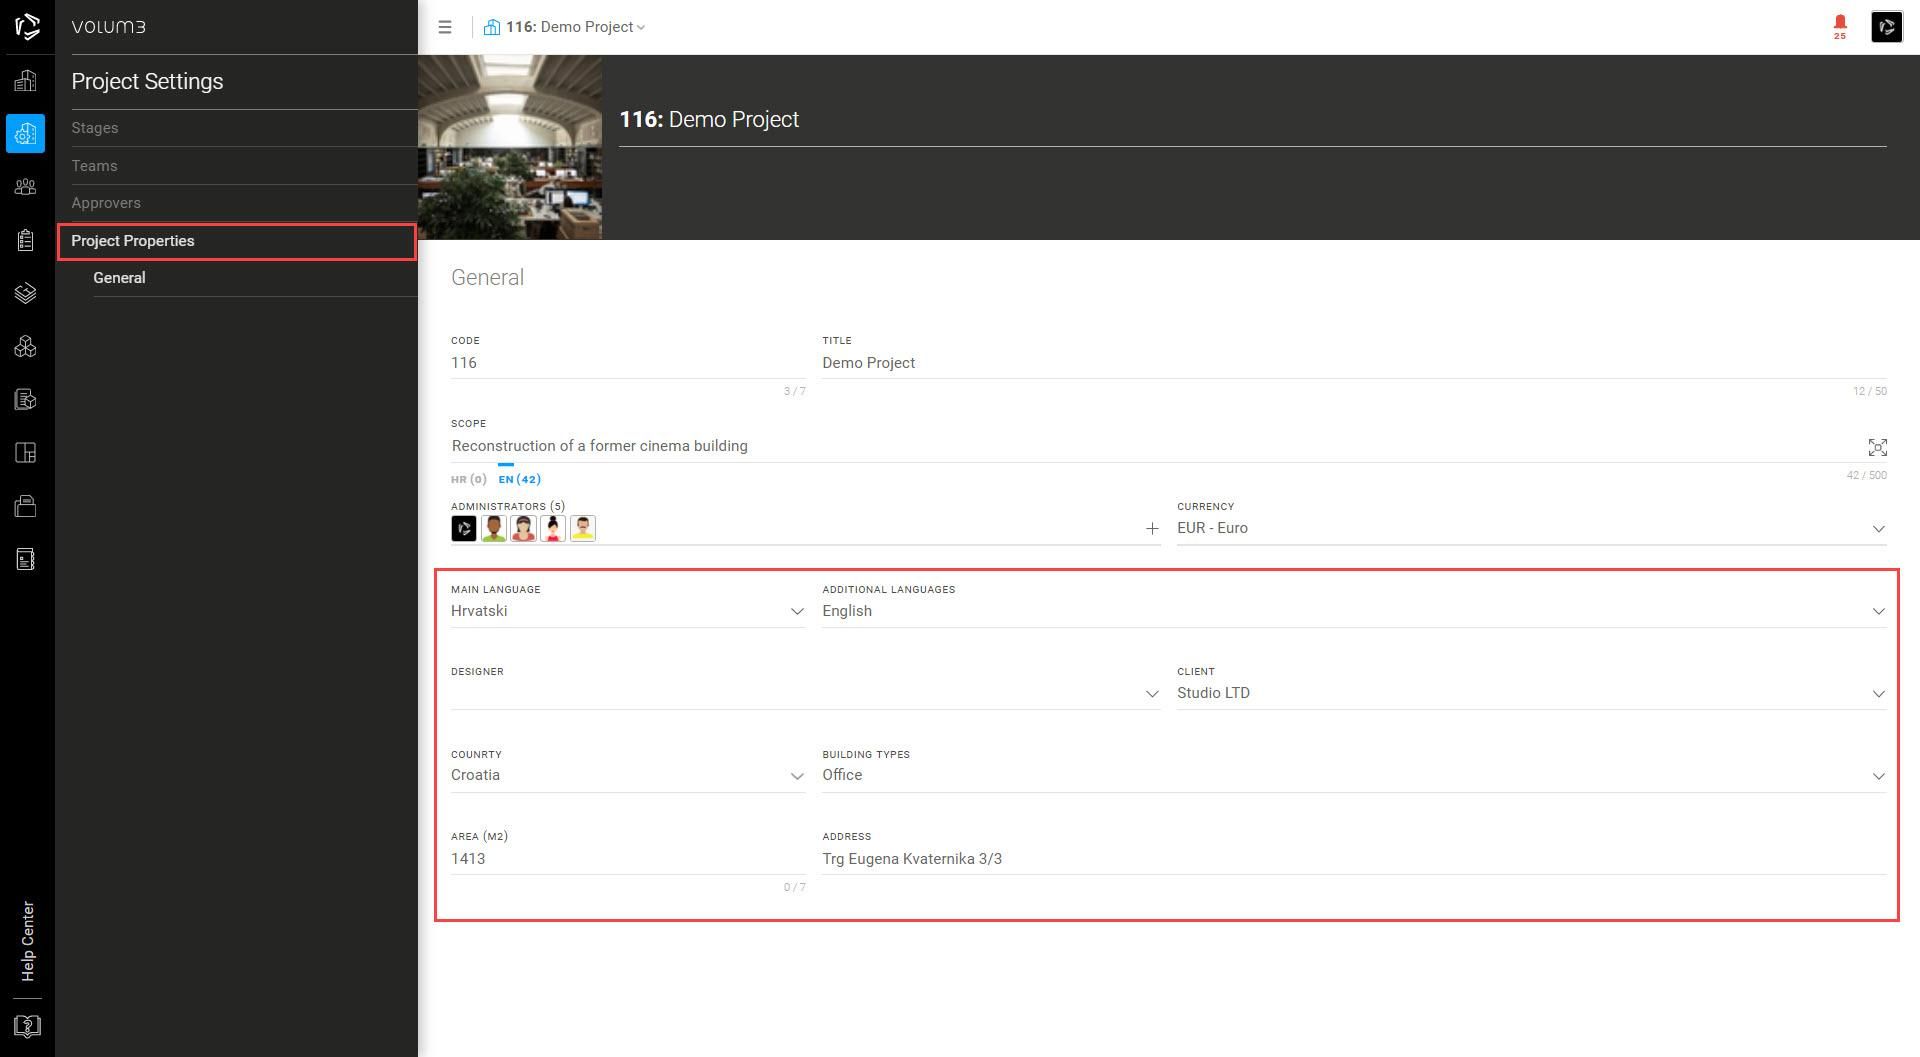
You can add main and additional languages on a project from the drop-down menu in the project properties, as well as Designer, Client, Country, Building type, Area, and Address.
Added languages will get their language abbreviations below each multilingual field in the application.
Import area
We understand that efficient scheduling is crucial for your project, and we are here to make it as straightforward as possible. With VOLUM3, you can easily import areas from an Excel spreadsheet and streamline the scheduling process.
To get started, we've prepared a template with all the necessary columns, ensuring your schedule aligns seamlessly with our platform's requirements. You can download this template. This template serves as your starting point, making it easier than ever to organize your data.

Our platform is designed to integrate smoothly with various Building Information Modeling (BIM) software solutions, such as Archicad and Revit. This means you can generate and export your Excel schedule directly from your preferred BIM software, saving you valuable time and effort.
The following steps will guide you through the process:
Step 1: Create an Area Table in Excel
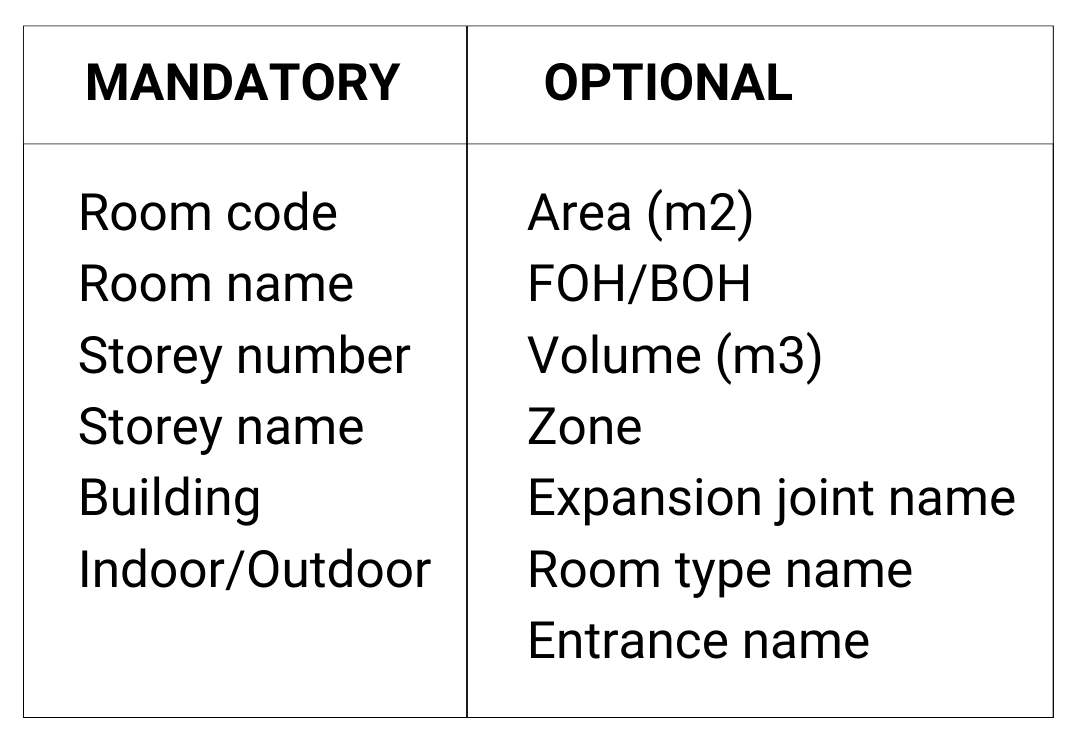
Create a schedule with the specified columns in Excel. These columns should correspond to the properties you want to import into VOLUM3. Before creating a schedule for import in VOLUM3, ensure that you have defined the necessary data.
Note: The image below displays all the mandatory columns. If these columns are nonexistent or filled with values, Volum3 import will not work. There are also optional data columns that you can import.
Note: Building names must be created manually in VOLUM3 before import; otherwise, the import will fail.
Step 2: Save the Excel File
Once you've reviewed and refined your data, save your Excel file with all the necessary updates. It's a good practice to keep a backup copy of the original data file for reference.
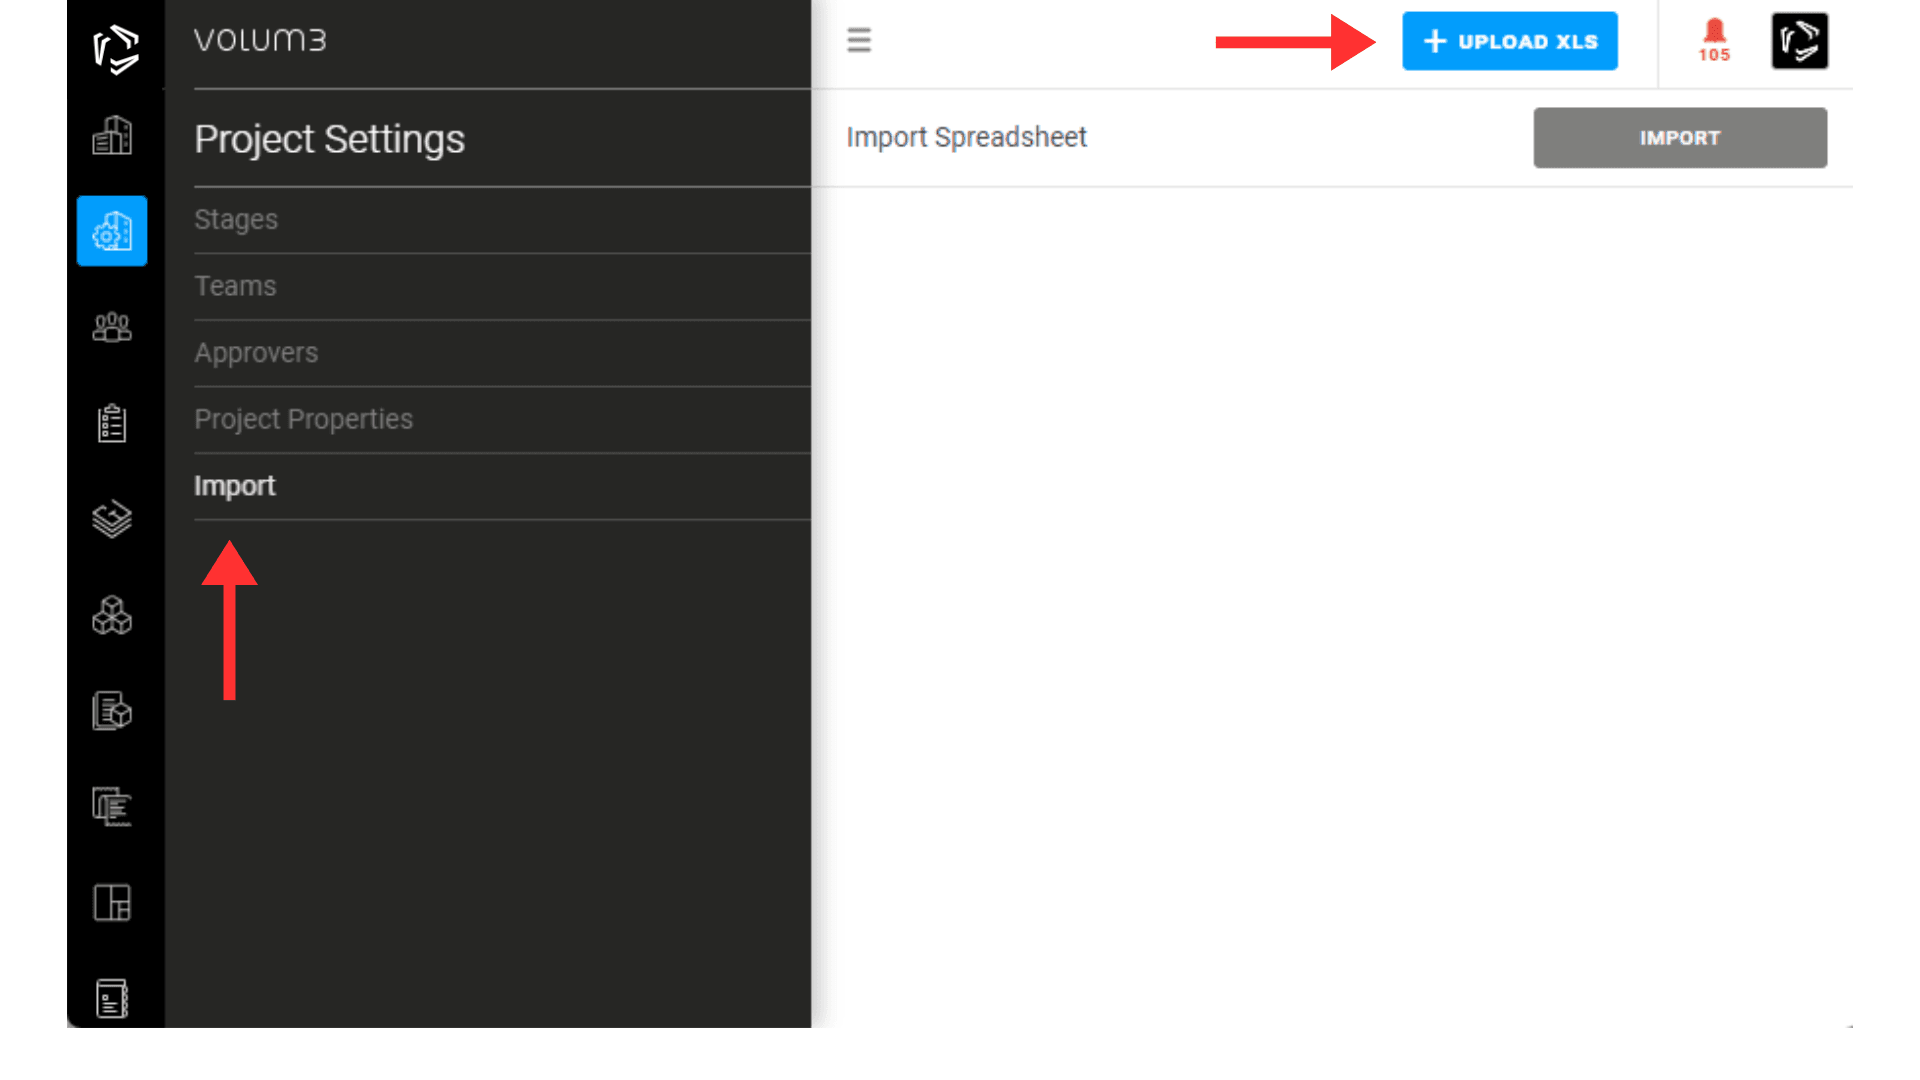
Step 3: Import the Excel File into VOLUM3
Open VOLUM3, go to Project Settings, and click on the Import feature. Click "Upload XLS" in the upper right corner and select the Excel file you just created and saved.
Step 4: Matching Columns
After uploading your Excel spreadsheet into VOLUM3, you'll need to match the columns in your Excel file with the corresponding data fields in VOLUM3. This matching ensures that the data aligns correctly. Once you've selected all the necessary columns, the Import button will transition from gray to blue, signaling that the table is ready for import.
Step 5: Unselecting Rows
All rows from your Excel file that are set for import will be marked with checkboxes in VOLUM3. This allows you to select or deselect specific rows based on your requirements. In cases where some rows contain data unrelated to the area you want to import (e.g., column names or headers), unselect these rows to include only relevant data in the import.
Step 6: Import Data into VOLUM3
After the validation is finished, you will receive one of two notifications:
Import Successful:
“The file has successfully been imported.
Data has been transferred.”
If the import was successful, skip all below and continue reading Step 9.
Import Failed:
“We’re sorry, recent Excel file import was unsuccessful.
To Assist you, we’ve prepared an Excel file with color-coded cells indicating issues.
Click here to download .XLS report
Correct the highlighted errors in the file and try importing it again. Please note that link(s) above is valid only for 7 days.”
If the import fails, the notification will contain a link to an Excel report file.
This action generates a notification with a link to an Excel spreadsheet highlighting data errors and providing further information on them. Click 'Download Report' to open the Excel file and review all the errors.
Step 7: Resolve Data Errors
Open the report spreadsheet in Excel. You will notice that some cells have different background colors. These colors indicate the types of errors:
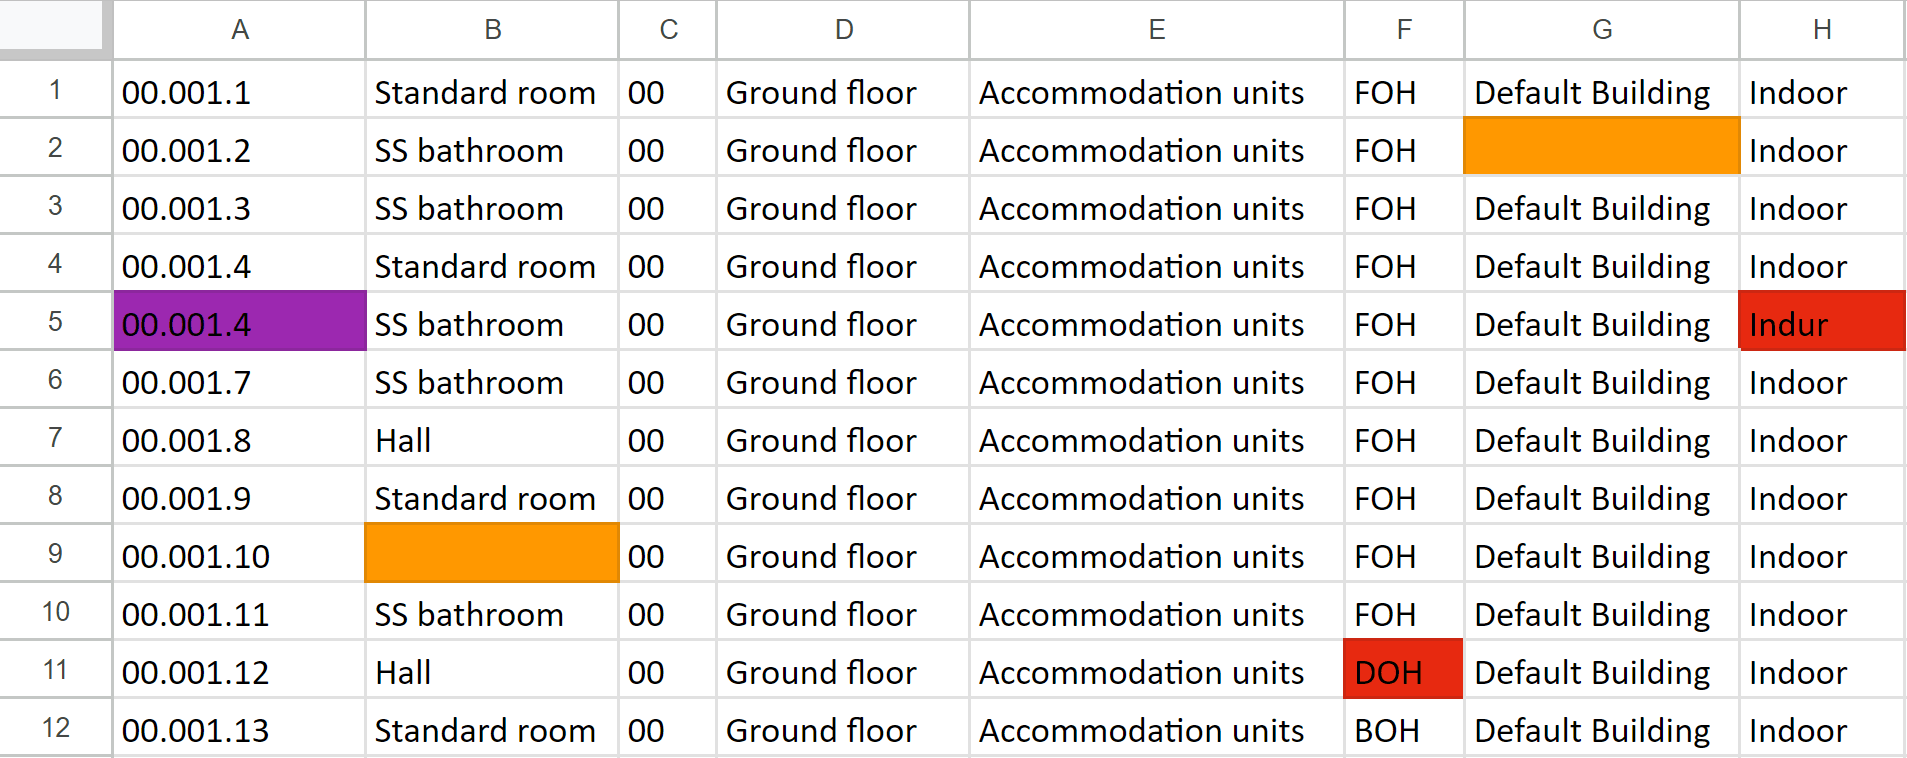
 Orange: Missing data - Data items cannot be empty; these fields are mandatory and must not be left blank.
 Purple: Duplicate data - These are duplicate data items, meaning each cell in this column must have unique values. Please review and remove duplicates.
 Red: Invalid data - Data with an invalid format cannot be imported. Please review the data format to ensure it corresponds with the selected column, such as numbers, dates, etc.
Save the corrected Excel file.
Note: The same explanation can be found in the "Legend" sheet within the spreadsheet (second tab) for additional guidance on error color indications.
Step 8: Import Corrected Excel File into VOLUM3
Import the corrected spreadsheet back into VOLUM3. Repeat steps 4 and 5.
Step 9: Import Areas into VOLUM3
Click on the Import button to initiate the process. If the verification was successful, VOLUM3 will import the areas (rooms) from the spreadsheet into the area module, seamlessly integrating the area data.
Note: If there were errors in validation, return to Step 7.
By following these steps, you can efficiently import area data from your generated Excel spreadsheet into VOLUM3, ensuring accuracy and consistency in your project.