
Introduction to VOLUM3
To start using the VOLUM3 platform simply follow these steps:
1. User profile registration
2. Creating a company profile
2.1. Editing the company profile in 6 steps
3. Inviting new company members
4. Creating a project
5. Uploading plans
6. Adding tasks and markups
For information on navigating the site, go here.
For further questions, explore our Help Centre.
1. Register your account
To register an account click on the link VOLUM3. Registration is free.
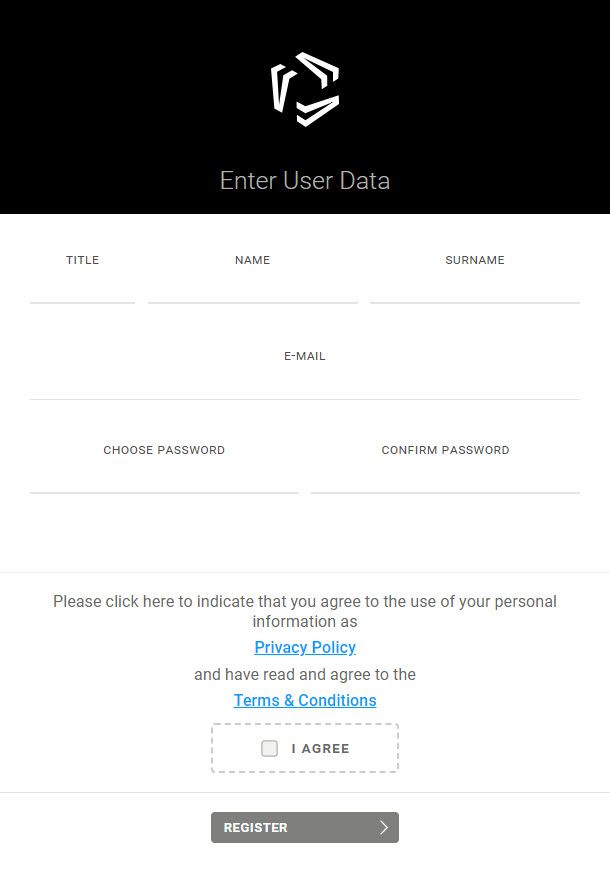
Enter required fields with user data. After ticking the I agree box for Privacy Policy and Terms & Conditions, you may Register. Check your e-mail inbox for the registration confirmation e-mail and confirm your profile account.
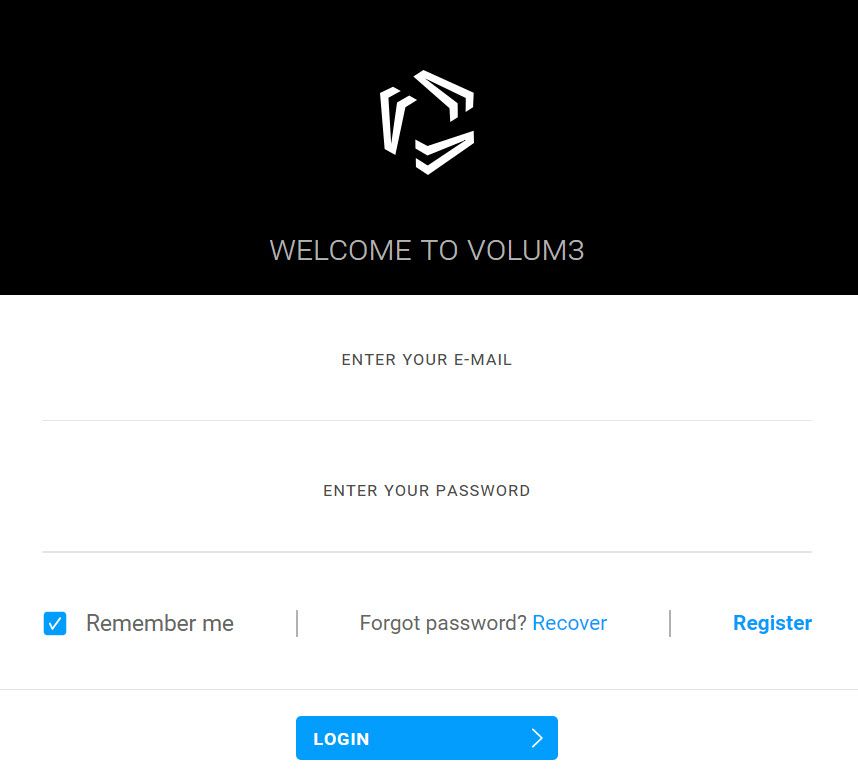
Profile registration is complete. You will be redirected to the VOLUM3 Login page. Enter your e-mail & password. Ticking the Remember me box will keep your data saved for further profile access.
NOTE:
All user profiles have to be connected to one company profile. After Login, choose one of the options on your VOLUM3 Homepage so the User profile and Company profile connection would be complete.
2. Create company profile
A company profile is created only once. To create your company profile, follow the suggested options on VOLUM3 Homepage. If your company profile is already registered, simply follow the instructions to Join the existing company.
All user profiles (employees of the company) have to be connected to their company profile (employment company).
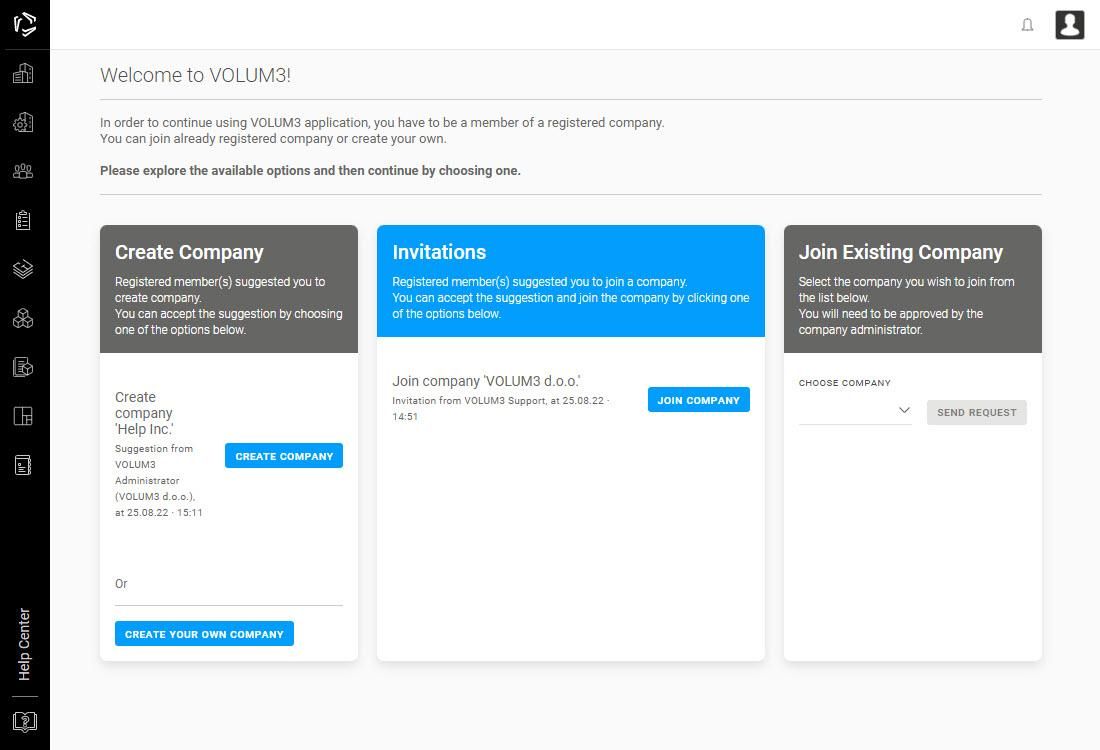

Options:
Create company
A registered VOLUM3 user suggests that you create a company profile. The user also suggested how your company should be called on VOLUM3. If you agree with this suggestion, select Create company and enter other necessary information to complete the company profile.
Invitations
A registered VOLUM3 user has sent an invitation to your e-mail address. The invitation contains a proposal to join his company, assuming that you are also an employee of that company. By selecting the Join company option, your user profile will be connected to the offered company.
Join existing company
If your company has already been successfully registered on VOLUM3, use the Search option to find and select the company from the drop-down menu and click on the Send request option. The owner of the company's profile or the company administrator will receive a notification and will decide whether to accept or reject your request to join the company.
Create your own company
When a company profile hasn’t been registered yet, you will be the first to create one. At this moment, it is only necessary to fill in the company information available to public data and you don’t have to be an actual owner of the company. Your user profile will have owner and/or administrator rights, which you can later edit, and add new members with specific company roles.
To sum up, if there is no active suggestion to create a company with the suggested company name, if no invitation has been received, or if you don’t want to join a registered company, select Create your own company option and continue entering the necessary data.
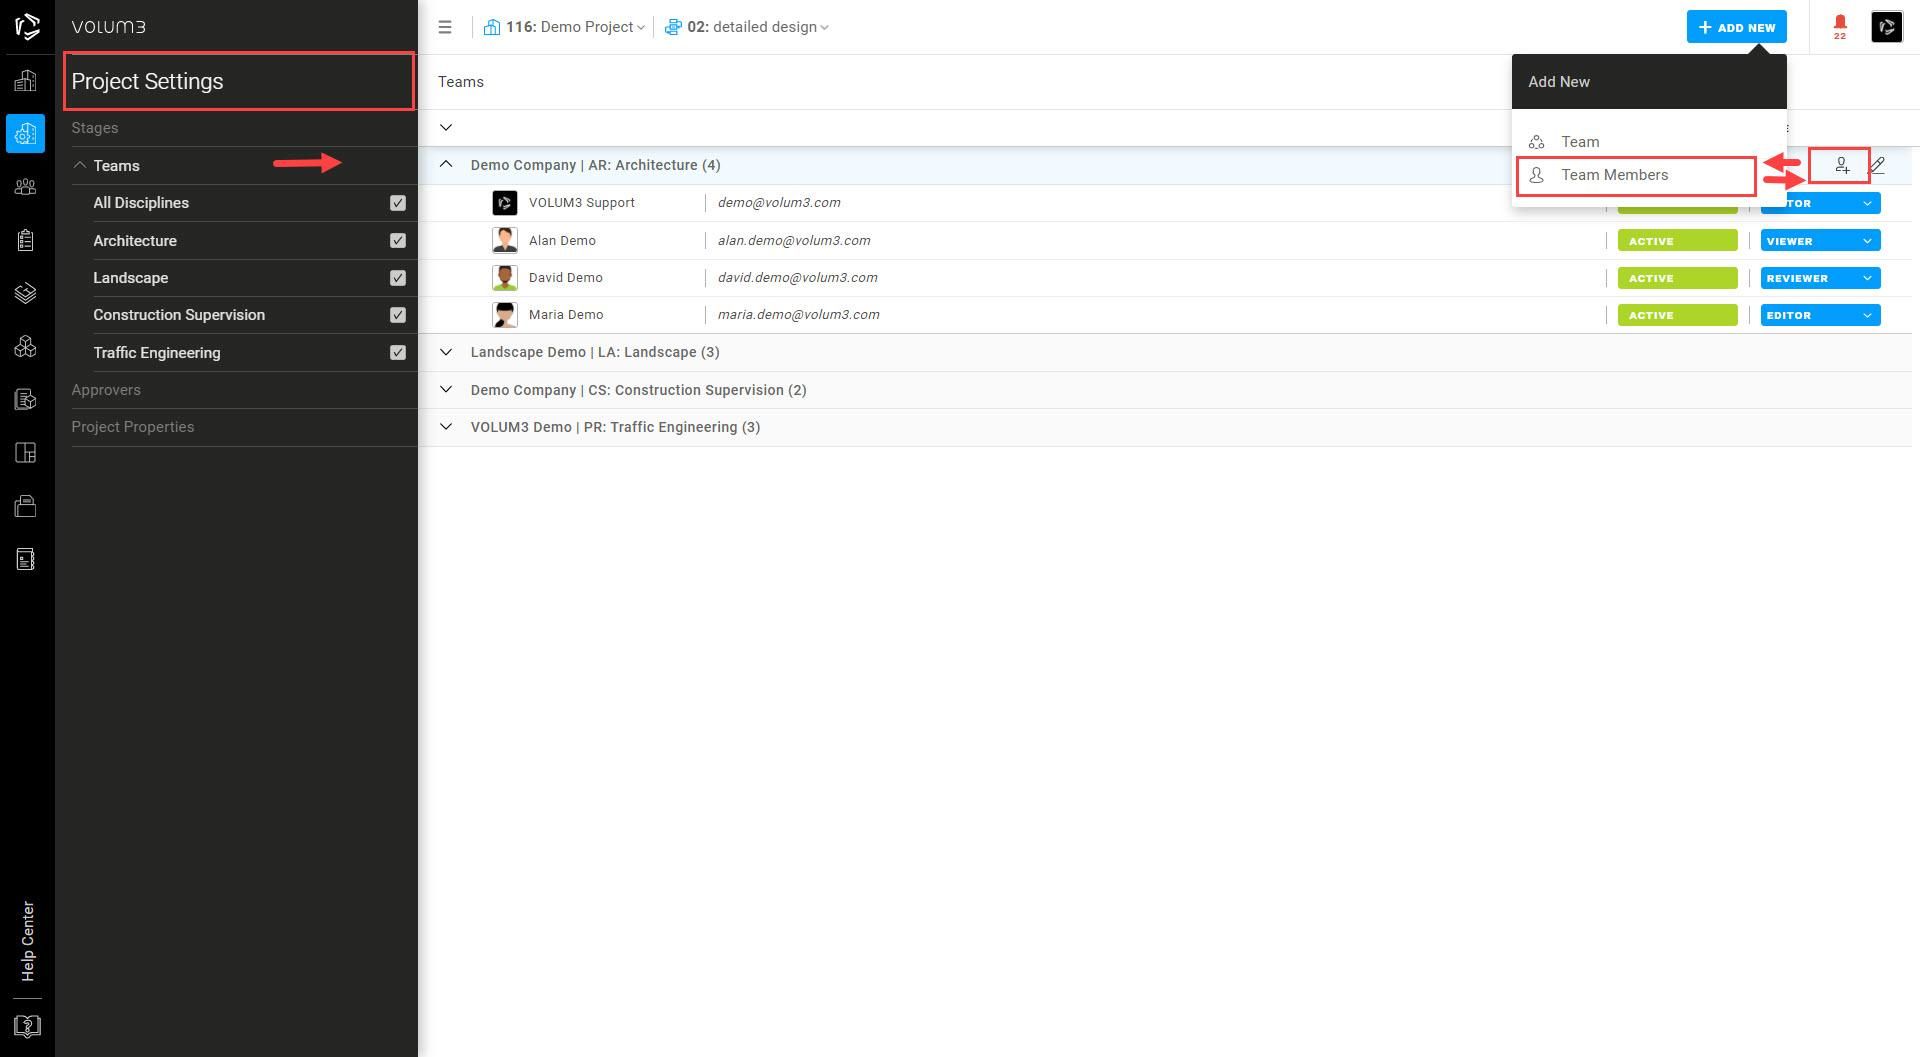
3. Invite new members
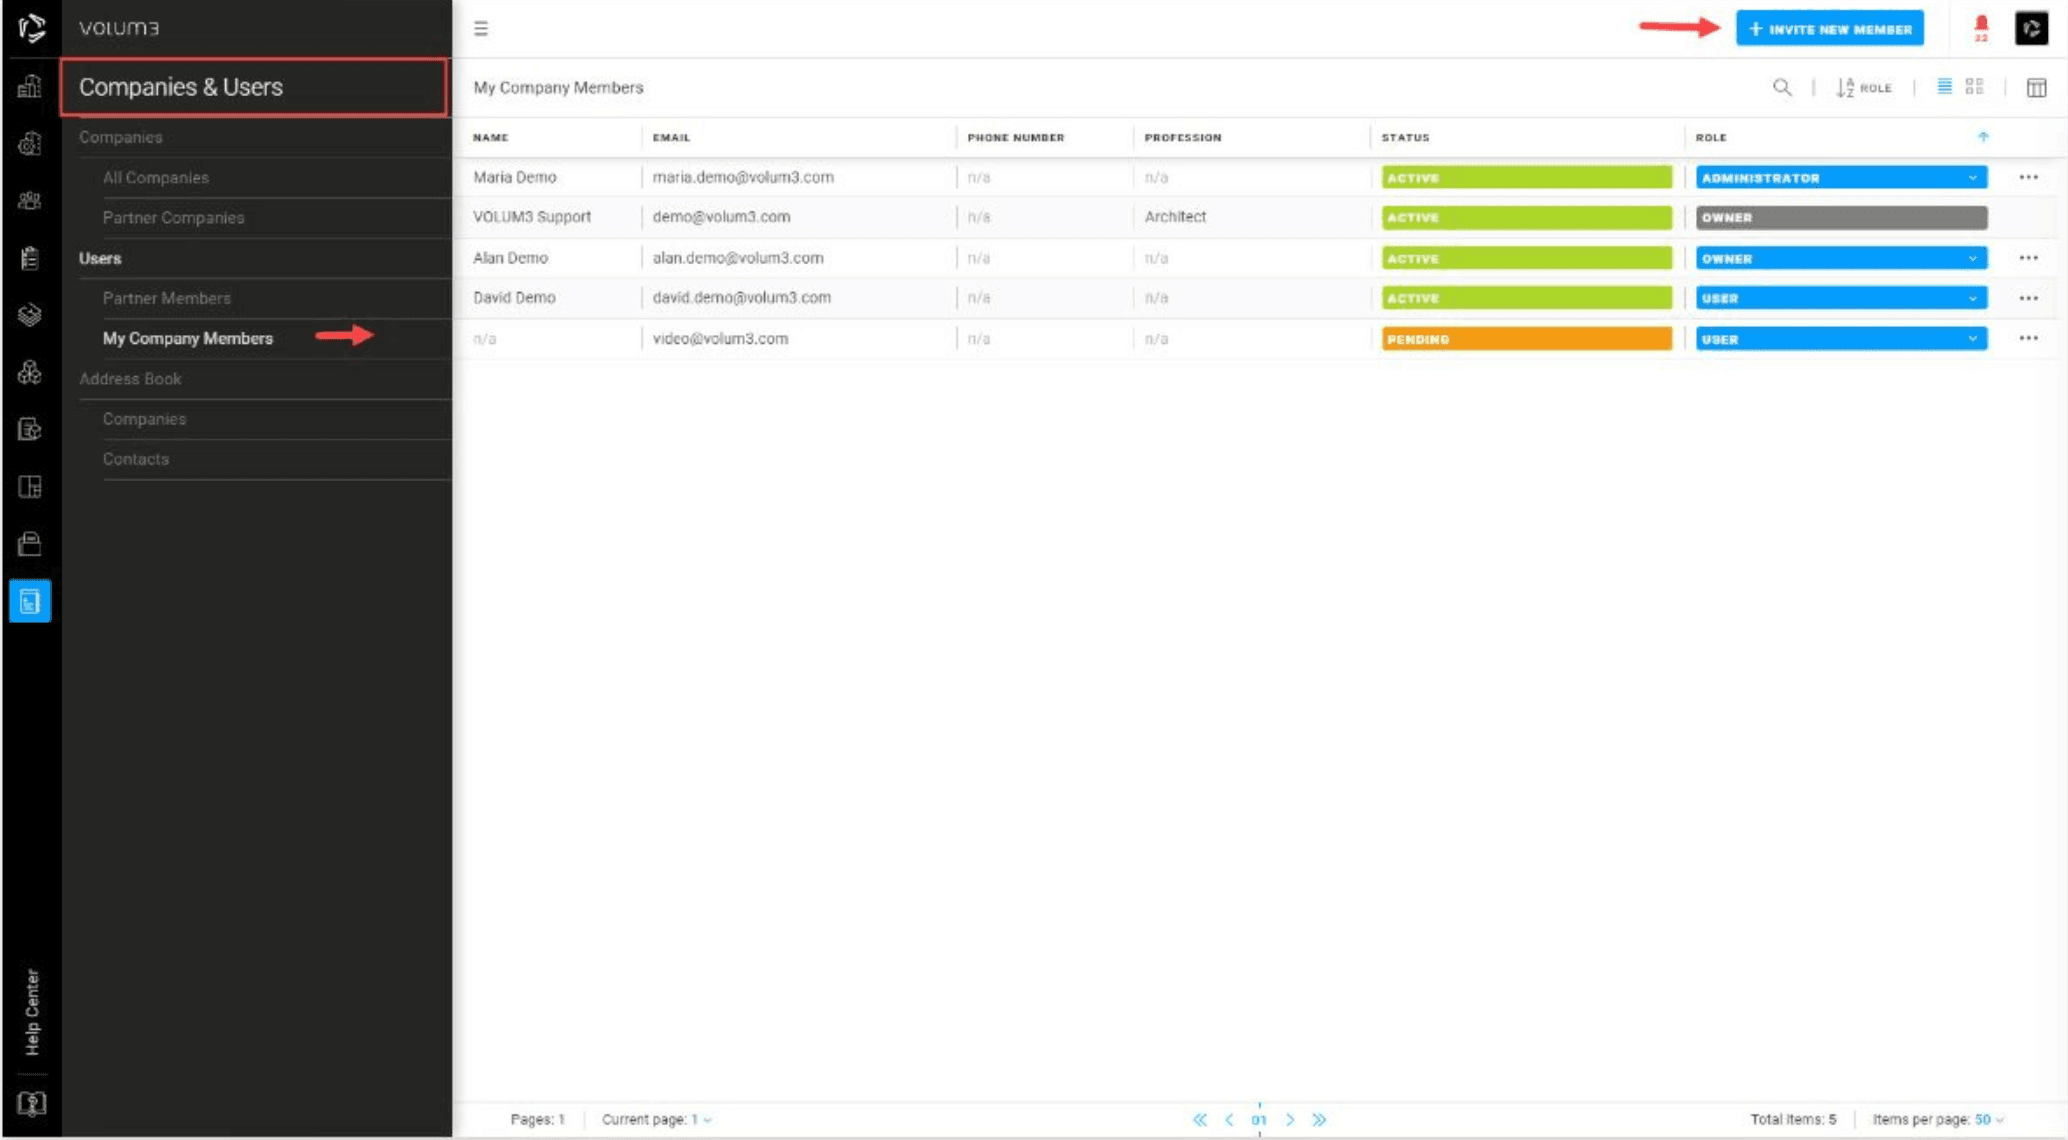
Add new company members by going to Companies & Users, then My Company Members and clicking on + Invite New Member in the upper right corner. To add new people to the company you need have either Administrator or Owner role.
If you have joined an existing company, you need to have admin rights to add members. For more information, go to User roles.
You can also invite people outside your company to join VOLUM3 by sending them a link to register at https://app.volum3.com/ or by adding them directly from your Project Settings.
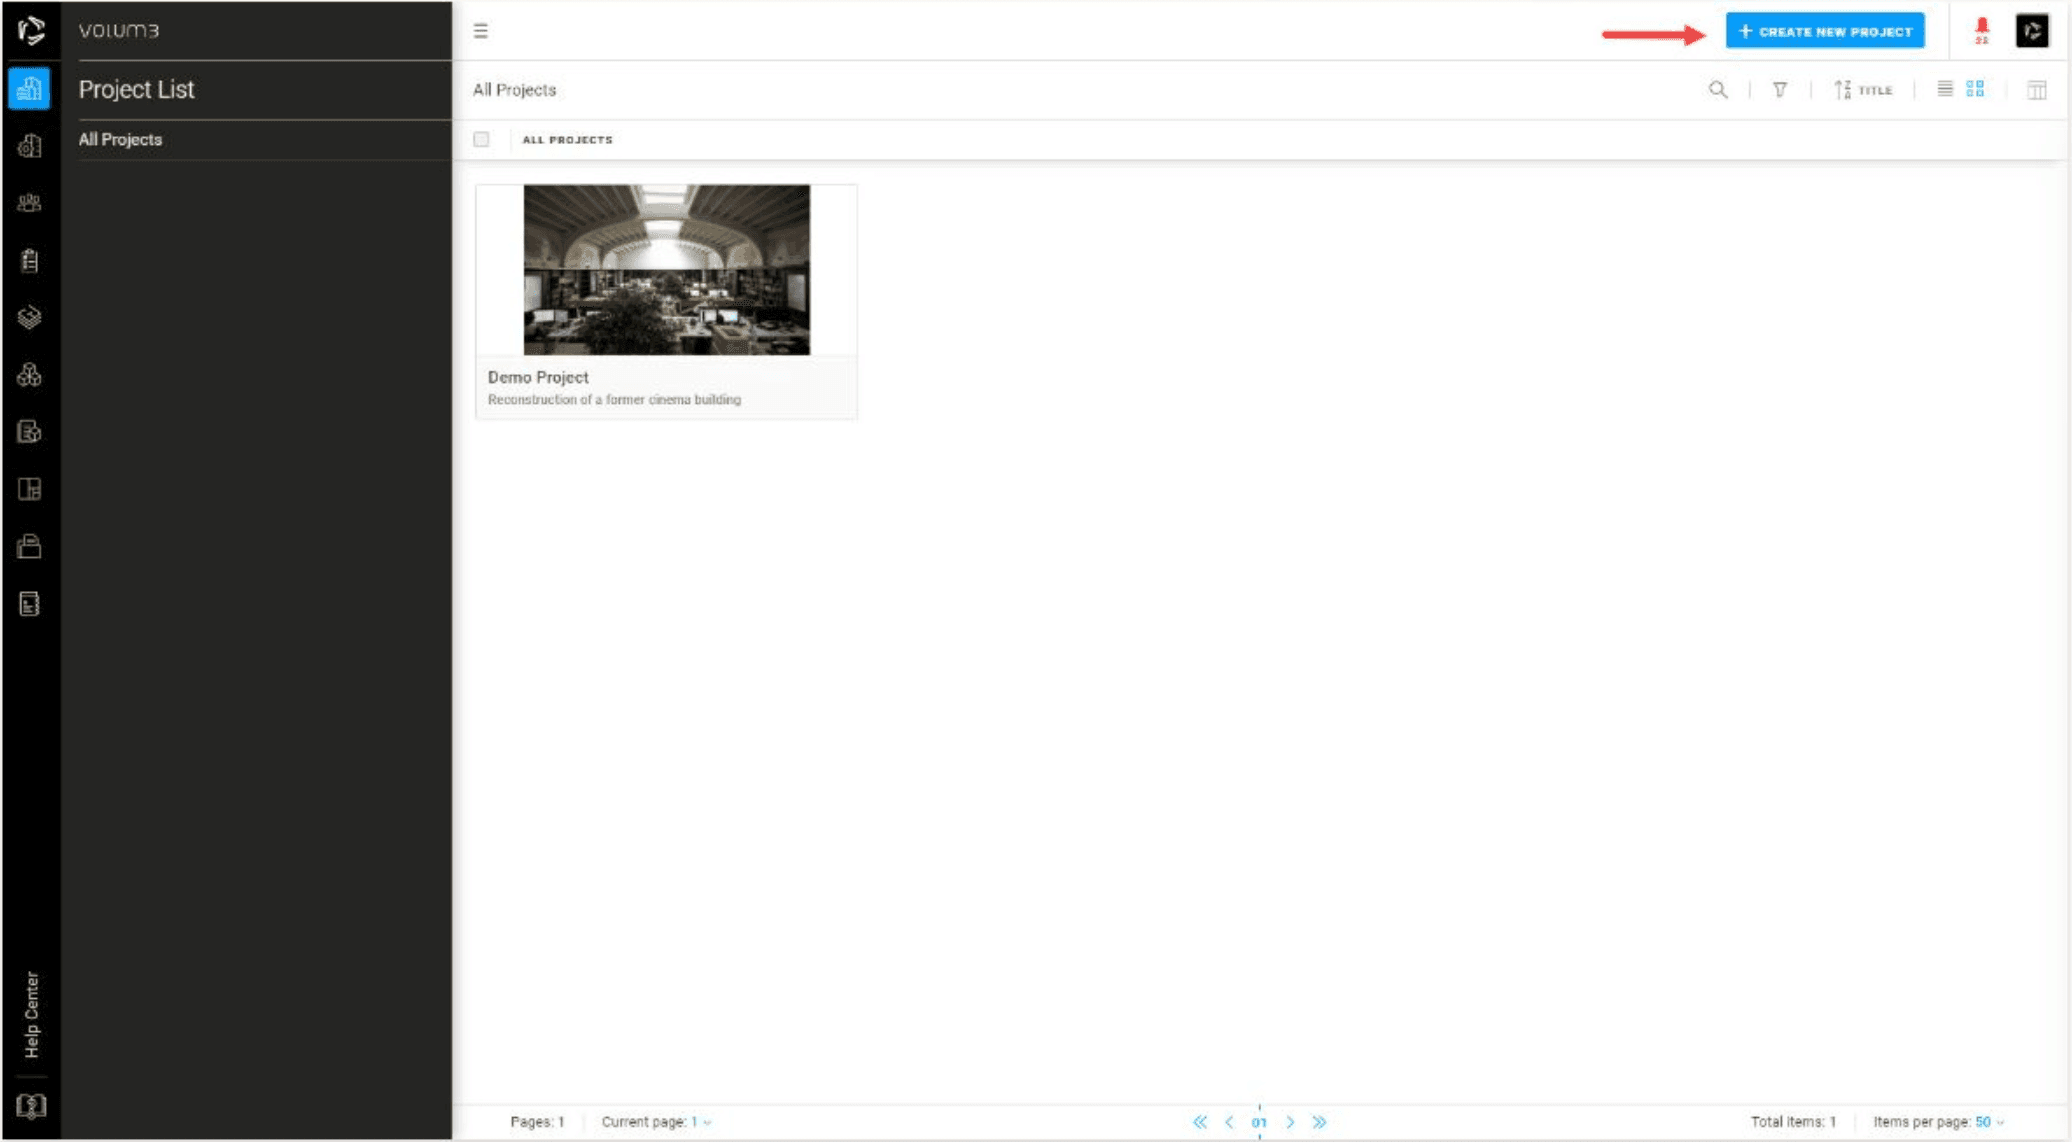
4. Create a project
Create your project by going to Project List and clicking on the + Create New Project in the upper right corner. Each project needs to have a defined stage, discipline, team, and member roles.
If you have joined an existing company and wish to create a new project, you need to have admin rights in the company. For more information, go to User roles. If you have been invited by a project admin to join an existing project, it will be visible in your project list.
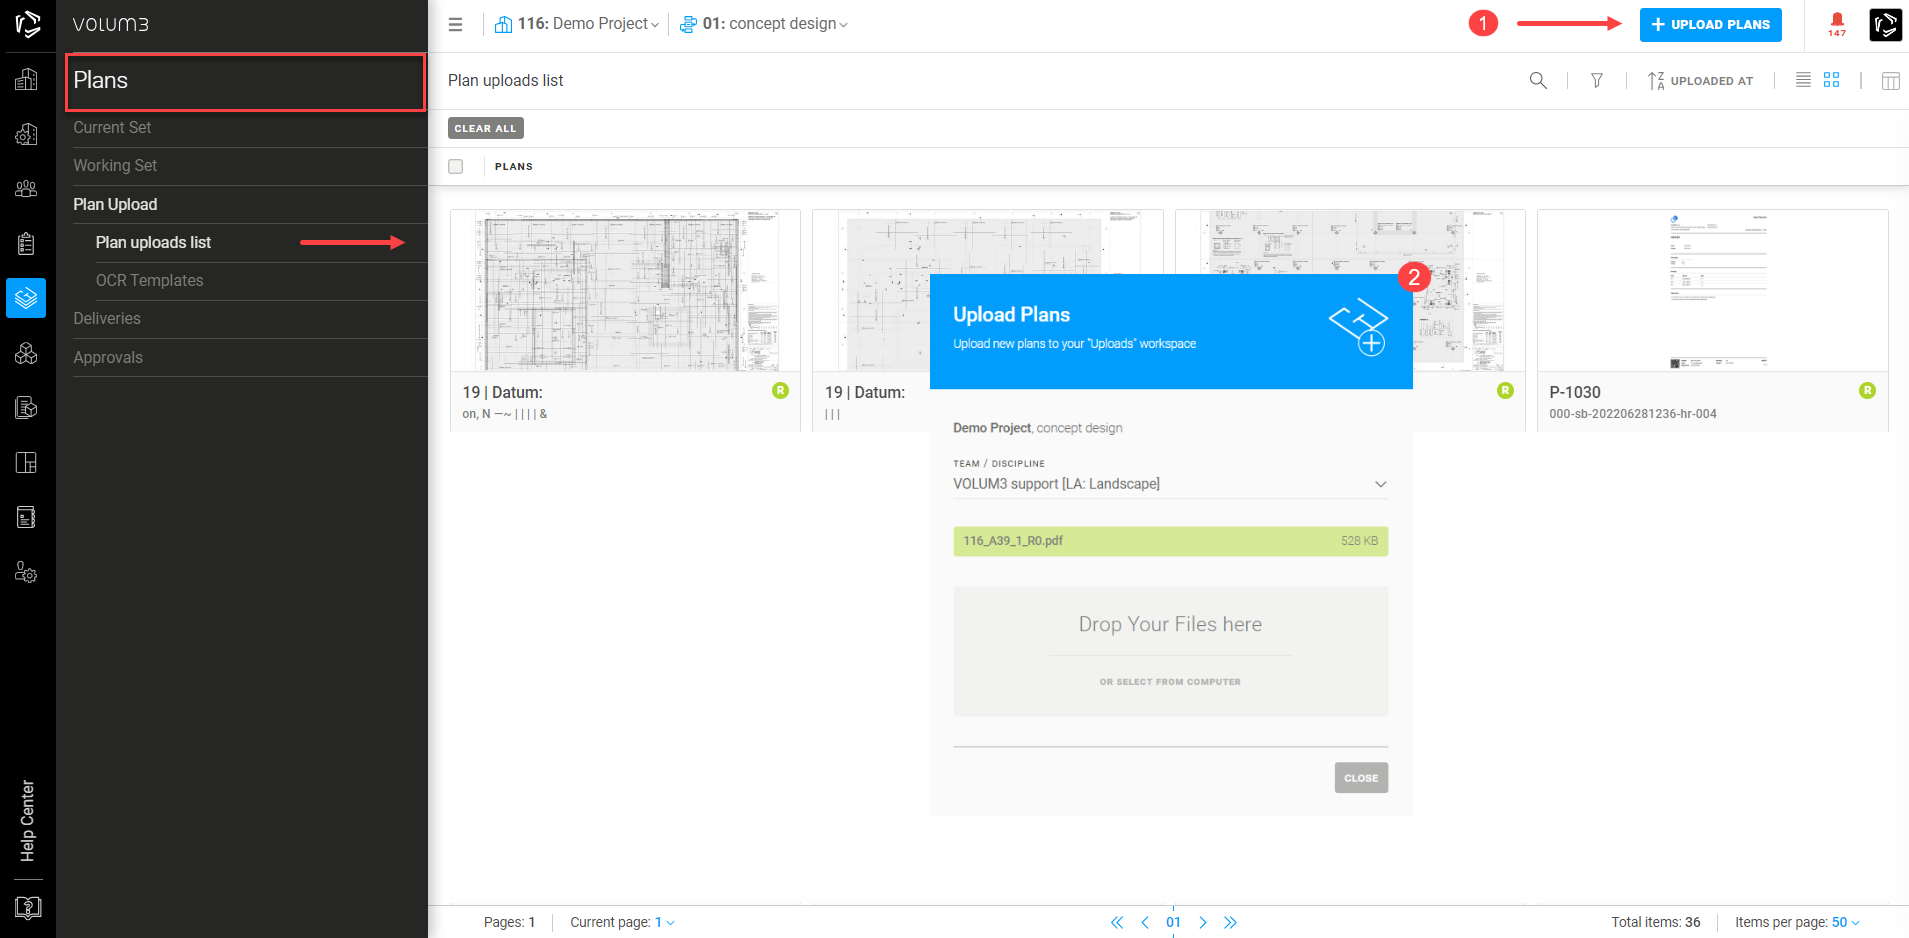
5. Upload plans
Upload plans by going to Plans, then Plan Upload and click on + Upload Plans in the upper right corner.
If you have joined an existing project, you need to have editor rights to upload plans. For more information, go to User Roles. If you are a project editor, you'll also see plans that other users already uploaded in the plan upload window.
To share plans and communicate with your team, you must publish your plans to Working Set. To share plans with all teams on the project, you must deliver your plans to Current Set.
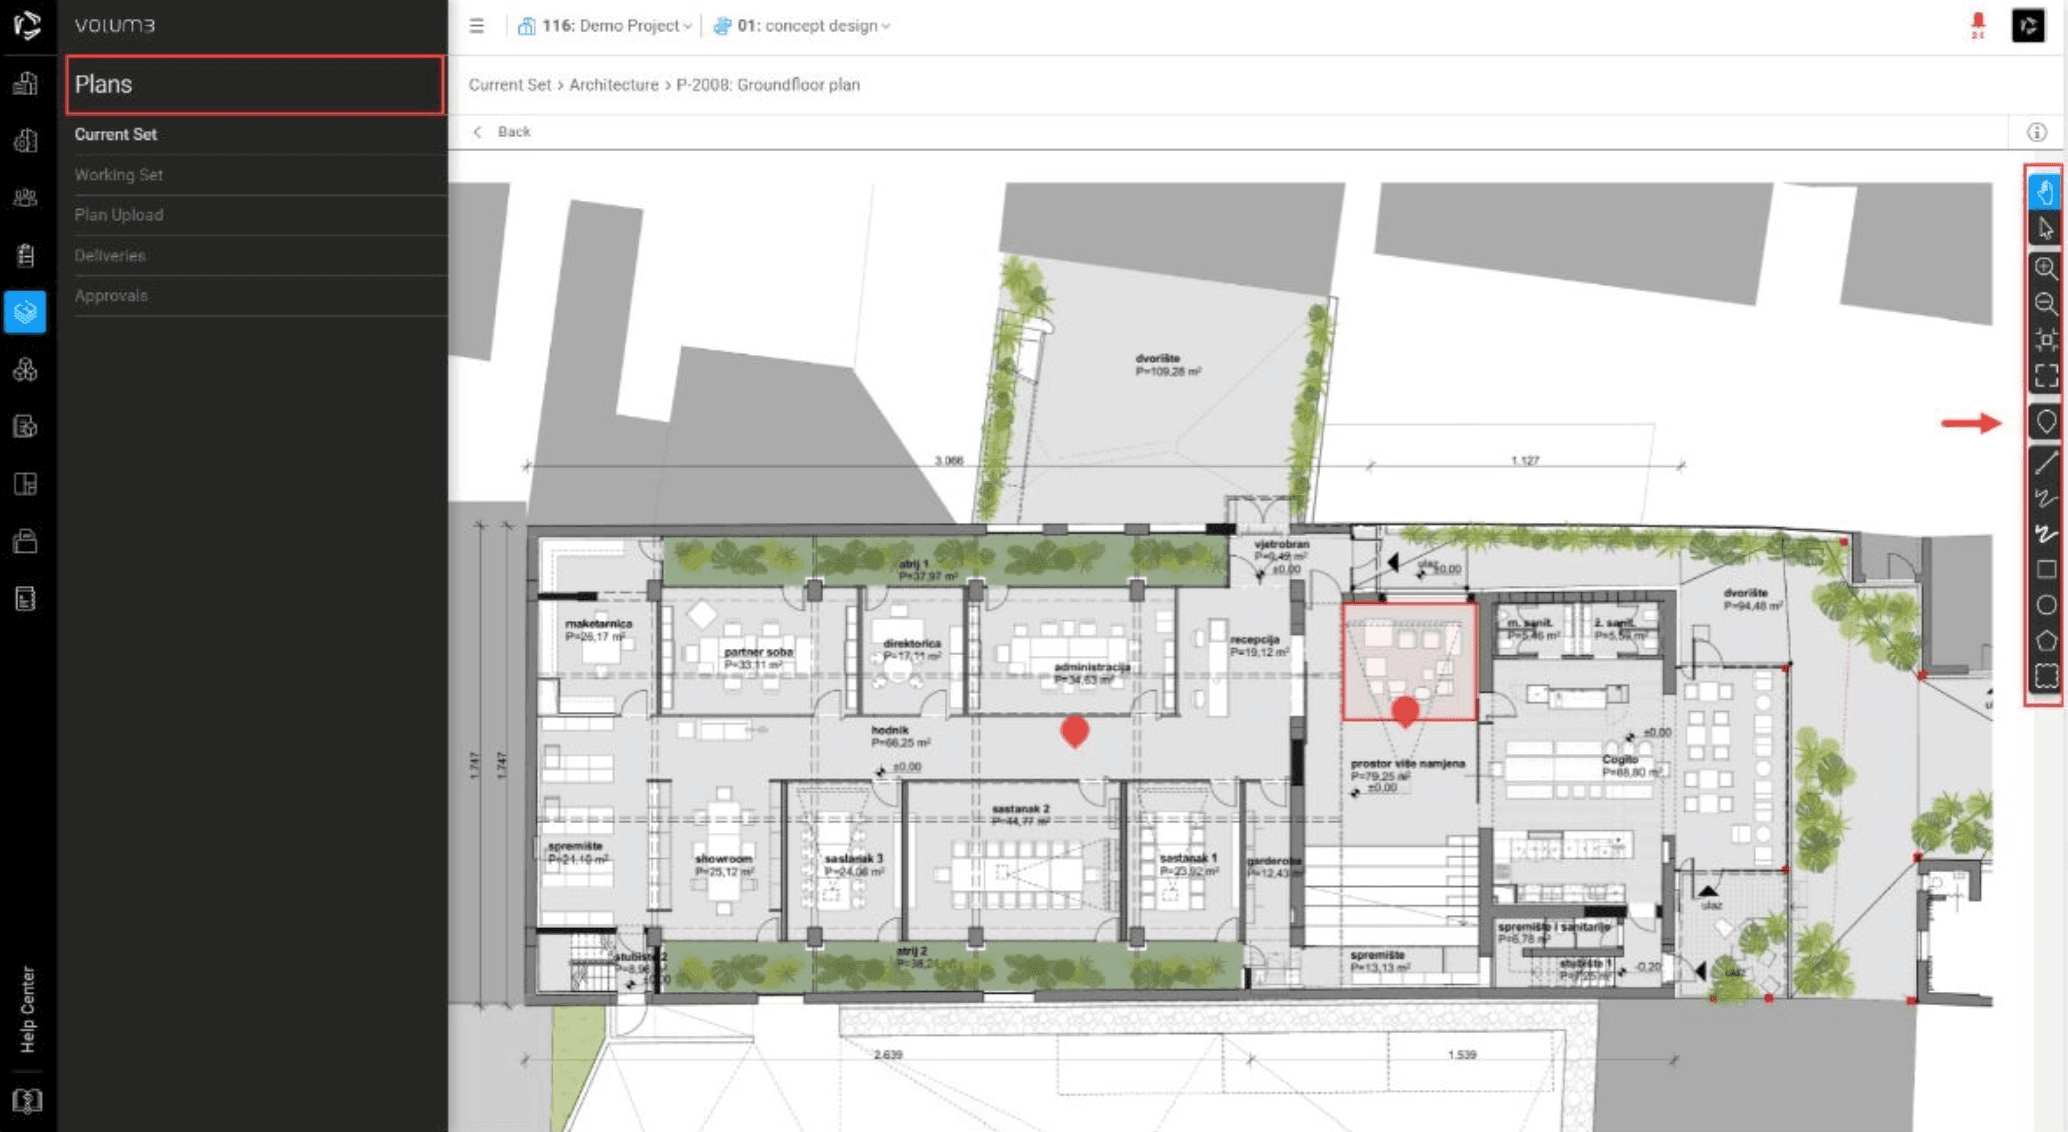
6. Add tasks and markups
Add tasks by going to Tasks and clicking on + Create New Task or directly on the plan using the markup toolbar.
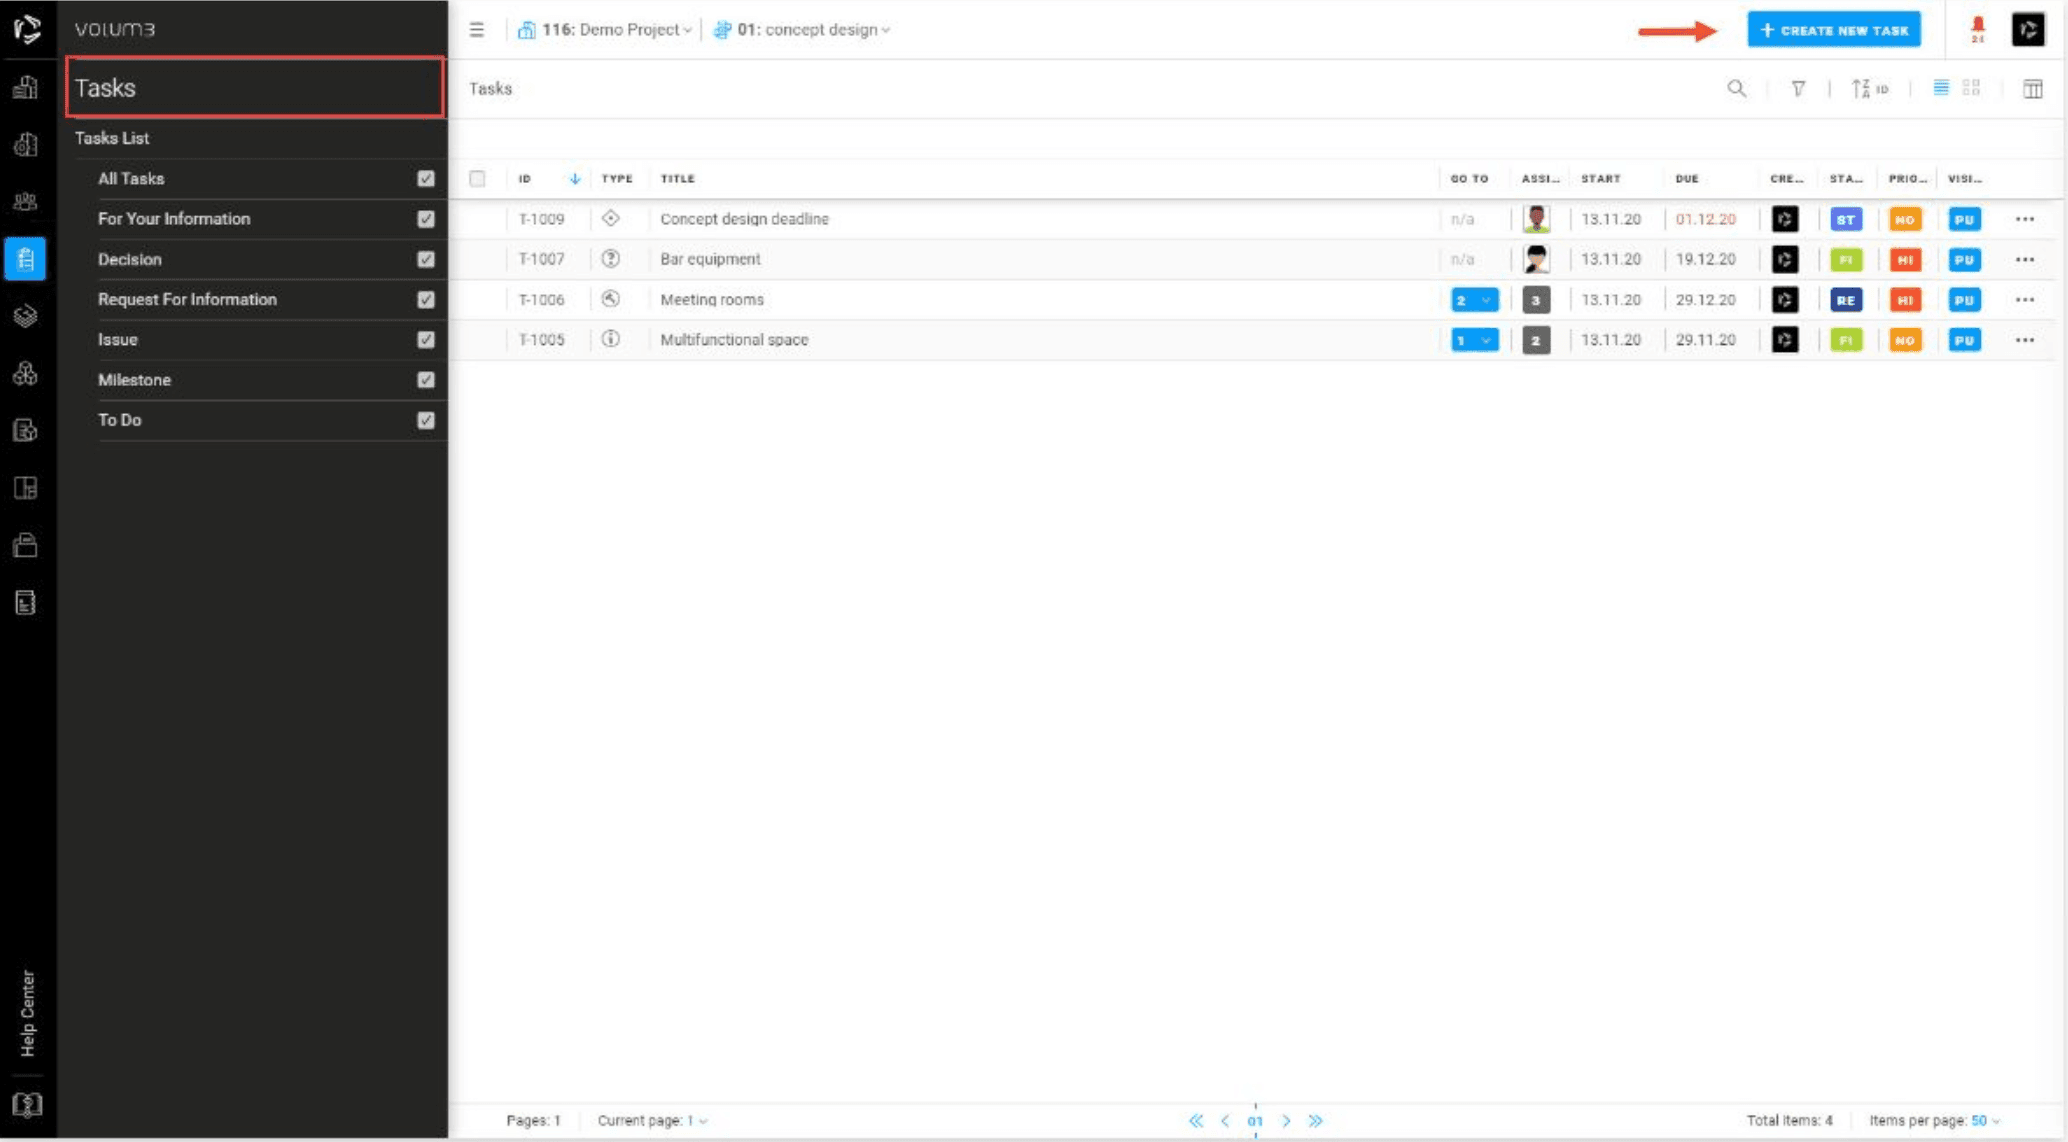
Add markups in Working Set or Current Set by using the markup toolbar in the main window. See the picture below.
If you have joined an existing project, you need to have editor rights to add Tasks. For more information, go to User Roles.
Getting started

Trg E. Kvaternika 3/3, 10 000 Zagreb, Croatia
+ 385 1 333 1909 info@volum3.com


