Plan Upload with OCR (Optical Character Recognition)
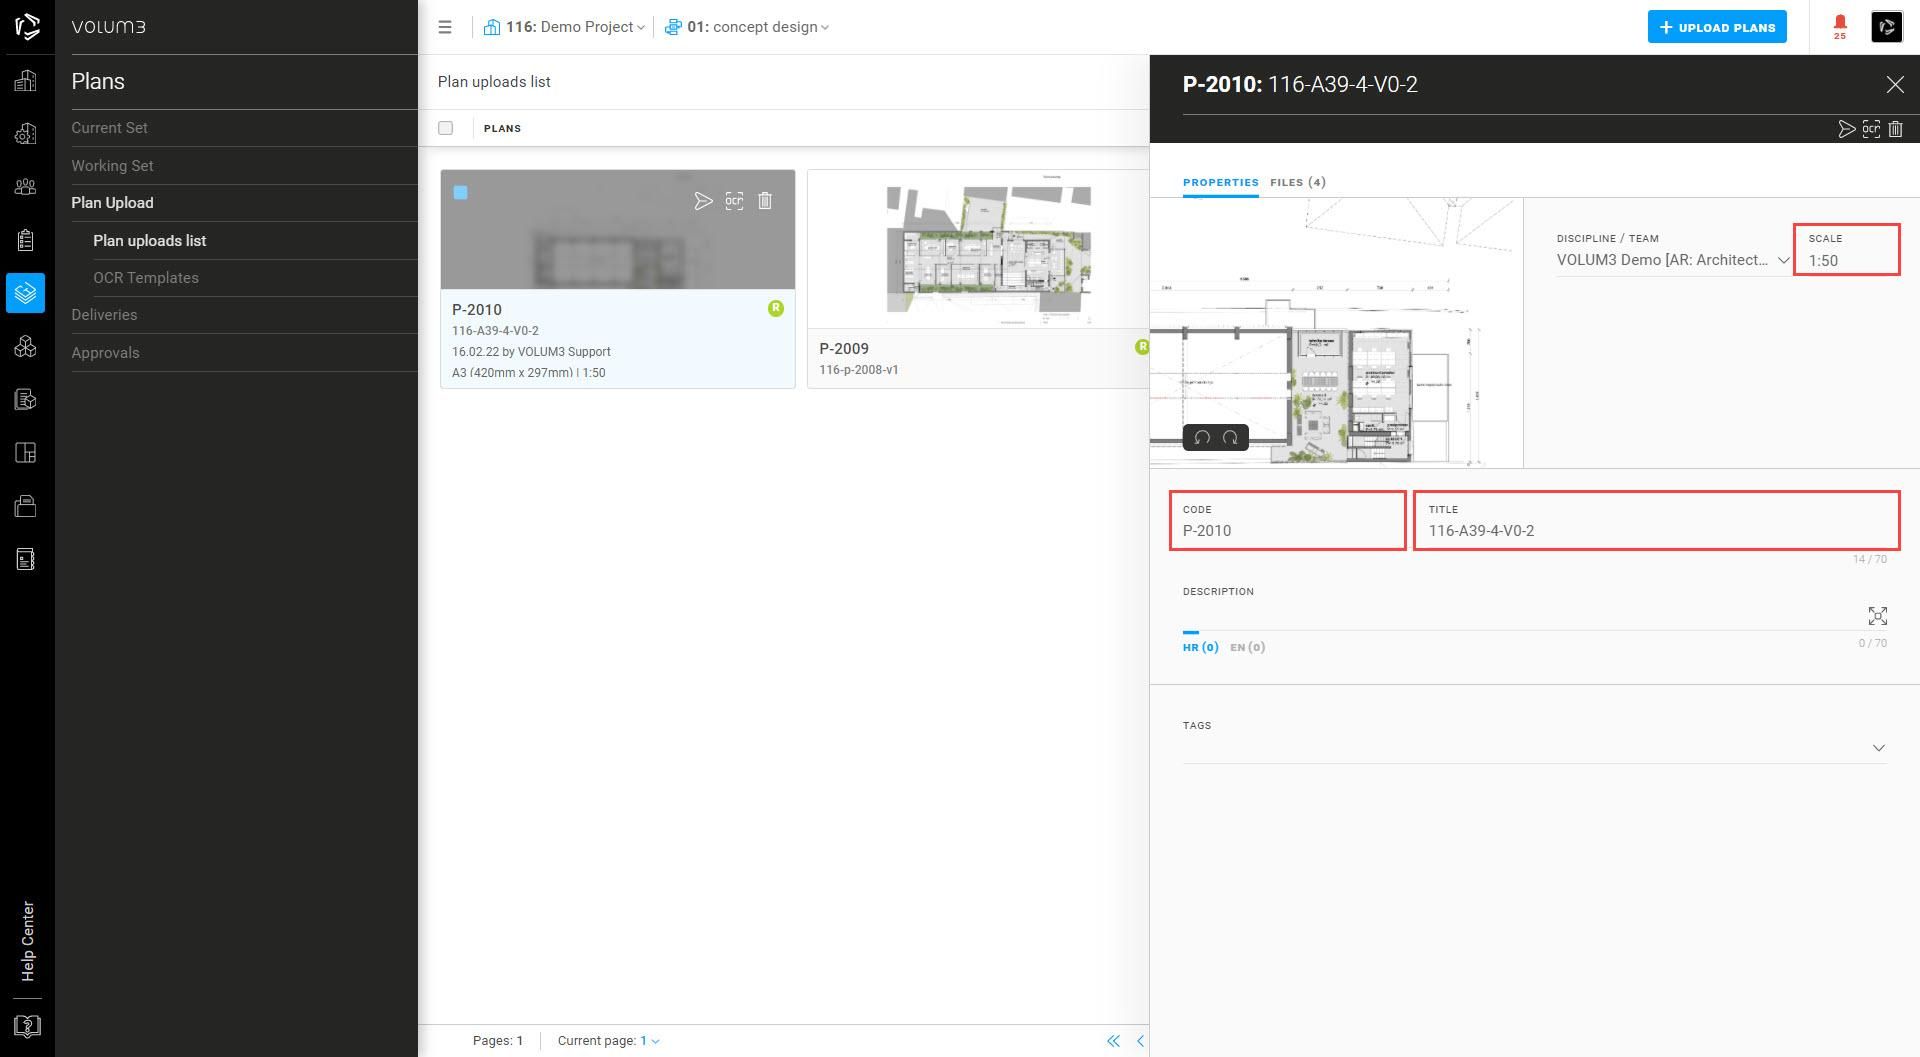
The code, title, and scale can be written manually or, in this case, automatically using OCR recognition. OCR (Optical Character Recognition) is a quick way to fill in the required plan data by reading the key data from the template. To be able to use OCR when uploading and preparing plans, you must create a template and mark the parts that contain the requested data.
It reads data directly from the plan (template), and the essential data (title, scale, number) goes into the program, which saves you a lot of time, especially if you load a large number of plans.
In OCR Templates, you can add new and edit existing templates. You need to choose a language and add a name to each template (only languages selected on the project are offered)
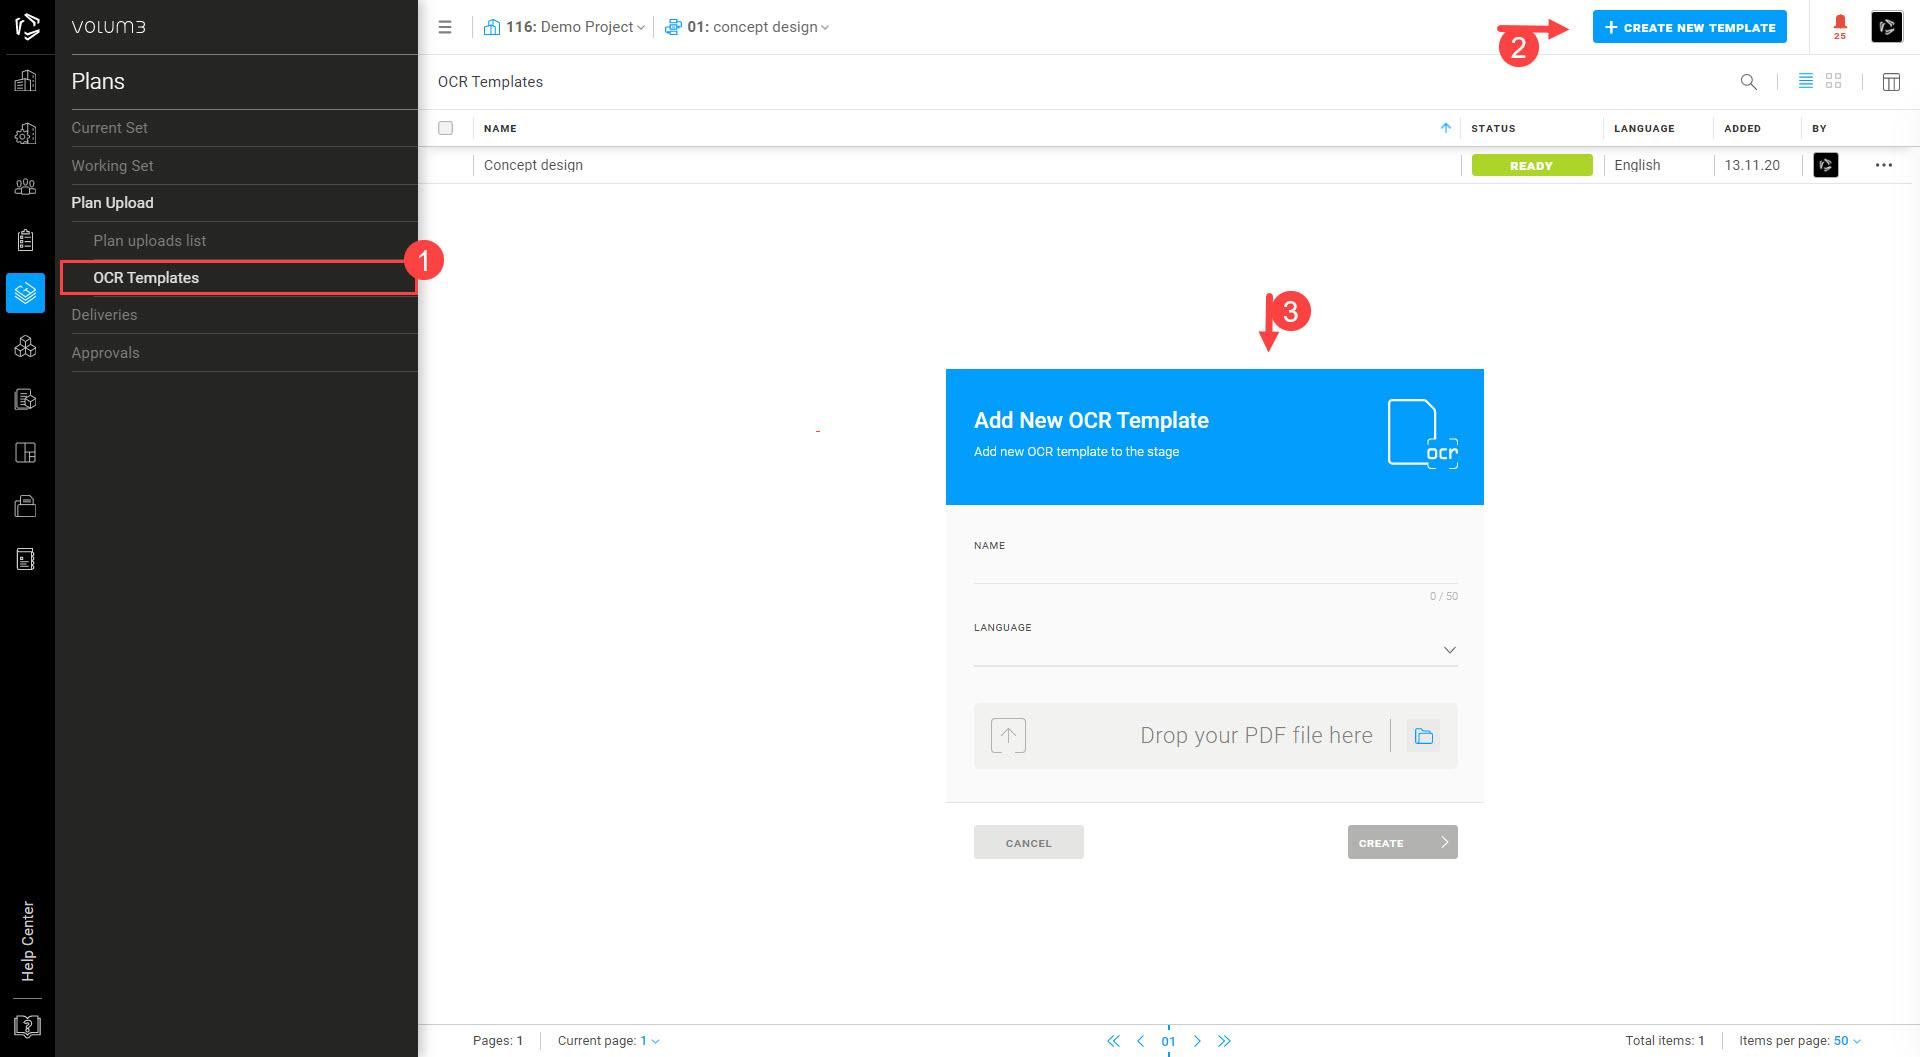
In OCR Template settings, you can adjust the green (Code), red (Title), and blue (Scale) fields and position them on the layout. By using them, you can select the information you want to be on other documents (plans) as well.

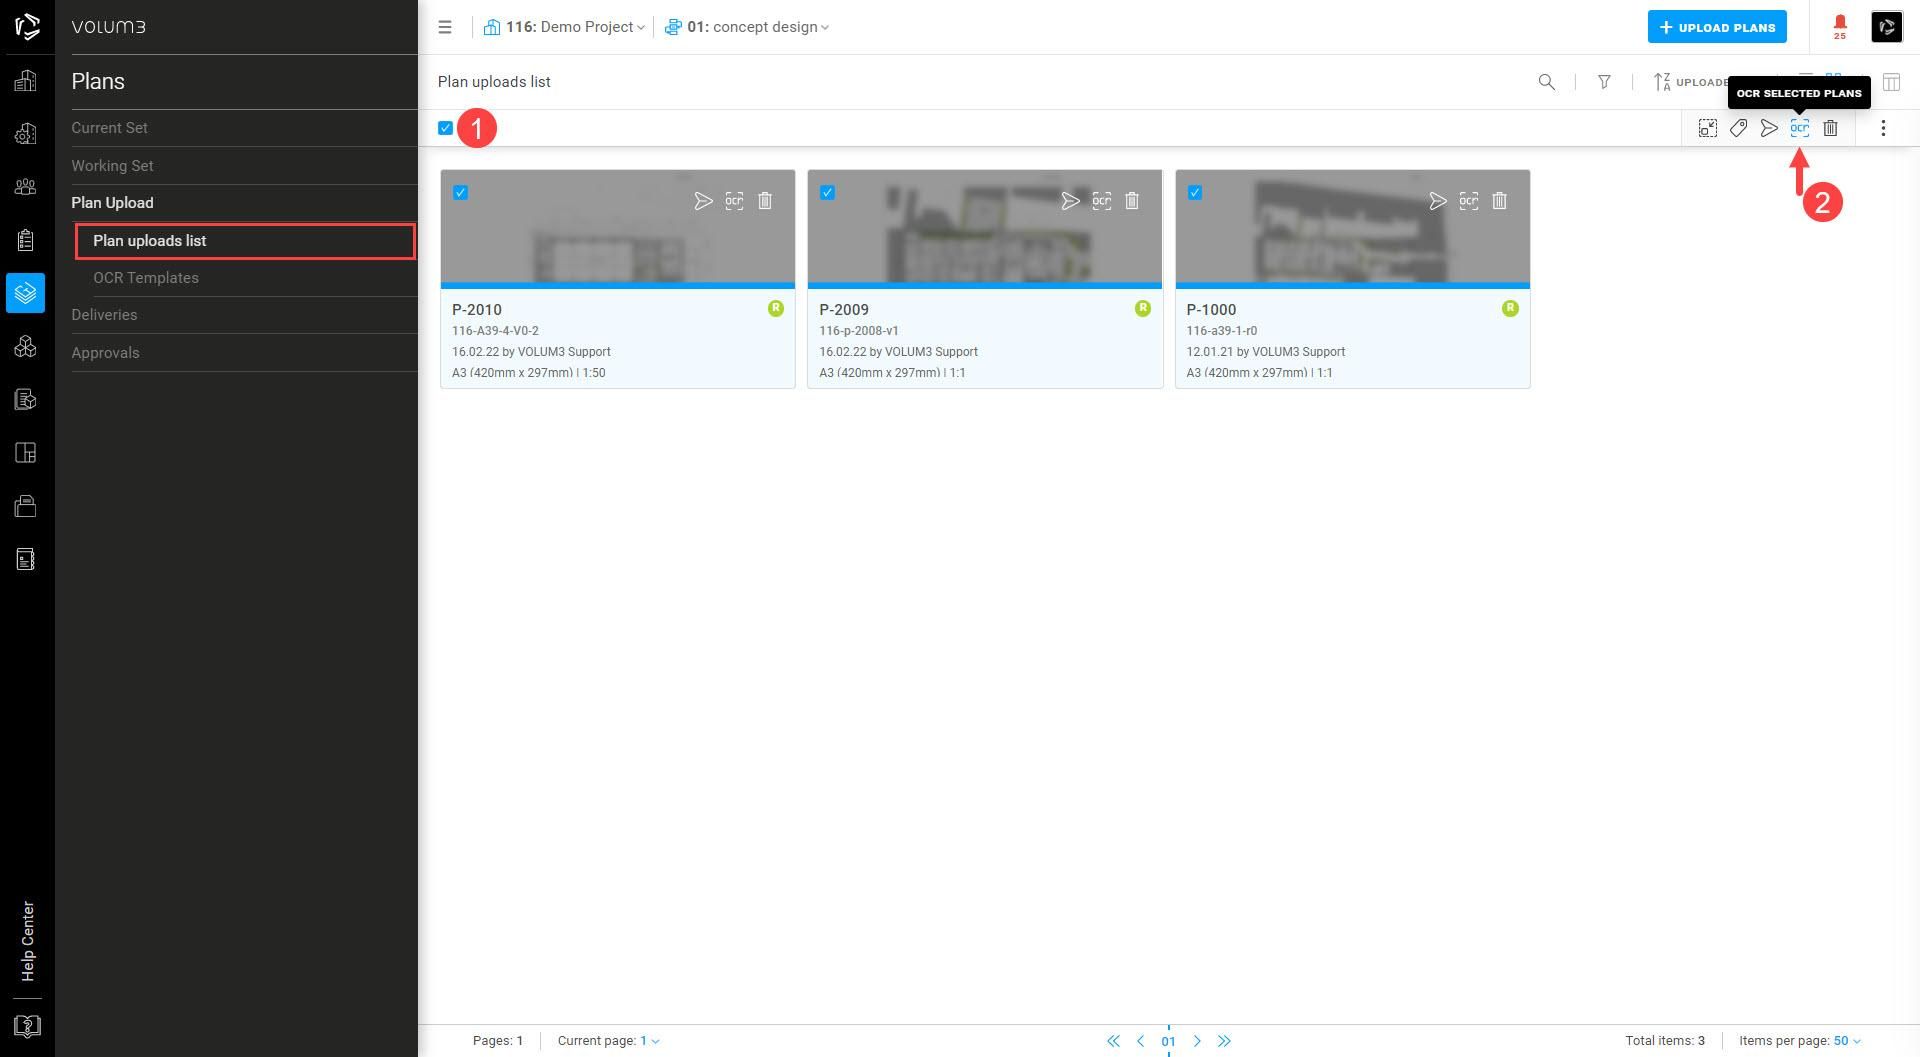
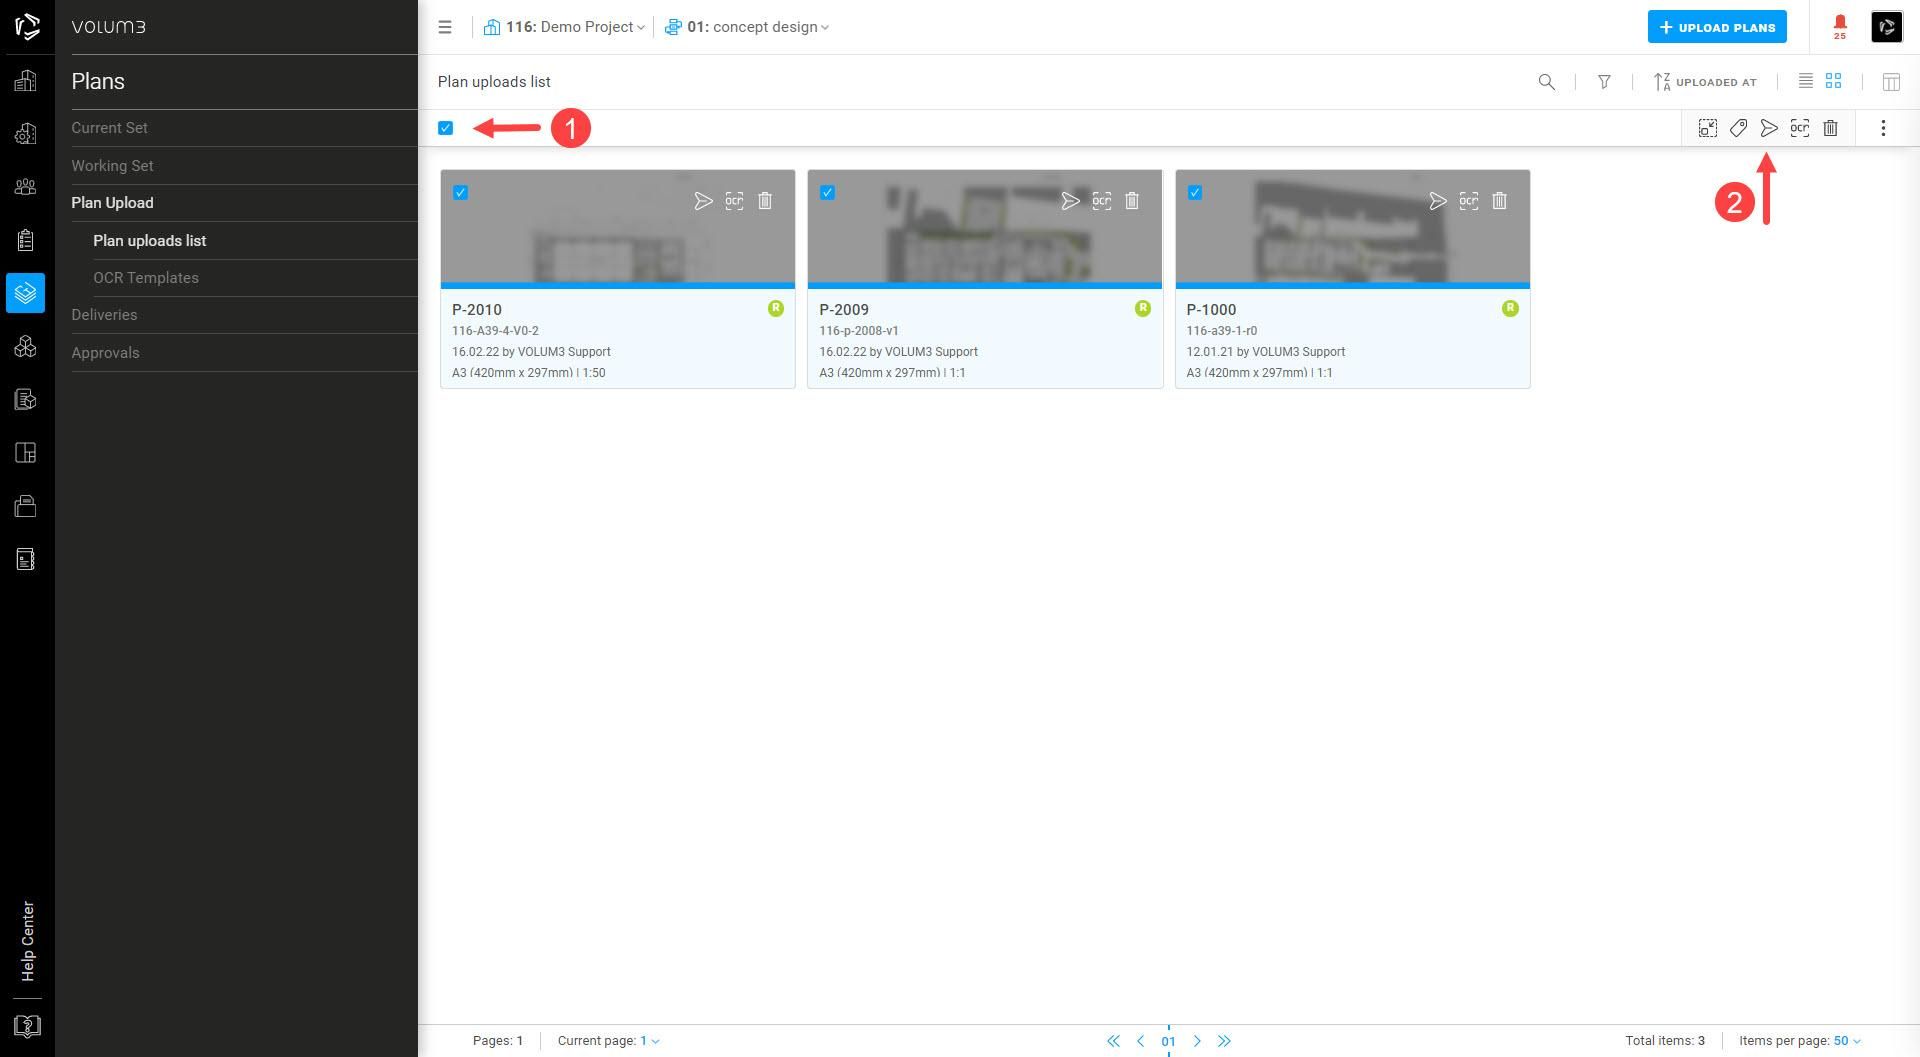
Once you add your plans on the Plan Upload section and they are ready for publishing, you can select one or more plans and choose OCR from available actions.
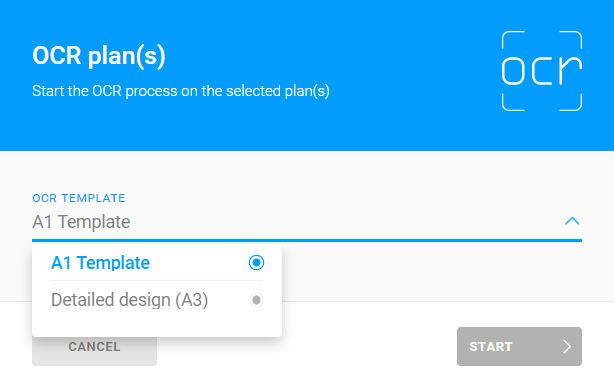
Please note that OCR, for example, A1 paper format can read plans with the same paper format only. If you have more paper formats, you must add an OCR per each format.
After that, a window will appear in which you have to select a template with configured settings where the component contains the data that the OCR should recognize. OCR will run and work in the background.
When OCR is finished, all the information read by OCR will get an OCR icon next to them. You can always edit this in plan properties.
Plan upload
The workflow in the plans section is the following:
1. Upload your plans on Plan Upload
2. Publish your plans to the Working Set
3. Deliver your plans to the Current Set
If you have assigned approvers on the project, your plans need to be approved before they become visible in the Current Set.
___
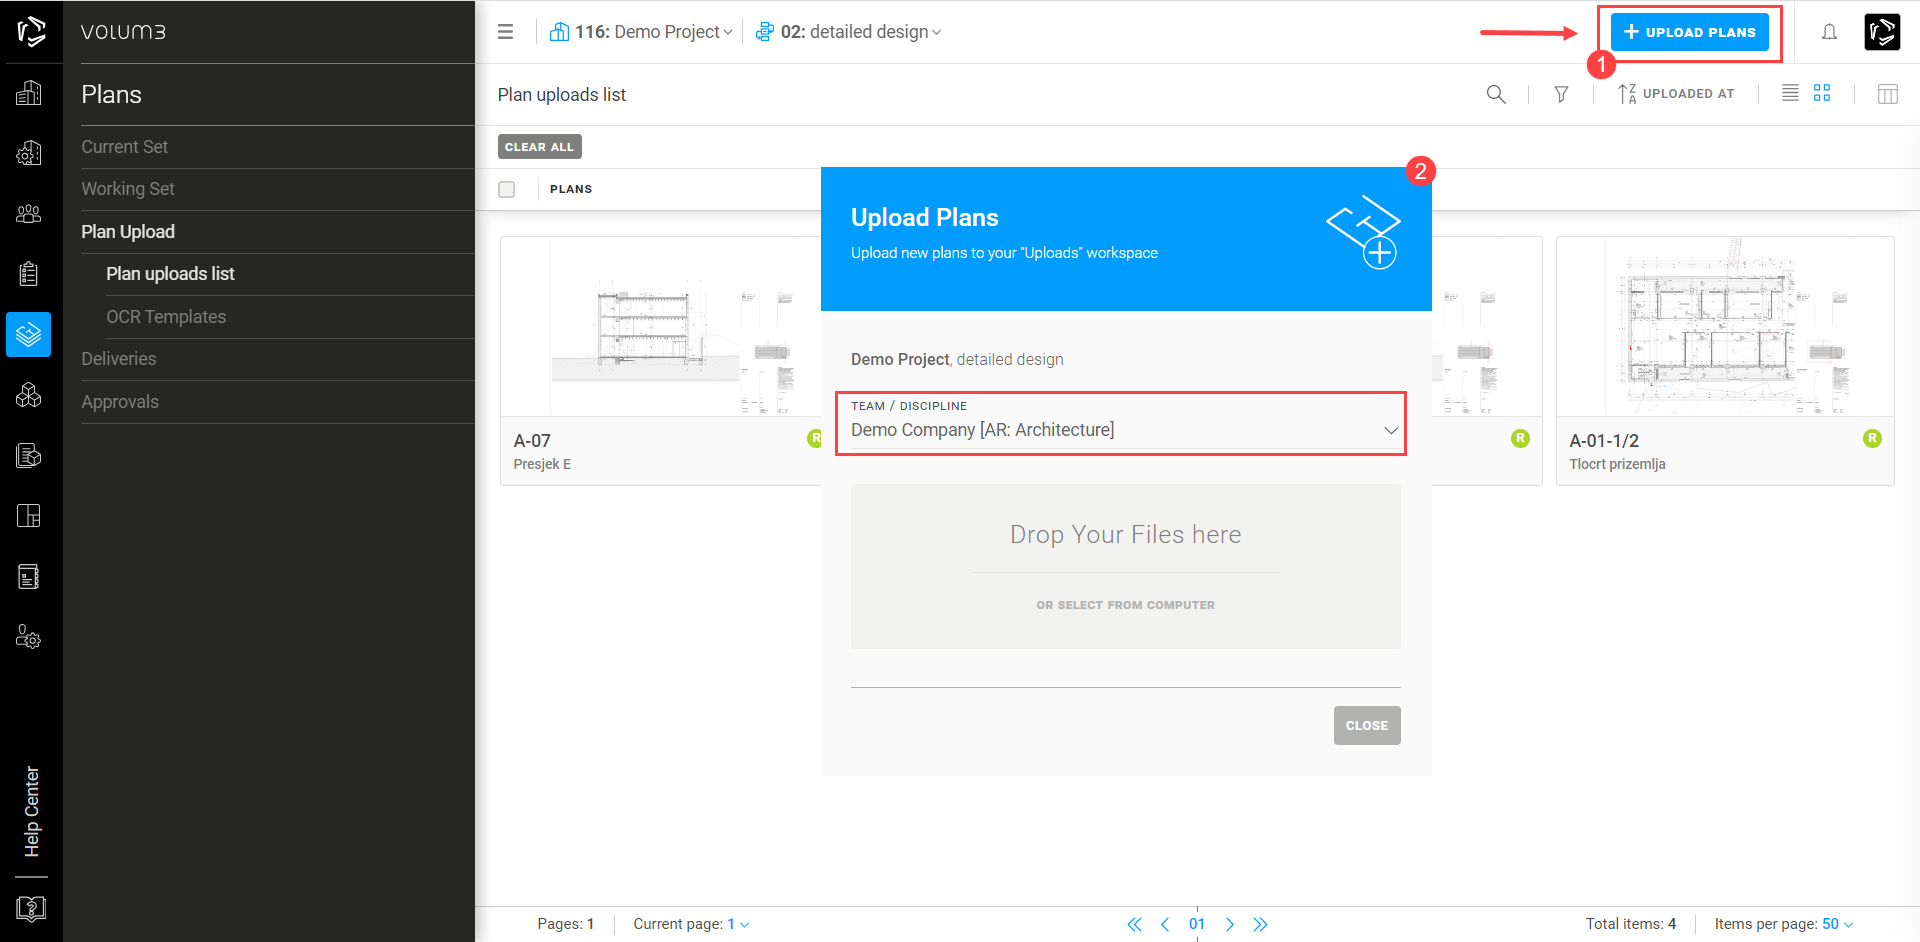
To upload plans to a specific stage on the project, you need to have editor rights. Plans are associated with a specific discipline/team on the project. Uploaded plans will become visible to your team.
Click on the + Upload Plans in the upper right corner. A creation wizard will pop up and you will be asked to choose a discipline/team. Plans can be uploaded in PDF only - dwg or any other filed type can be attached to the PDF.
Once you upload the plan, its status will change from P - processing the plan to R - ready for publishing. If you are uploading more than one plan, some of them will have status Q - queued for processing.
By clicking on the plan, a flyout menu will appear.
Before publishing plans in the Working Set, all plans must have a unique plan number, title, and scale. You can also zoom in and rotate the plan in the preview window and add tags to the plan.
Once you’re ready, you can publish the plan by clicking the publish icon in the pop-up menu or main window. You can also choose to publish multiple plans if they have all the information filled out.
Published plans will move to the Working Set and will be ready for markups and tasks. Plans in the Working Set are still visible only to your team, not to all teams on the project.
___
Plans in Working Set are visible only to companies that created them (their team). Each new upload of the same plan in the Working Set is called version. Every new version upload will get a subsequent number (see the table below).
Plans in the Current Set are visible to all participants in the project (all teams). Each new upload of the same plan in the Current Set is called revision. Every new revision upload will get a subsequent number (see the table below).
Every version in Working Set does not need to be published to the Current Set.
| Working Set | Current Set |
| V0 | R0 |
| V1* | / |
| V2* | / |
| V3 | R1 |
| V4 | R2 |
Working Set
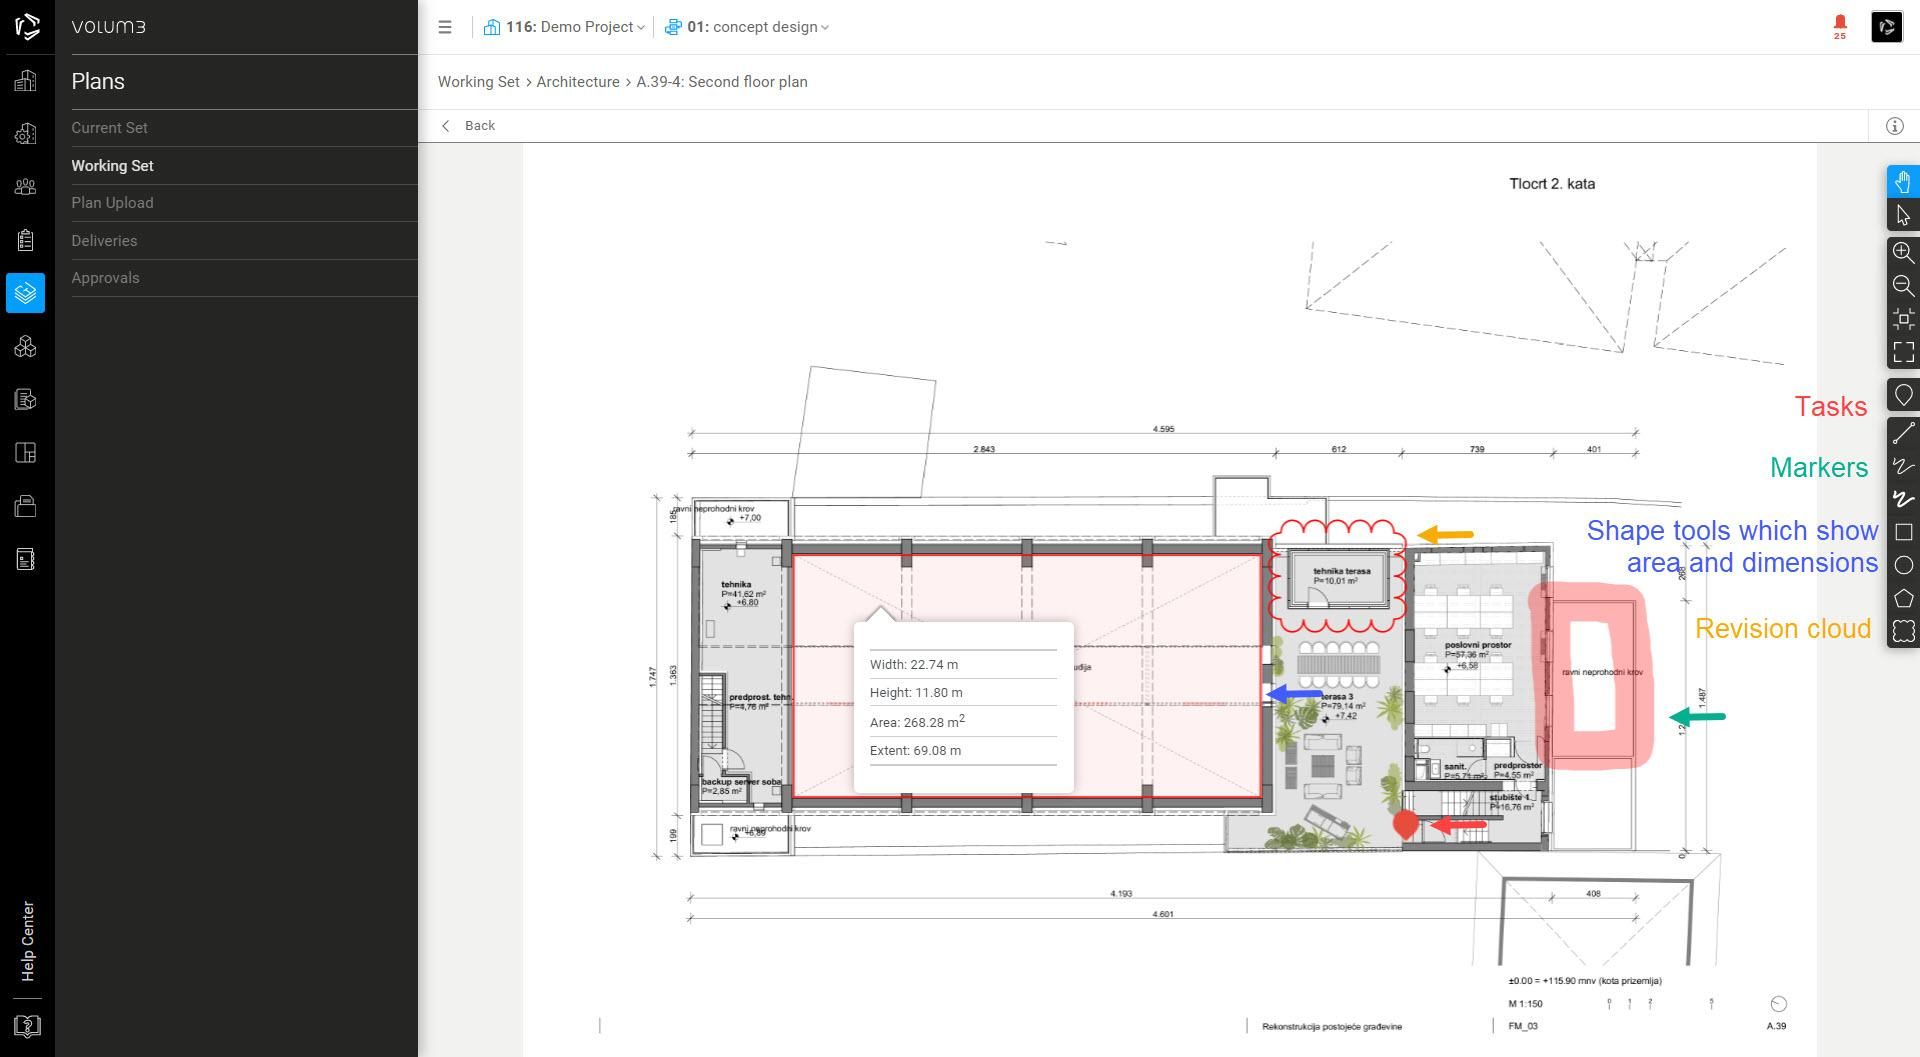
You can add markups and tasks to your plans in Working Set and thus communicate with your team. By clicking on the plan, it will open in the main window with a markup toolbar on the right.
You can:
- draw shapes and measure if you entered the right scale. To draw shapes use the tools Rectangle, Ellipse, and Polygon. To draw a line or make a measurement use the tool Line
- draw revision clouds in your plan using the tool Revision cloud
- use freehand markers if you want to point something or mark up
- create a task that is private (or public). To find out more, go to Tasks.
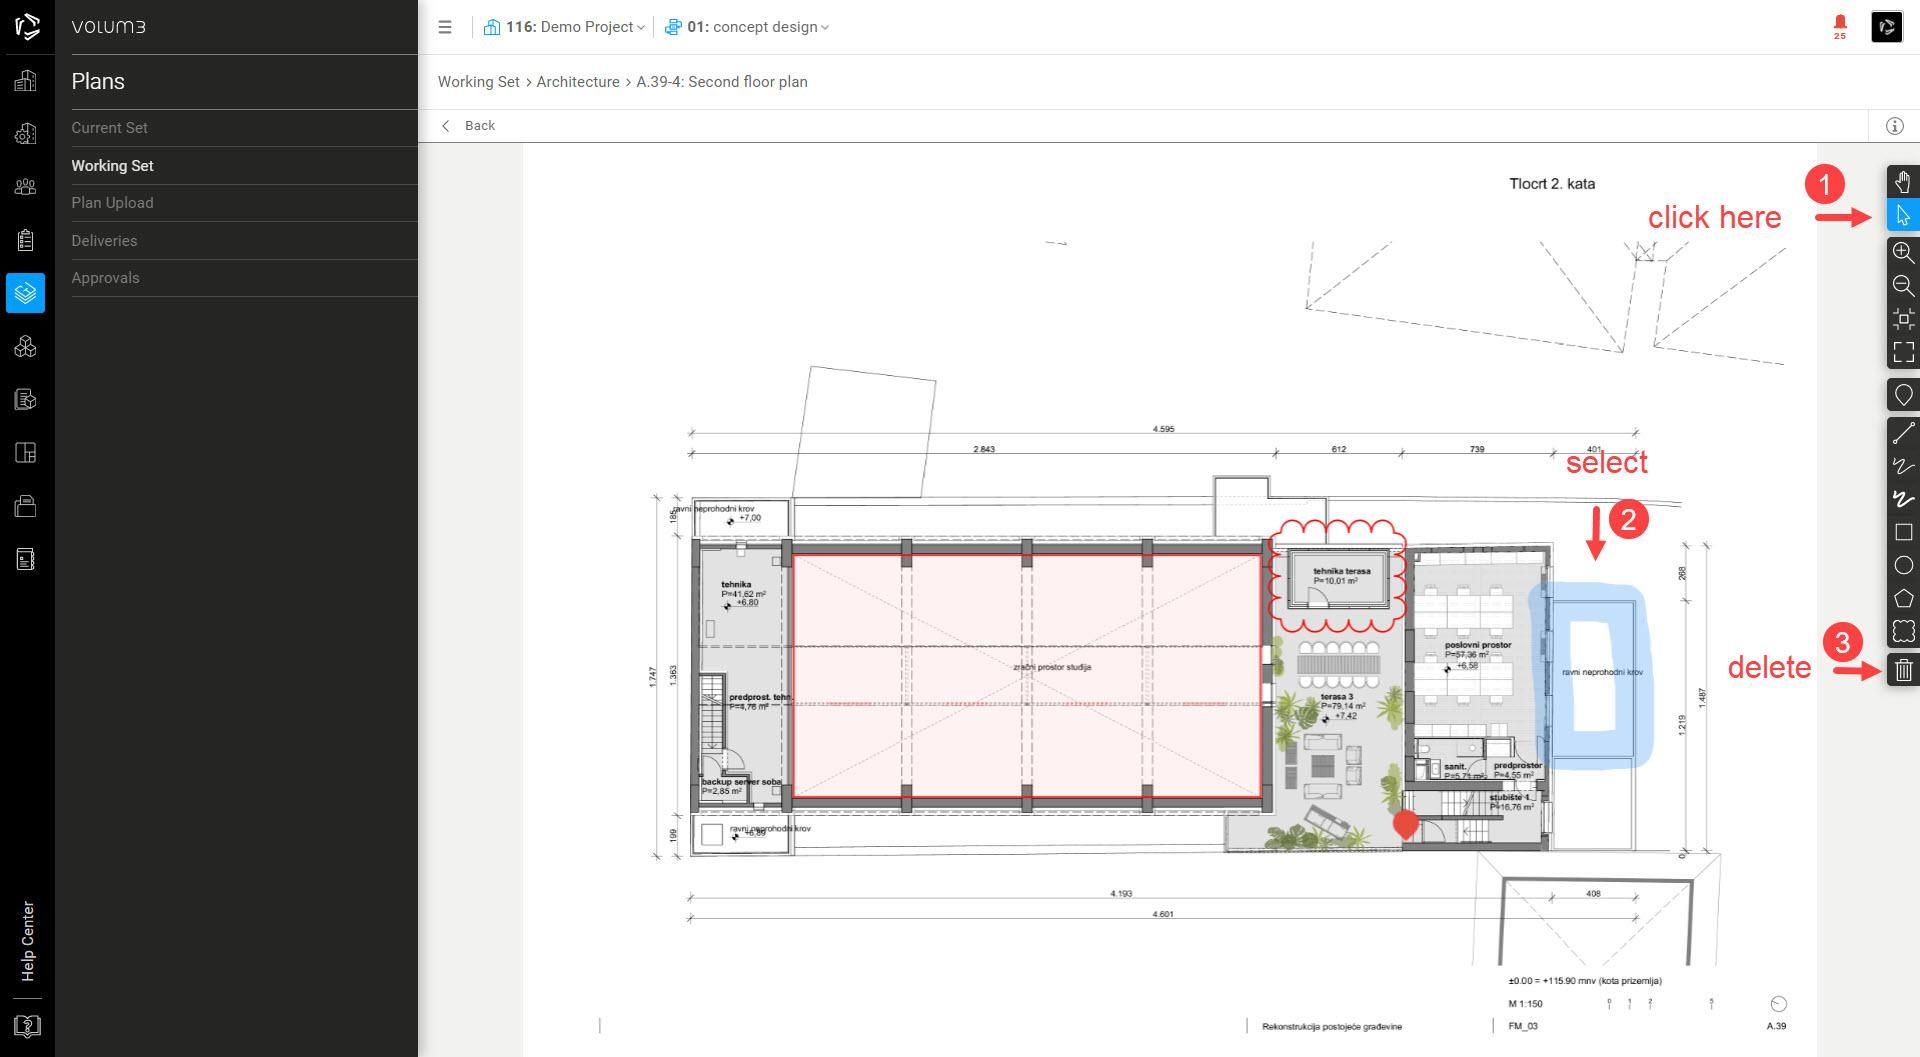
You can also select and delete all markups. Click the Select icon and choose the markup you would like to delete and click on the Delete icon.
All markups except tasks are visible to everyone on the team, but can only be edited and deleted by the user who created them.
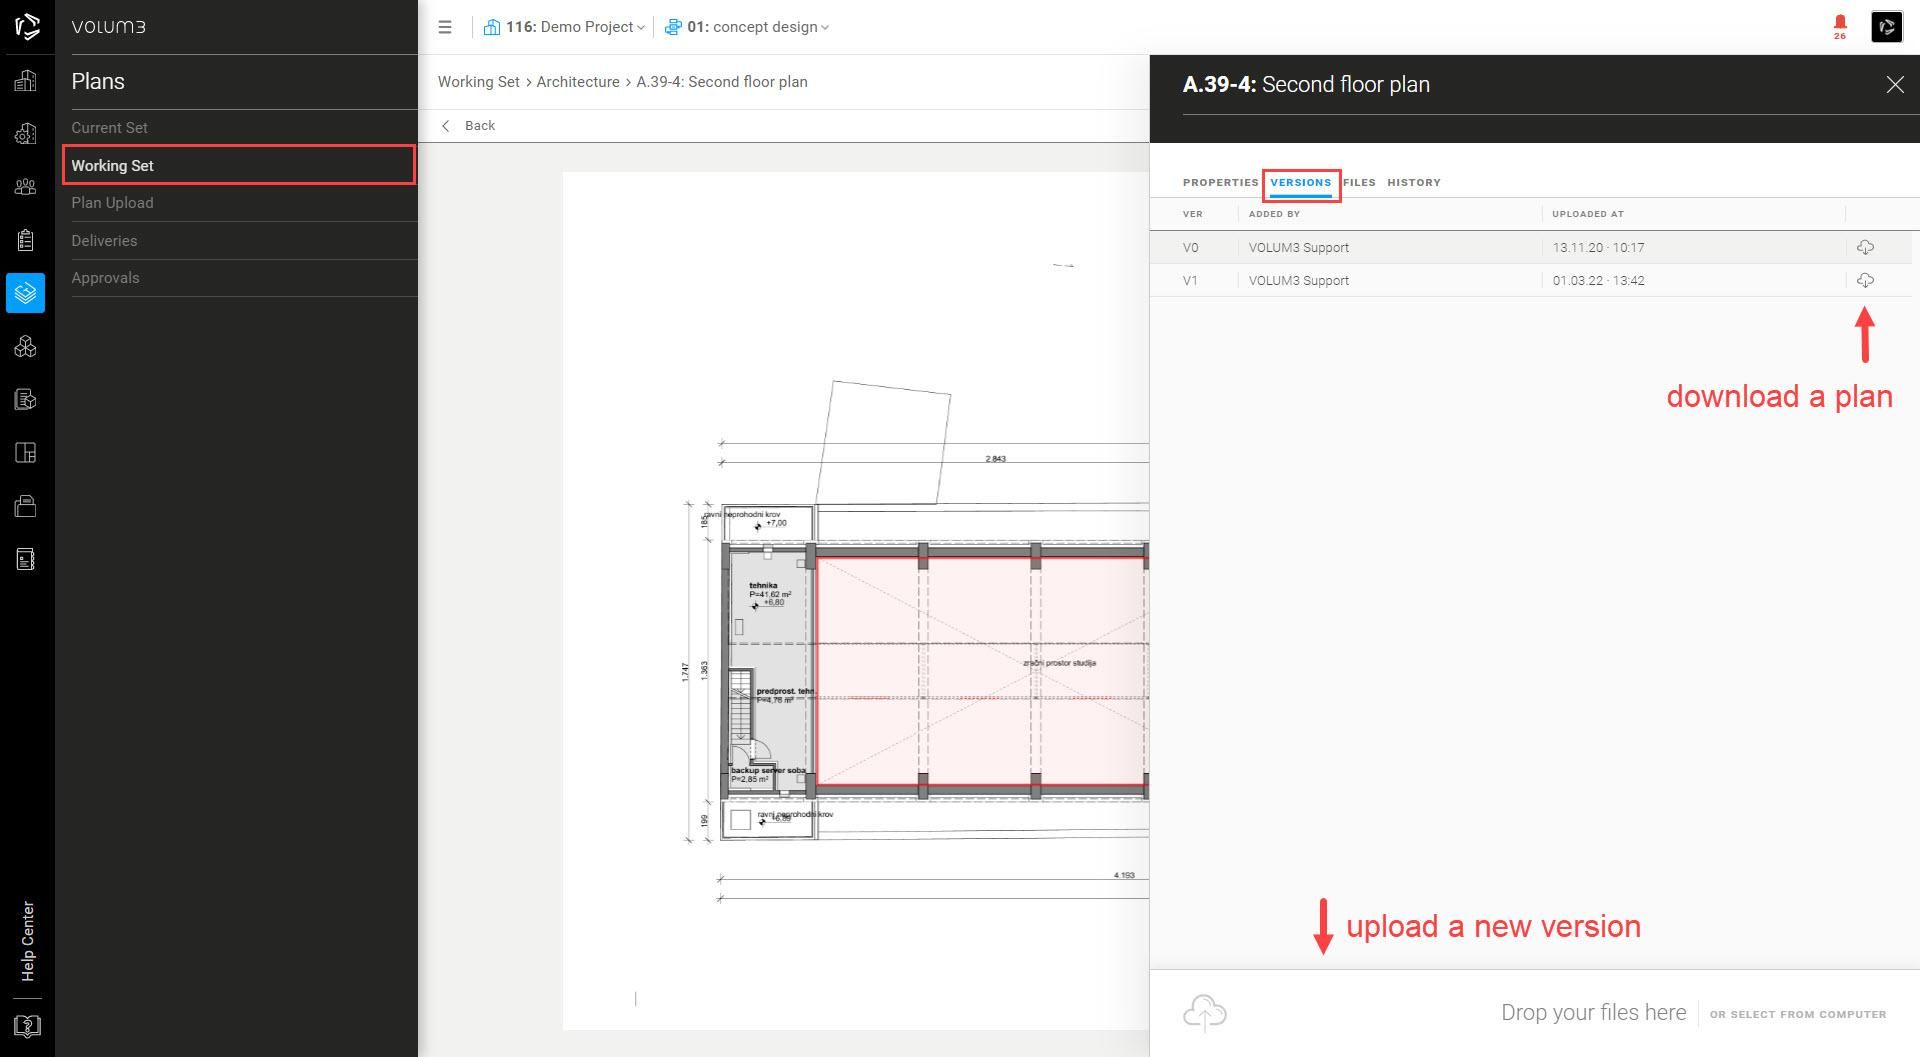
In plan properties, you can edit plan properties, see plan history, and upload new versions of the plan. Version numbers start from zero (V0). Version number increases automatically. (Each new version automatically gets the following number V0, V1, V2, etc.).
You can download the plan by clicking on the cloud icon next to each version.
If for, some reason, the plan is no longer in use, you can change its status from active to cancel. It will no longer be editable, and you can no longer change it to active again. The plan will receive a watermark PLAN CANCELED.
Note that the plan number cannot be used twice on the stage of the project. In case you need to use the number of a plan you are about to cancel, make sure you change that plans code to something else. For example - P-0842 Canceled.

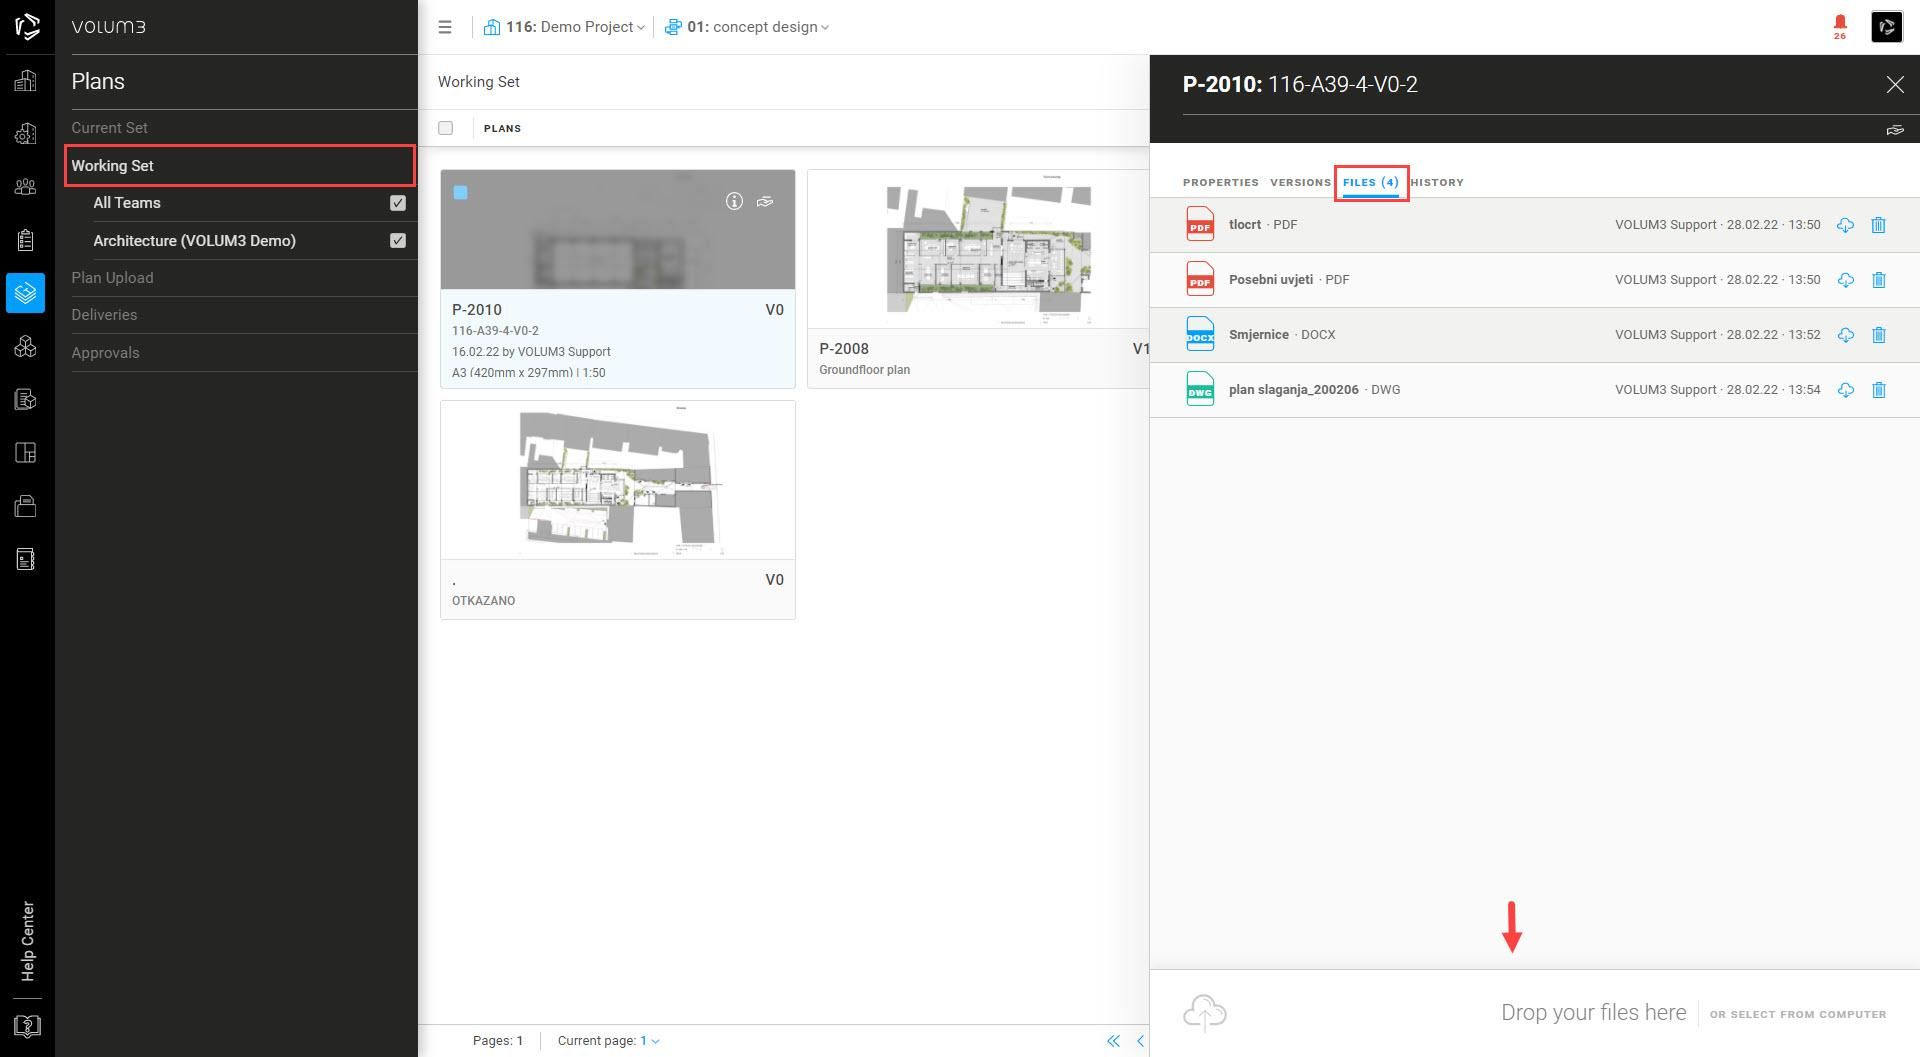
You can also attach files to the plan, in any format you need. You can download these files by clicking on the cloud icon next to them.
_____
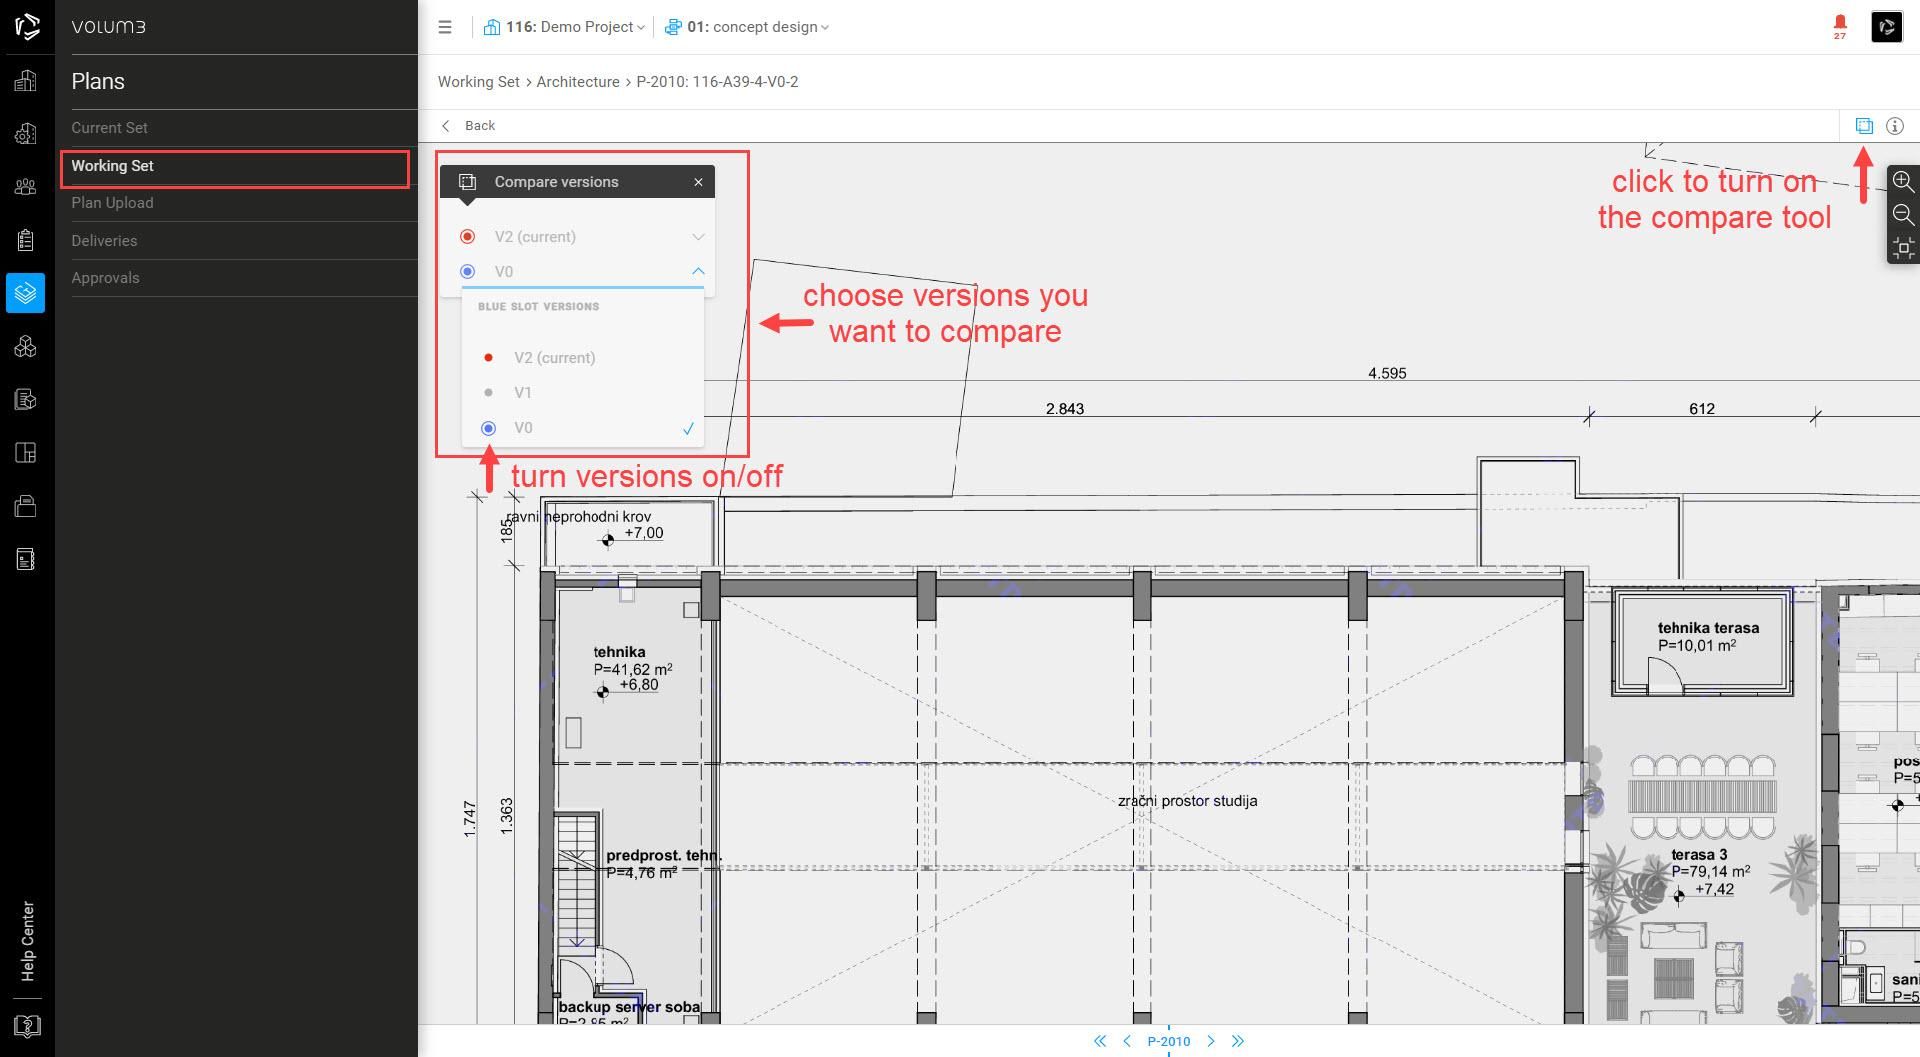
Once you have more than one version of the plan, you can compare them by using the compare tool. Open the plan in Working Set and click on the icon Compare plans in the upper right corner. You can display each version separately by clicking on the red or blue button. You can choose the version you want to compare in the drop-down menu.
____
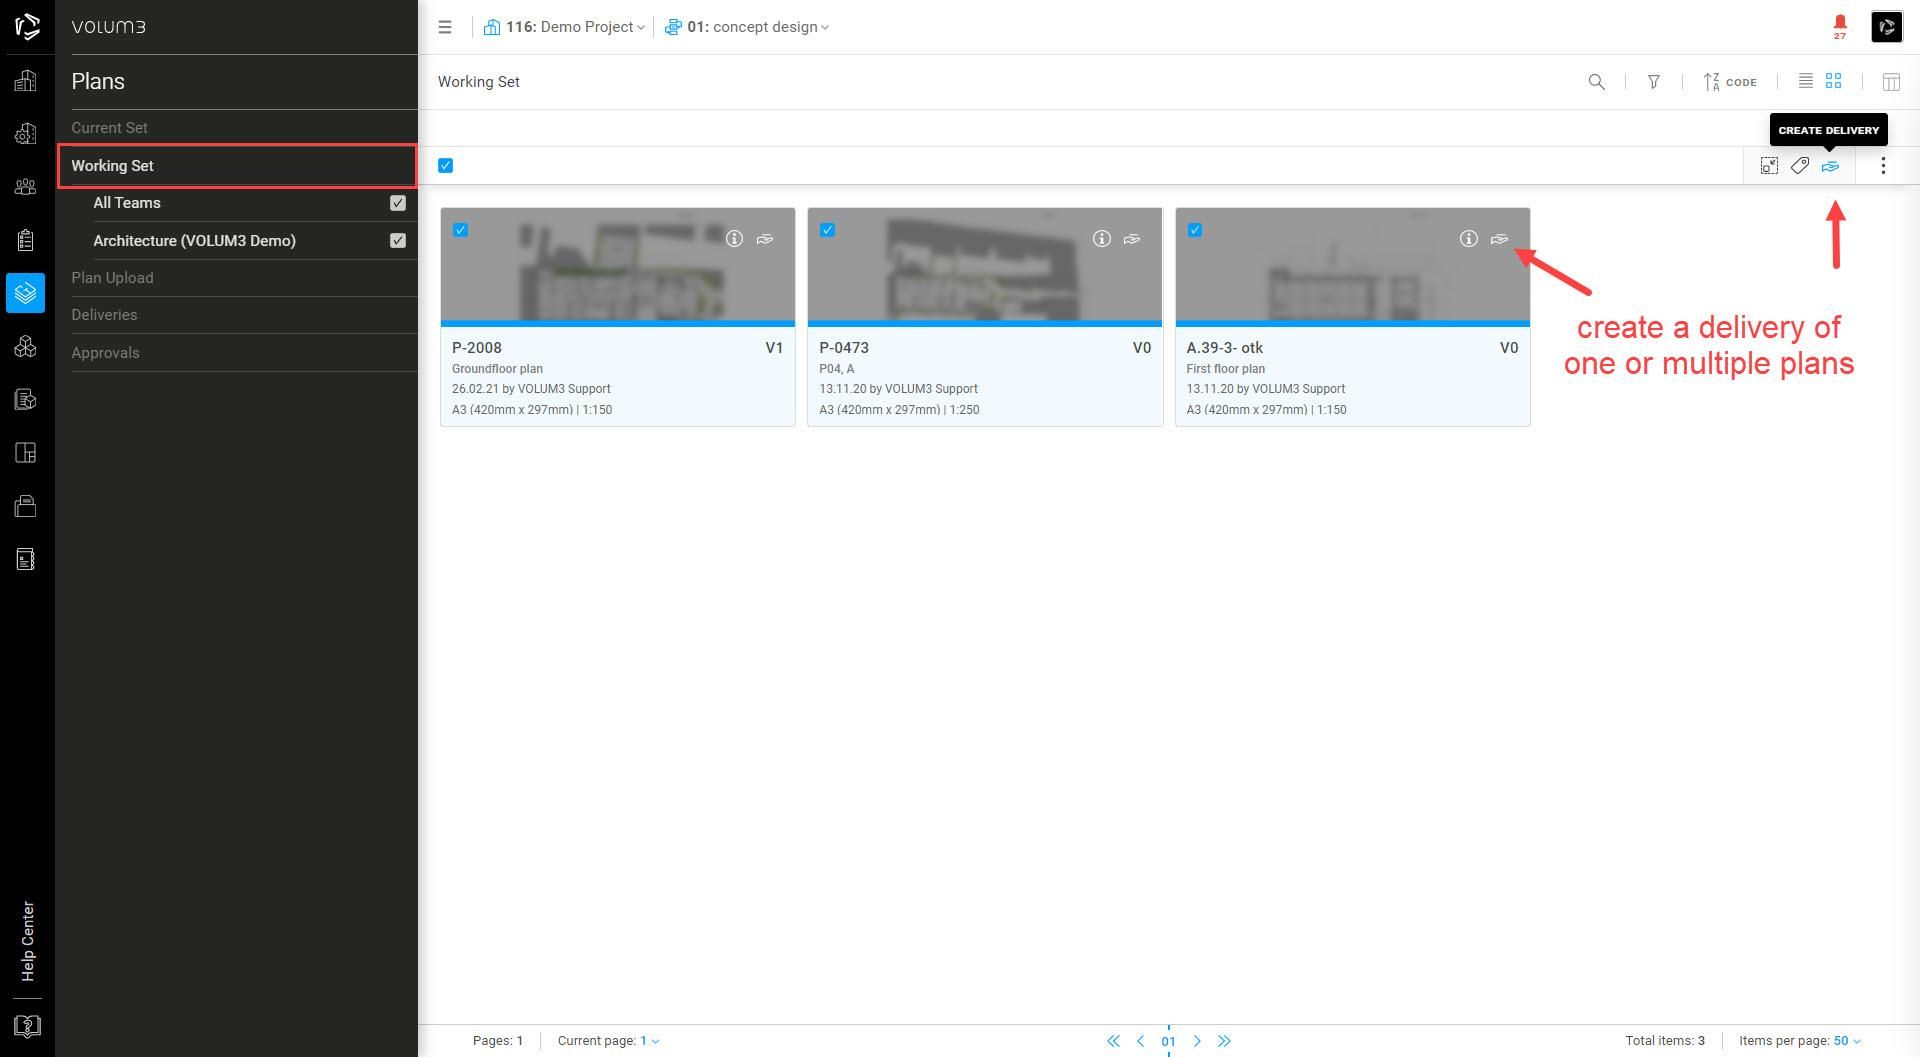
To move plans to the Current Set, you need to create a delivery.
Once you decide your plans are ready for sharing with other teams on the project, you need to deliver plans. You can deliver each plan separately or with multiple selections by clicking on the delivery icon. You can either create a new delivery or add to an existing delivery (a draft delivery that hasn't been delivered yet) from the drop-down list.
If you set assigned approvers to a project, plans will need to go through the approval process before they appear in the Current Set. The approver reviews the plans and decides whether to approve or reject the plan. If no approvers are assigned, plans will bypass the approval process and go directly to the Current Set.
Markups from your Working Set will not be visible in the Current Set, but the delivered plans will still be visible in your Working Set. You can continue to use markup tools on the plan in the Working Set, but they will not become visible in the Current Set after the plan is delivered.
____
All deliveries are visible in the Working Set list view as well as in the delivery section.
Current Set
When you upload new versions of the plan in the Working Set and create delivery, they are directly sent to the Current Set. You can create plan revisions in the Current Set by, once again, uploading a new version in the Working set and delivering it to the Current set.
You cannot deliver the same version of the same plan more than once.
In plan properties, you can view plan details and revisions. Each plan that appears in the Current Set will get a subsequent revision number automatically.
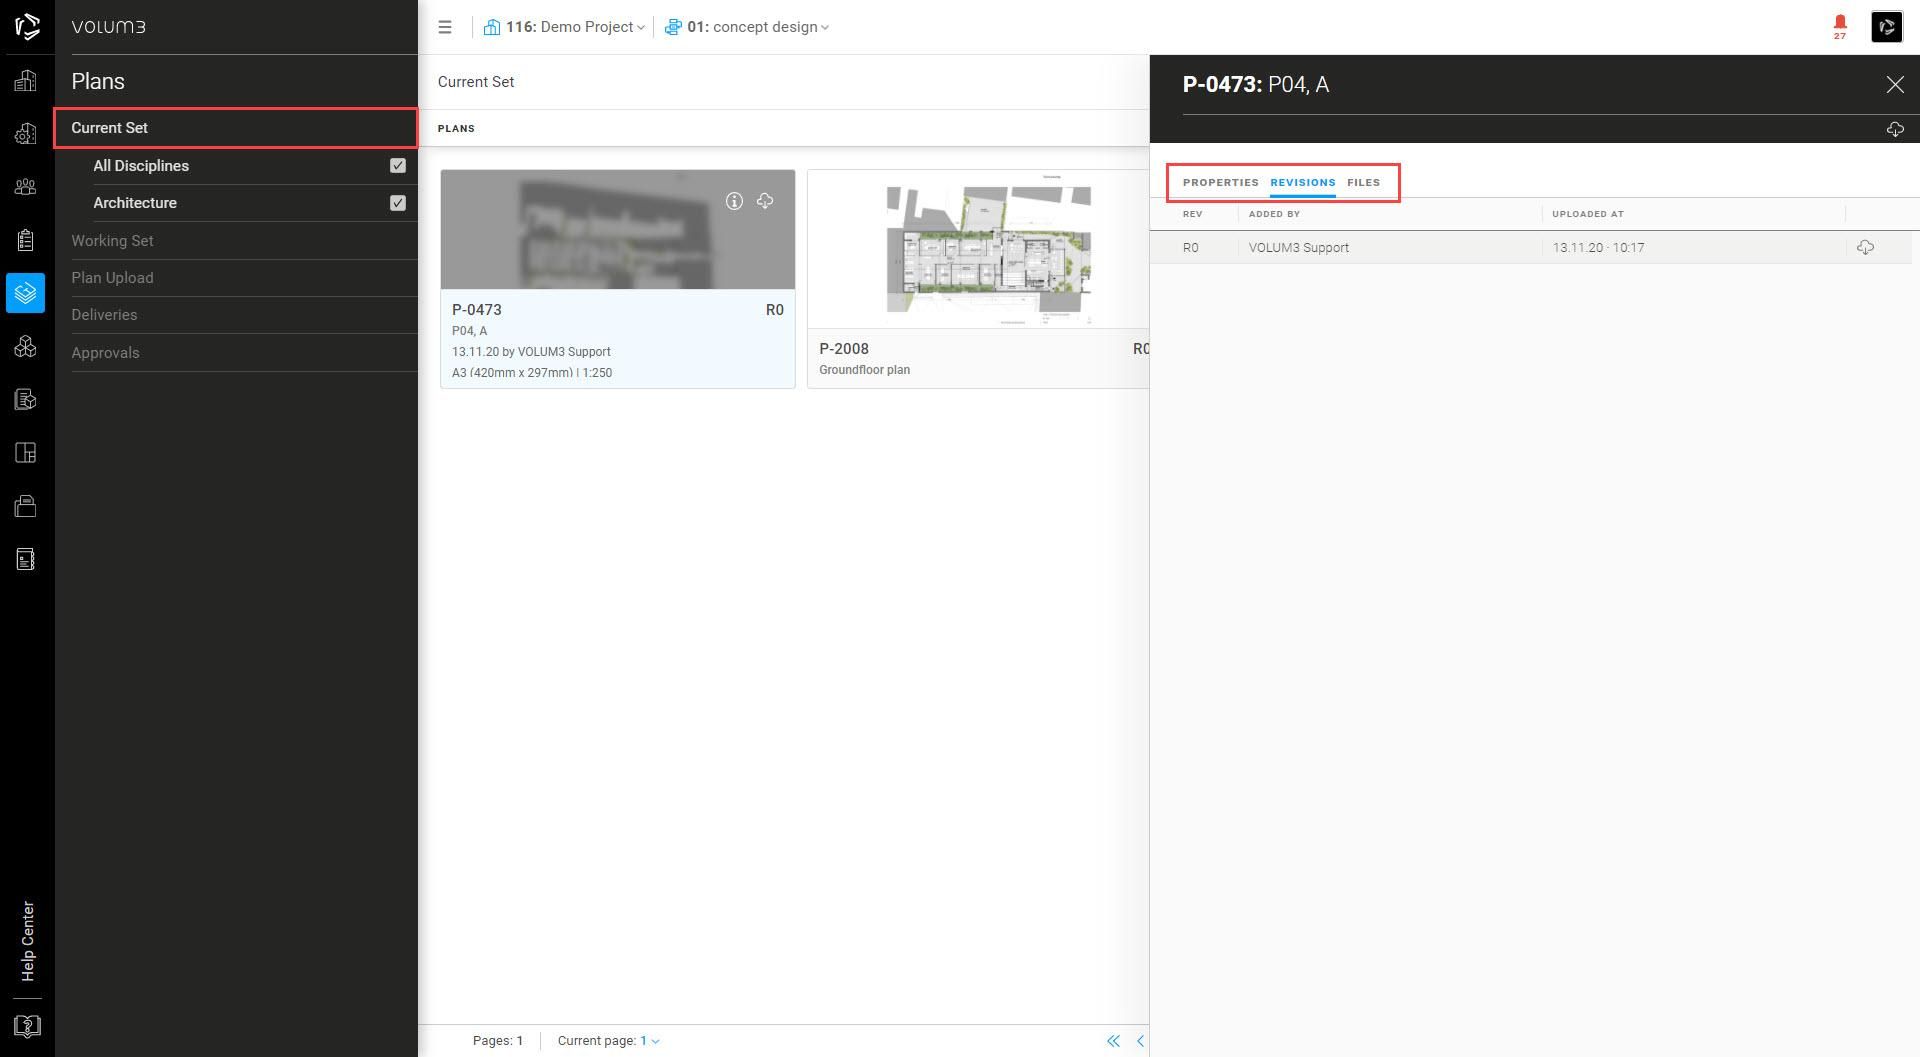
It is not possible to change or delete revision, you can only upload a new revision.
Deliveries & Approvals
Delivery is a document containing a set of various plans.
Once you create a delivery, it will become visible in the deliveries section. If you have created a delivery draft, it is visible only to your team, and it will appear in My Team.
You can add plans to existing delivery (draft) until you send it.
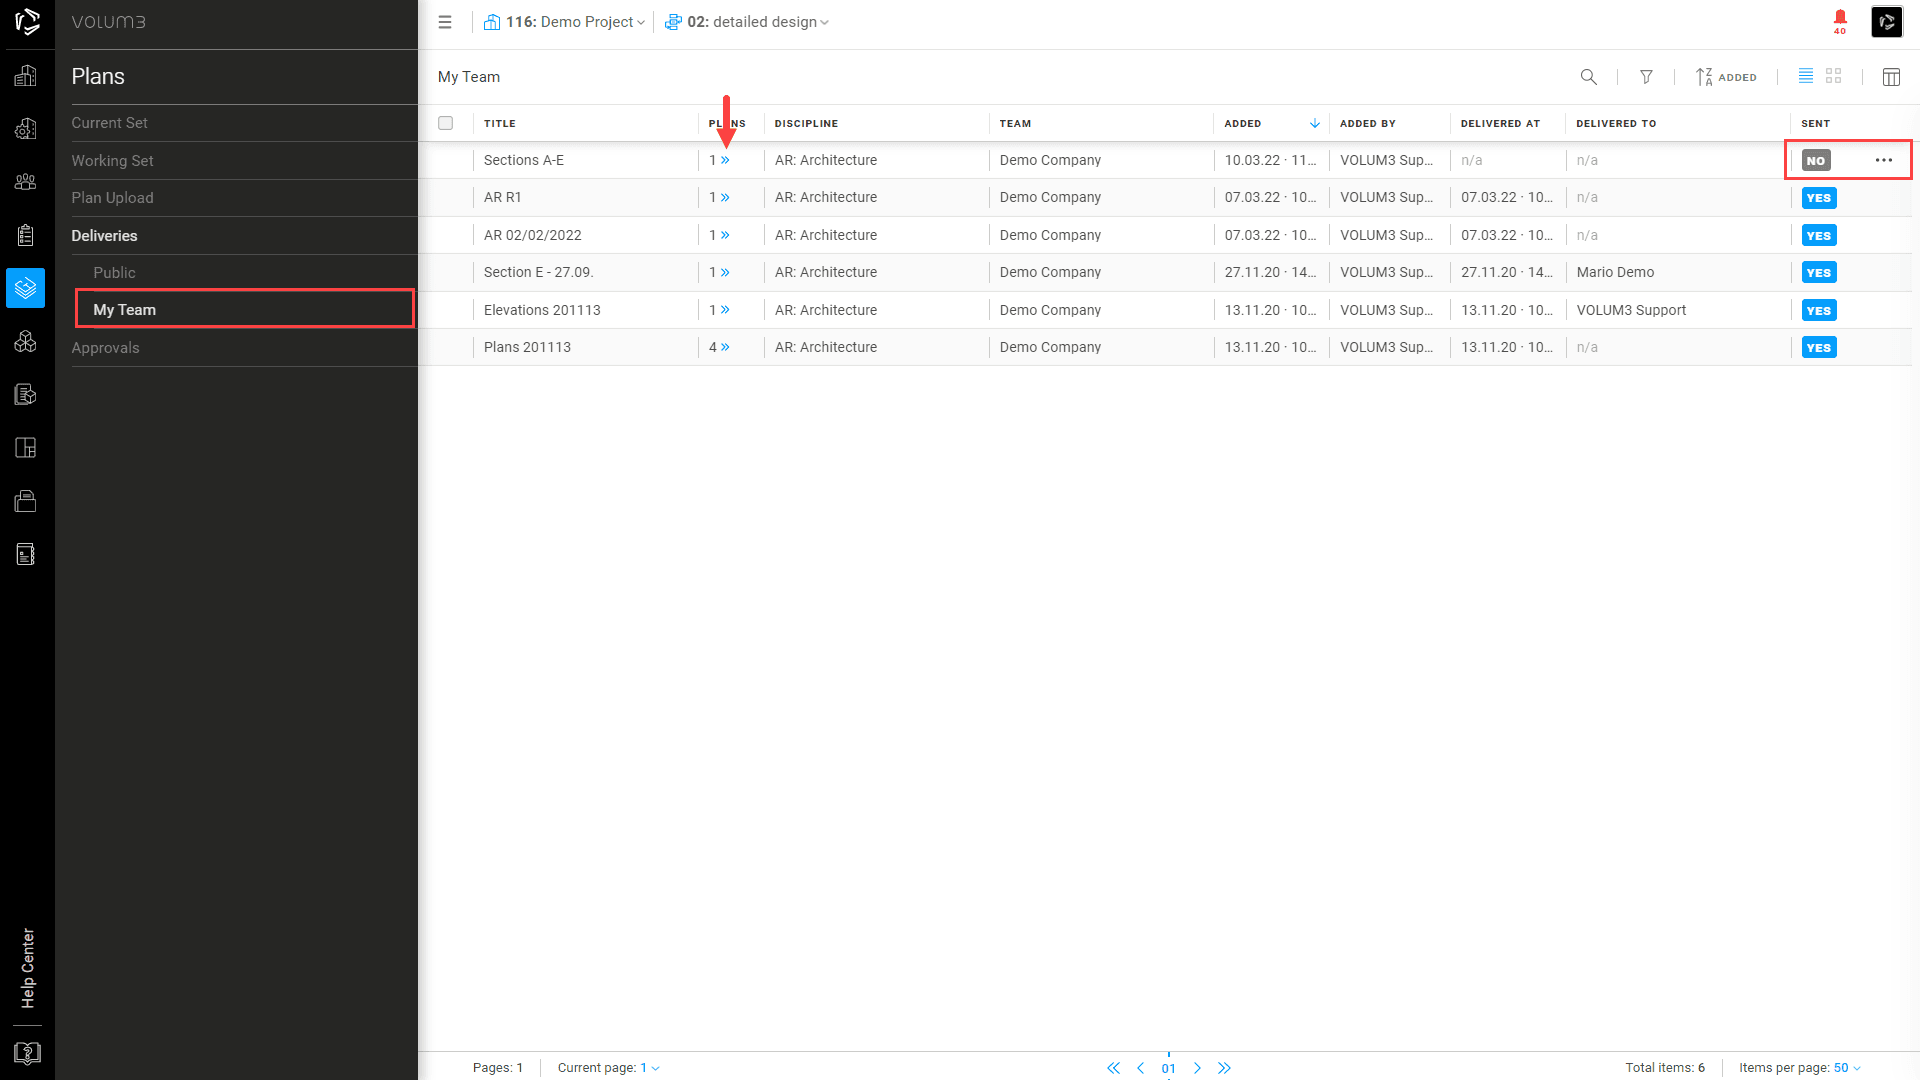
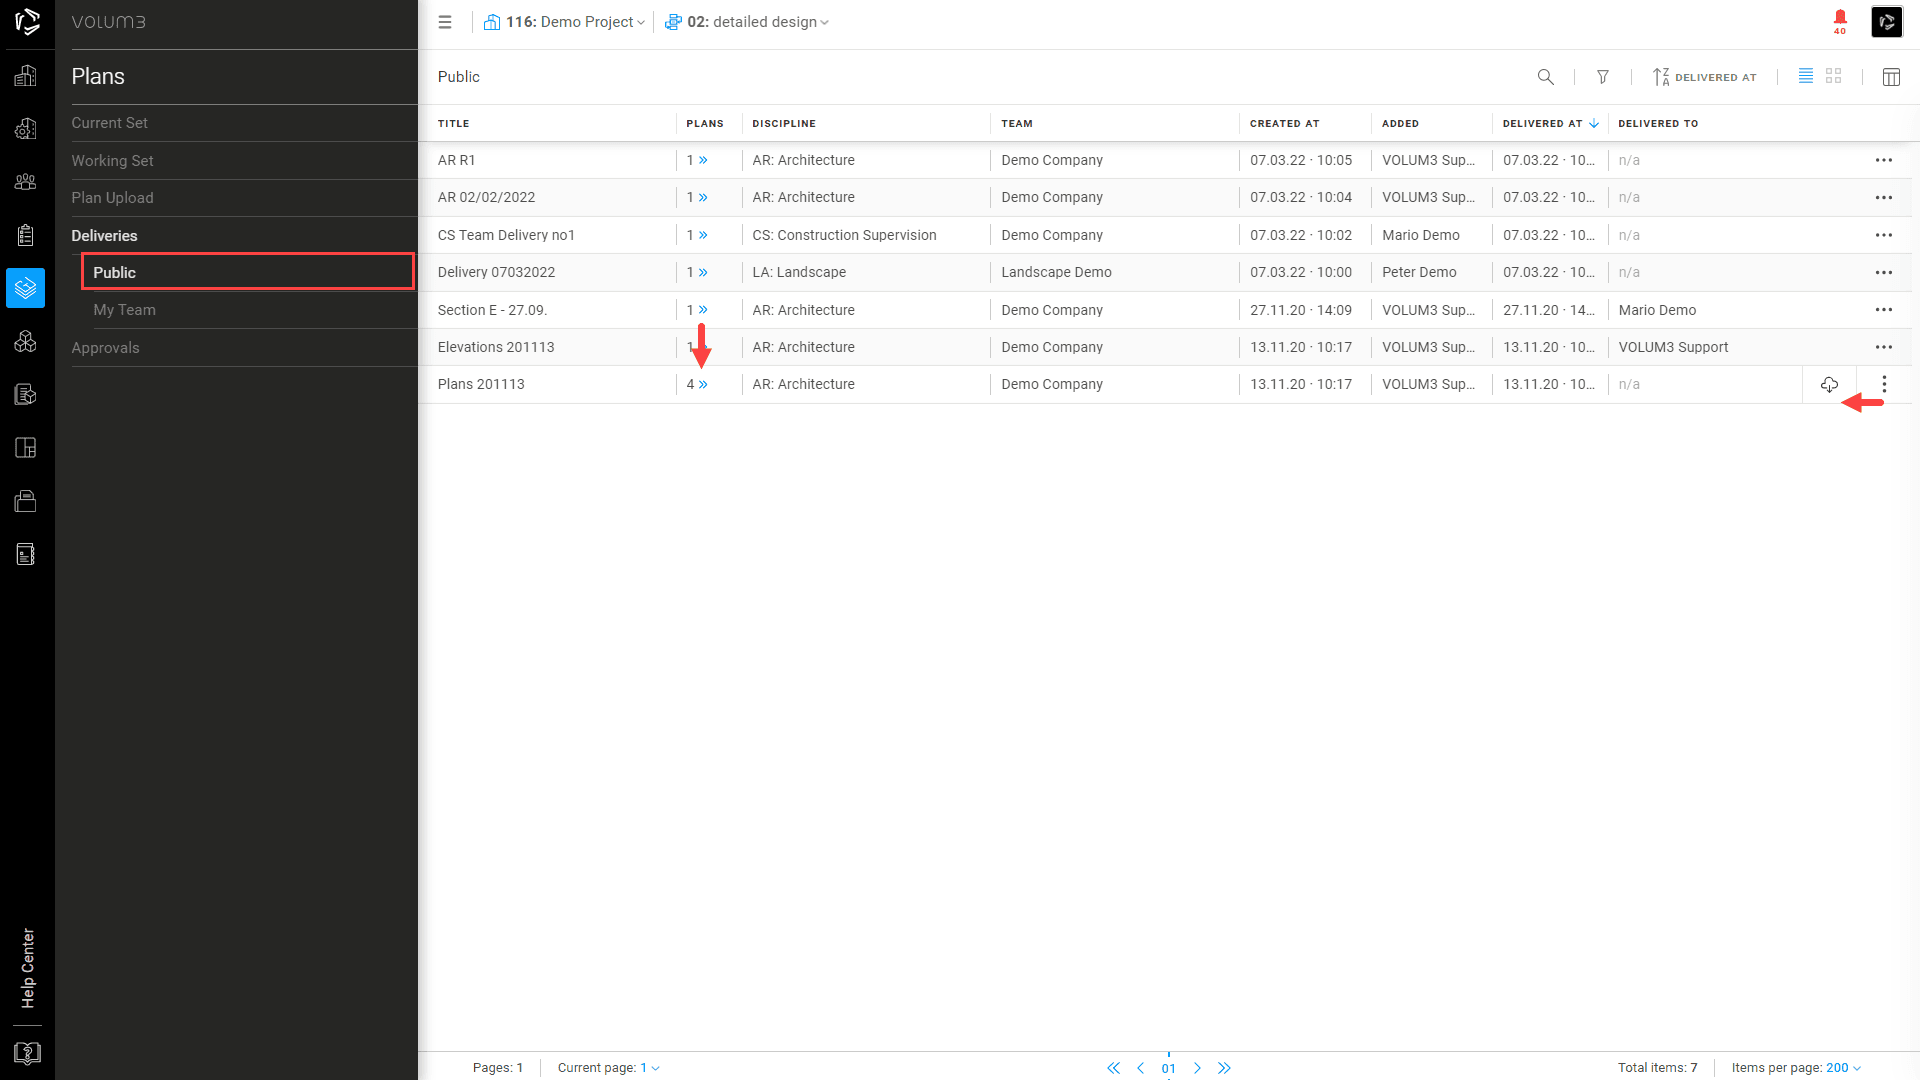
Once you decide to send a delivery, it will change sent status from NO to YES and will become visible to other teams on the project. Sent deliveries are visible in your Public list. There, by selecting a delivery, you will have an option to download plans of selected delivery in a zip file.
By clicking on the icon View plans in this delivery (>> ) you can see all delivered plans.
If the discipline you are working in has an assigned approver, the plans will become visible in the Current Set only if they are approved.
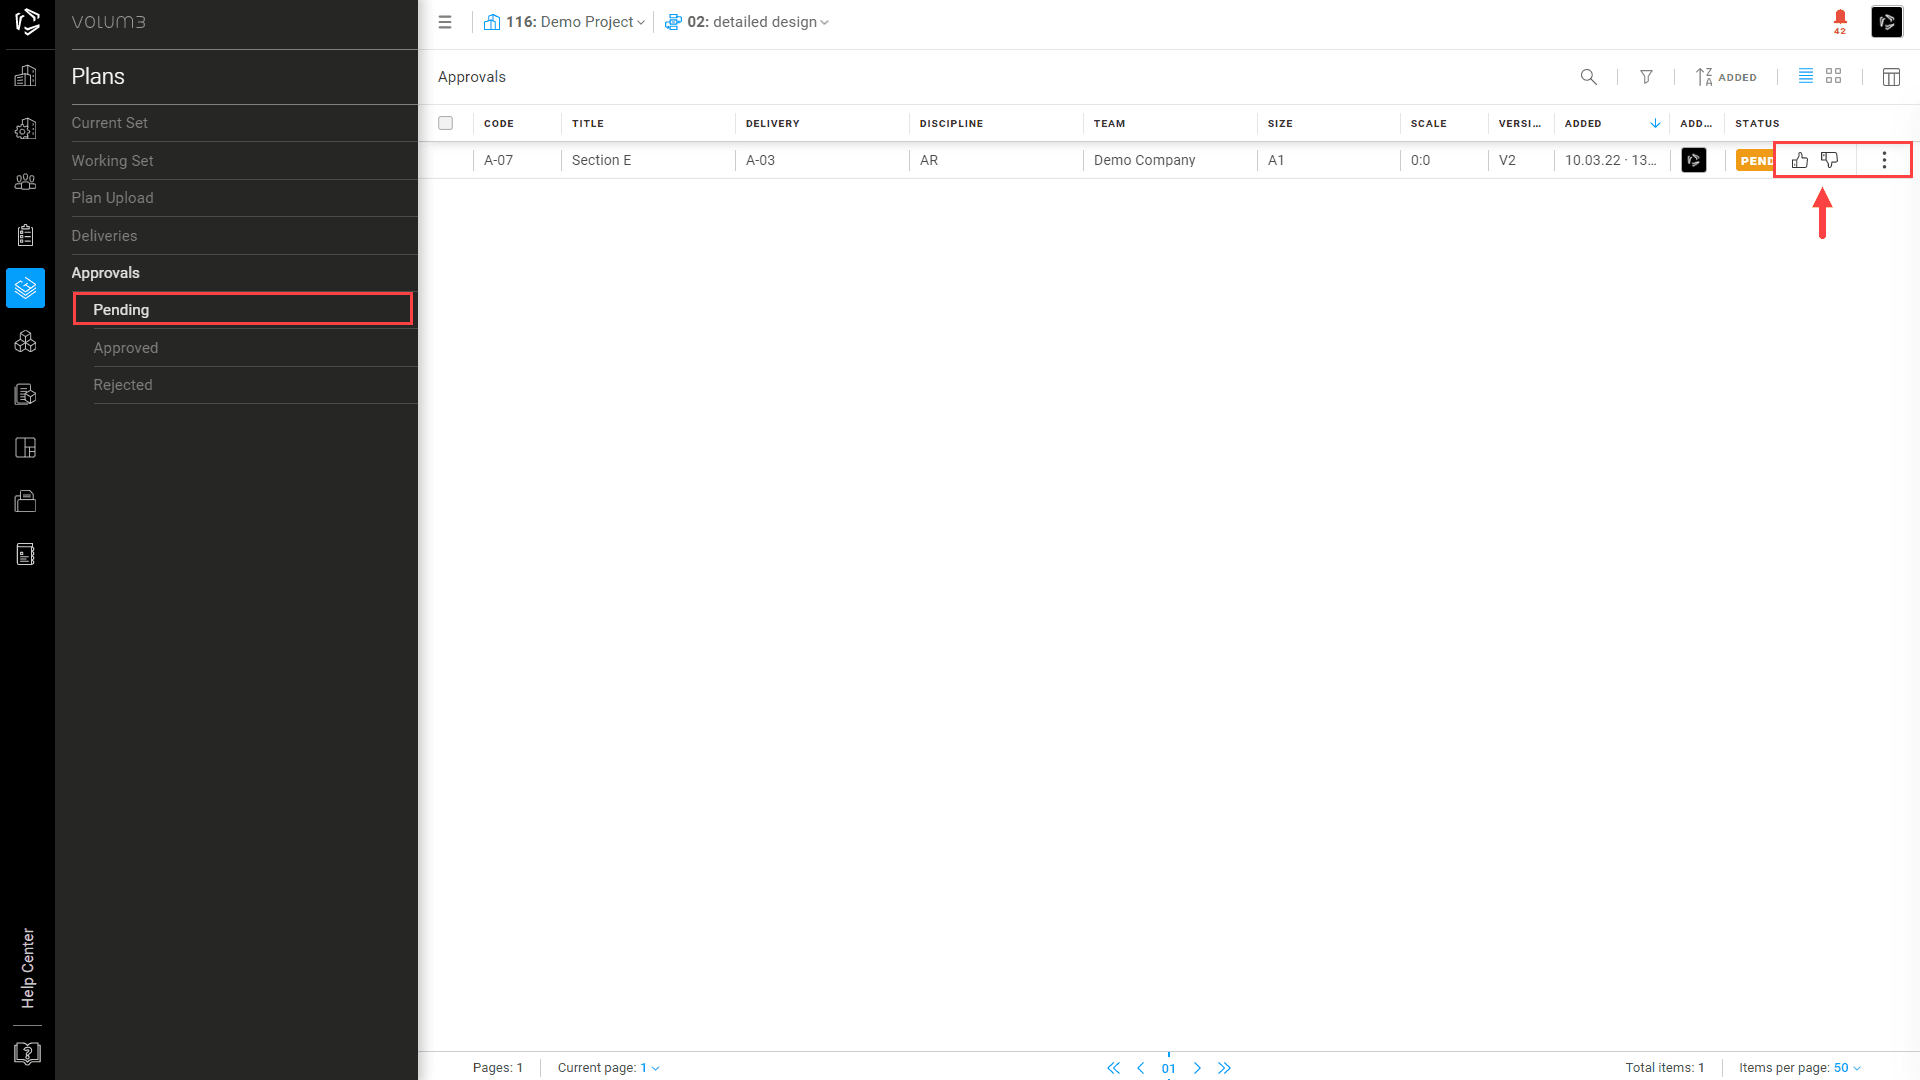
The plan status can be pending, approved, or rejected.
The approver may choose to approve only a few plans from the delivery. In that case, the rejected plans will go to your rejected list and the approved ones to the approved list and the Current Set.
Plans