Navigating The App
Registration
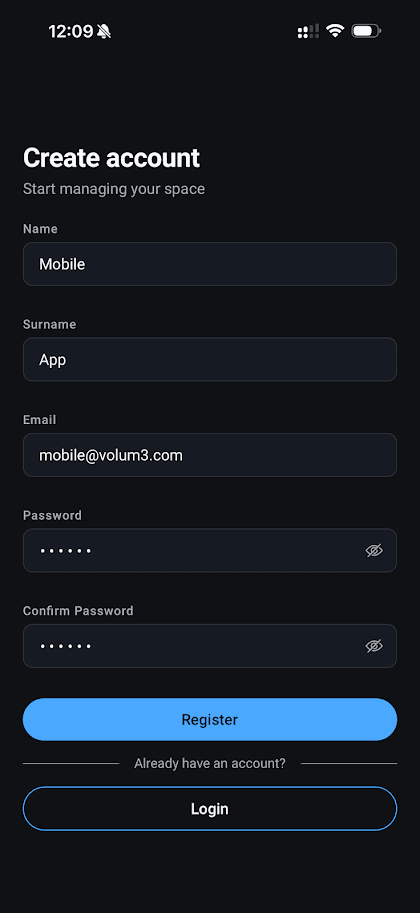
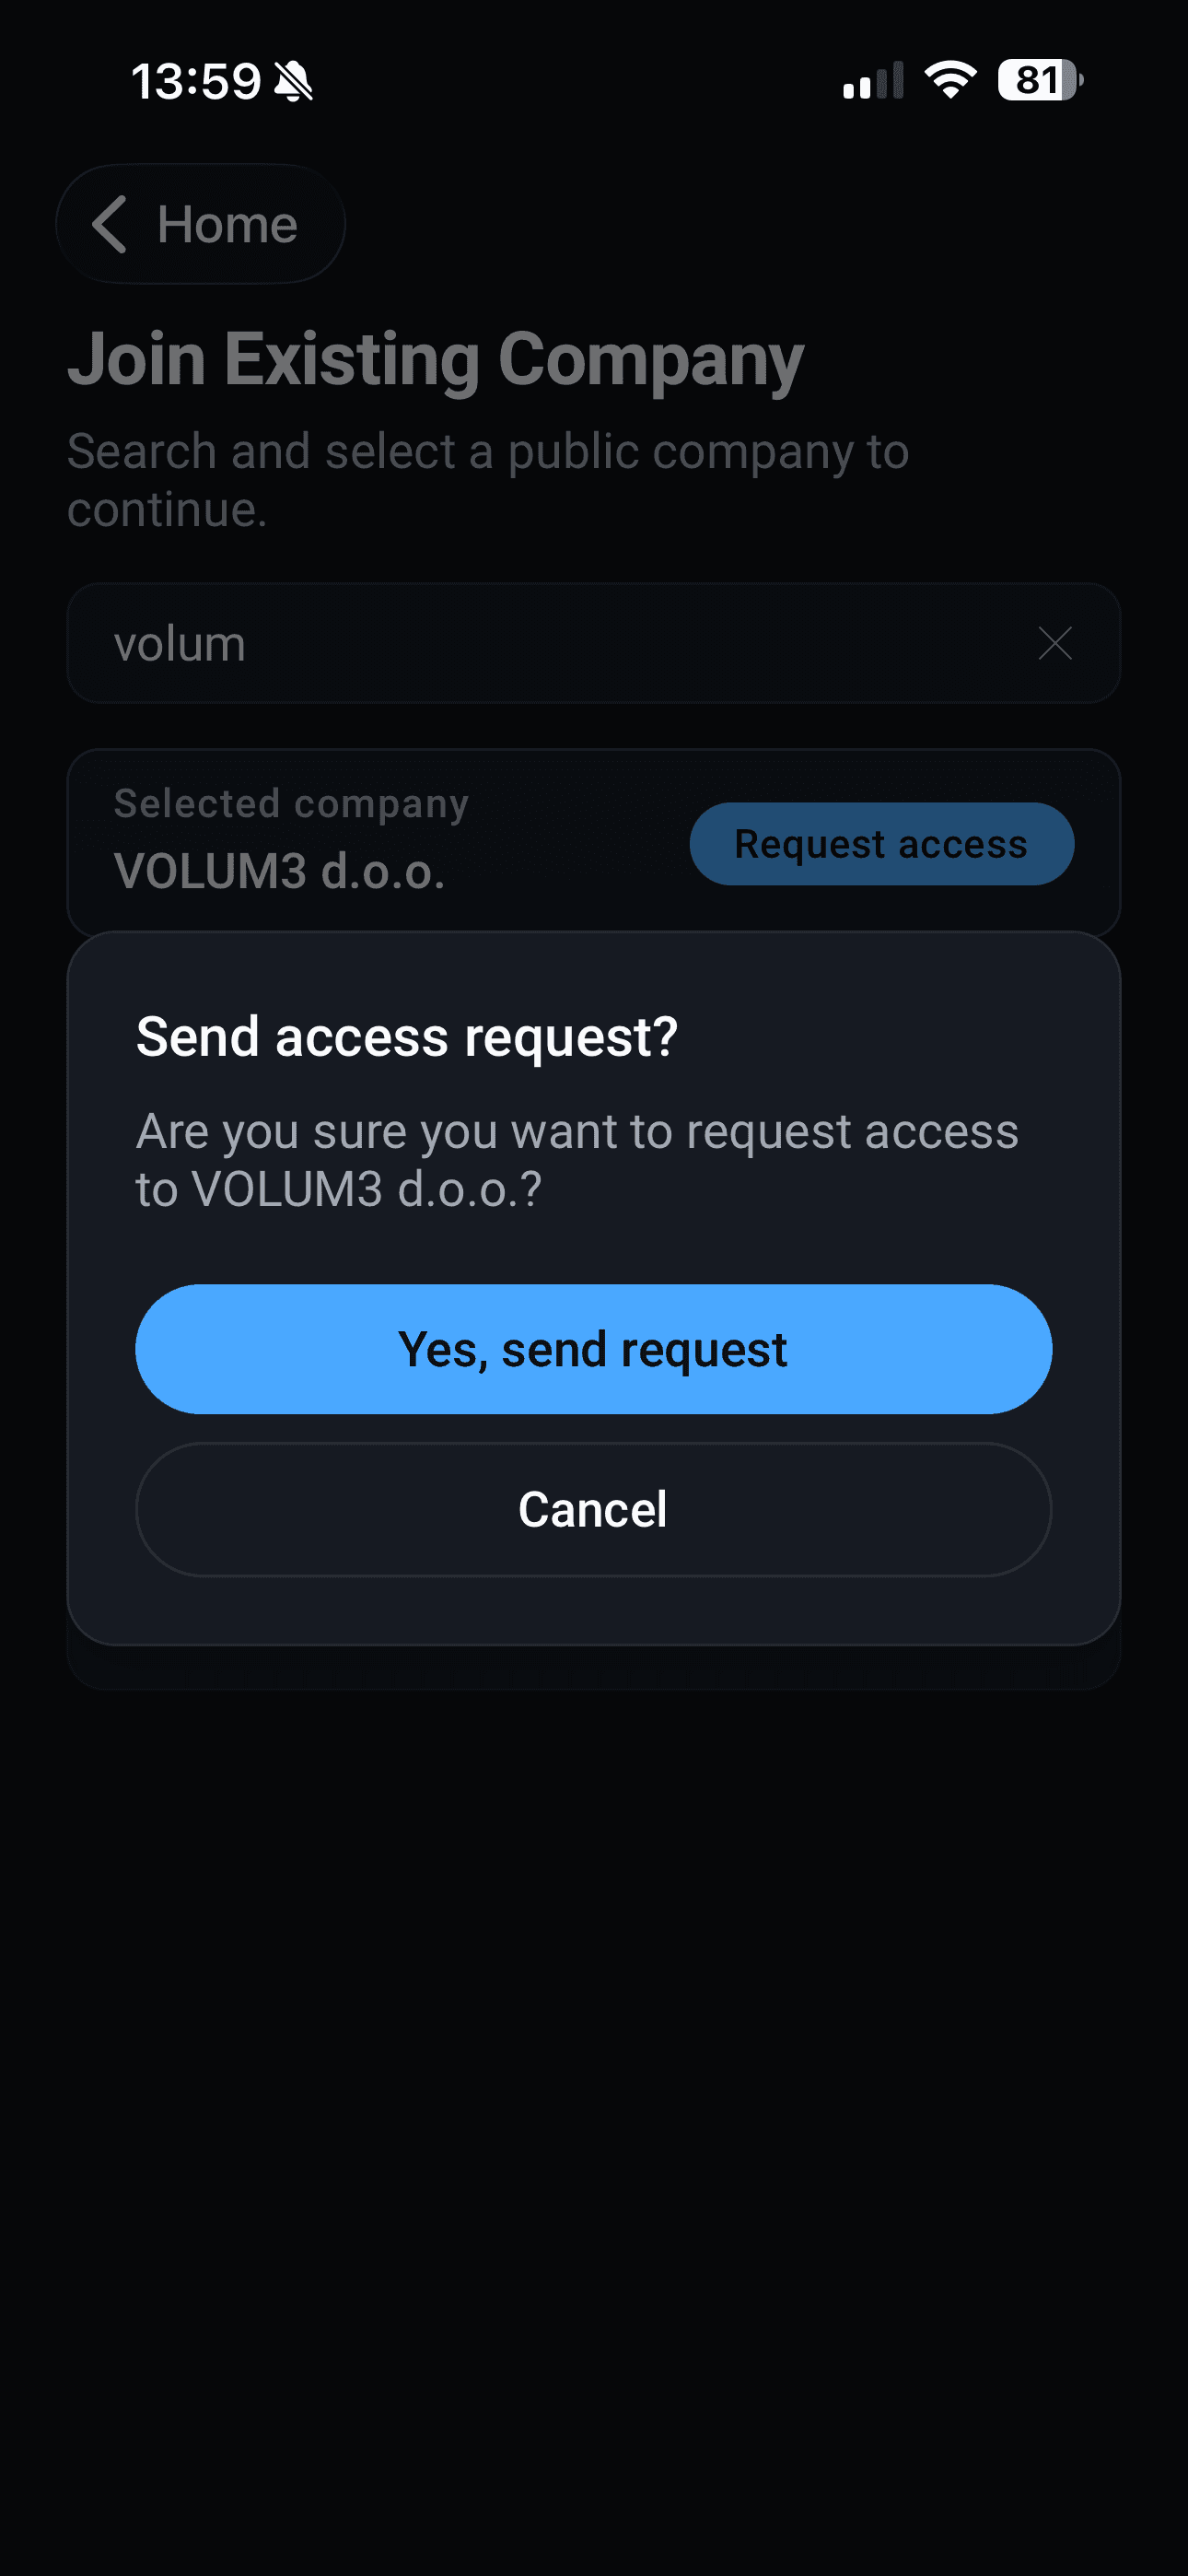
If you don't already have an account, click on “Create account” - fill in your info, click register and verify your e-mail.
That's it, you're all set!
After registration you will have 2 options:
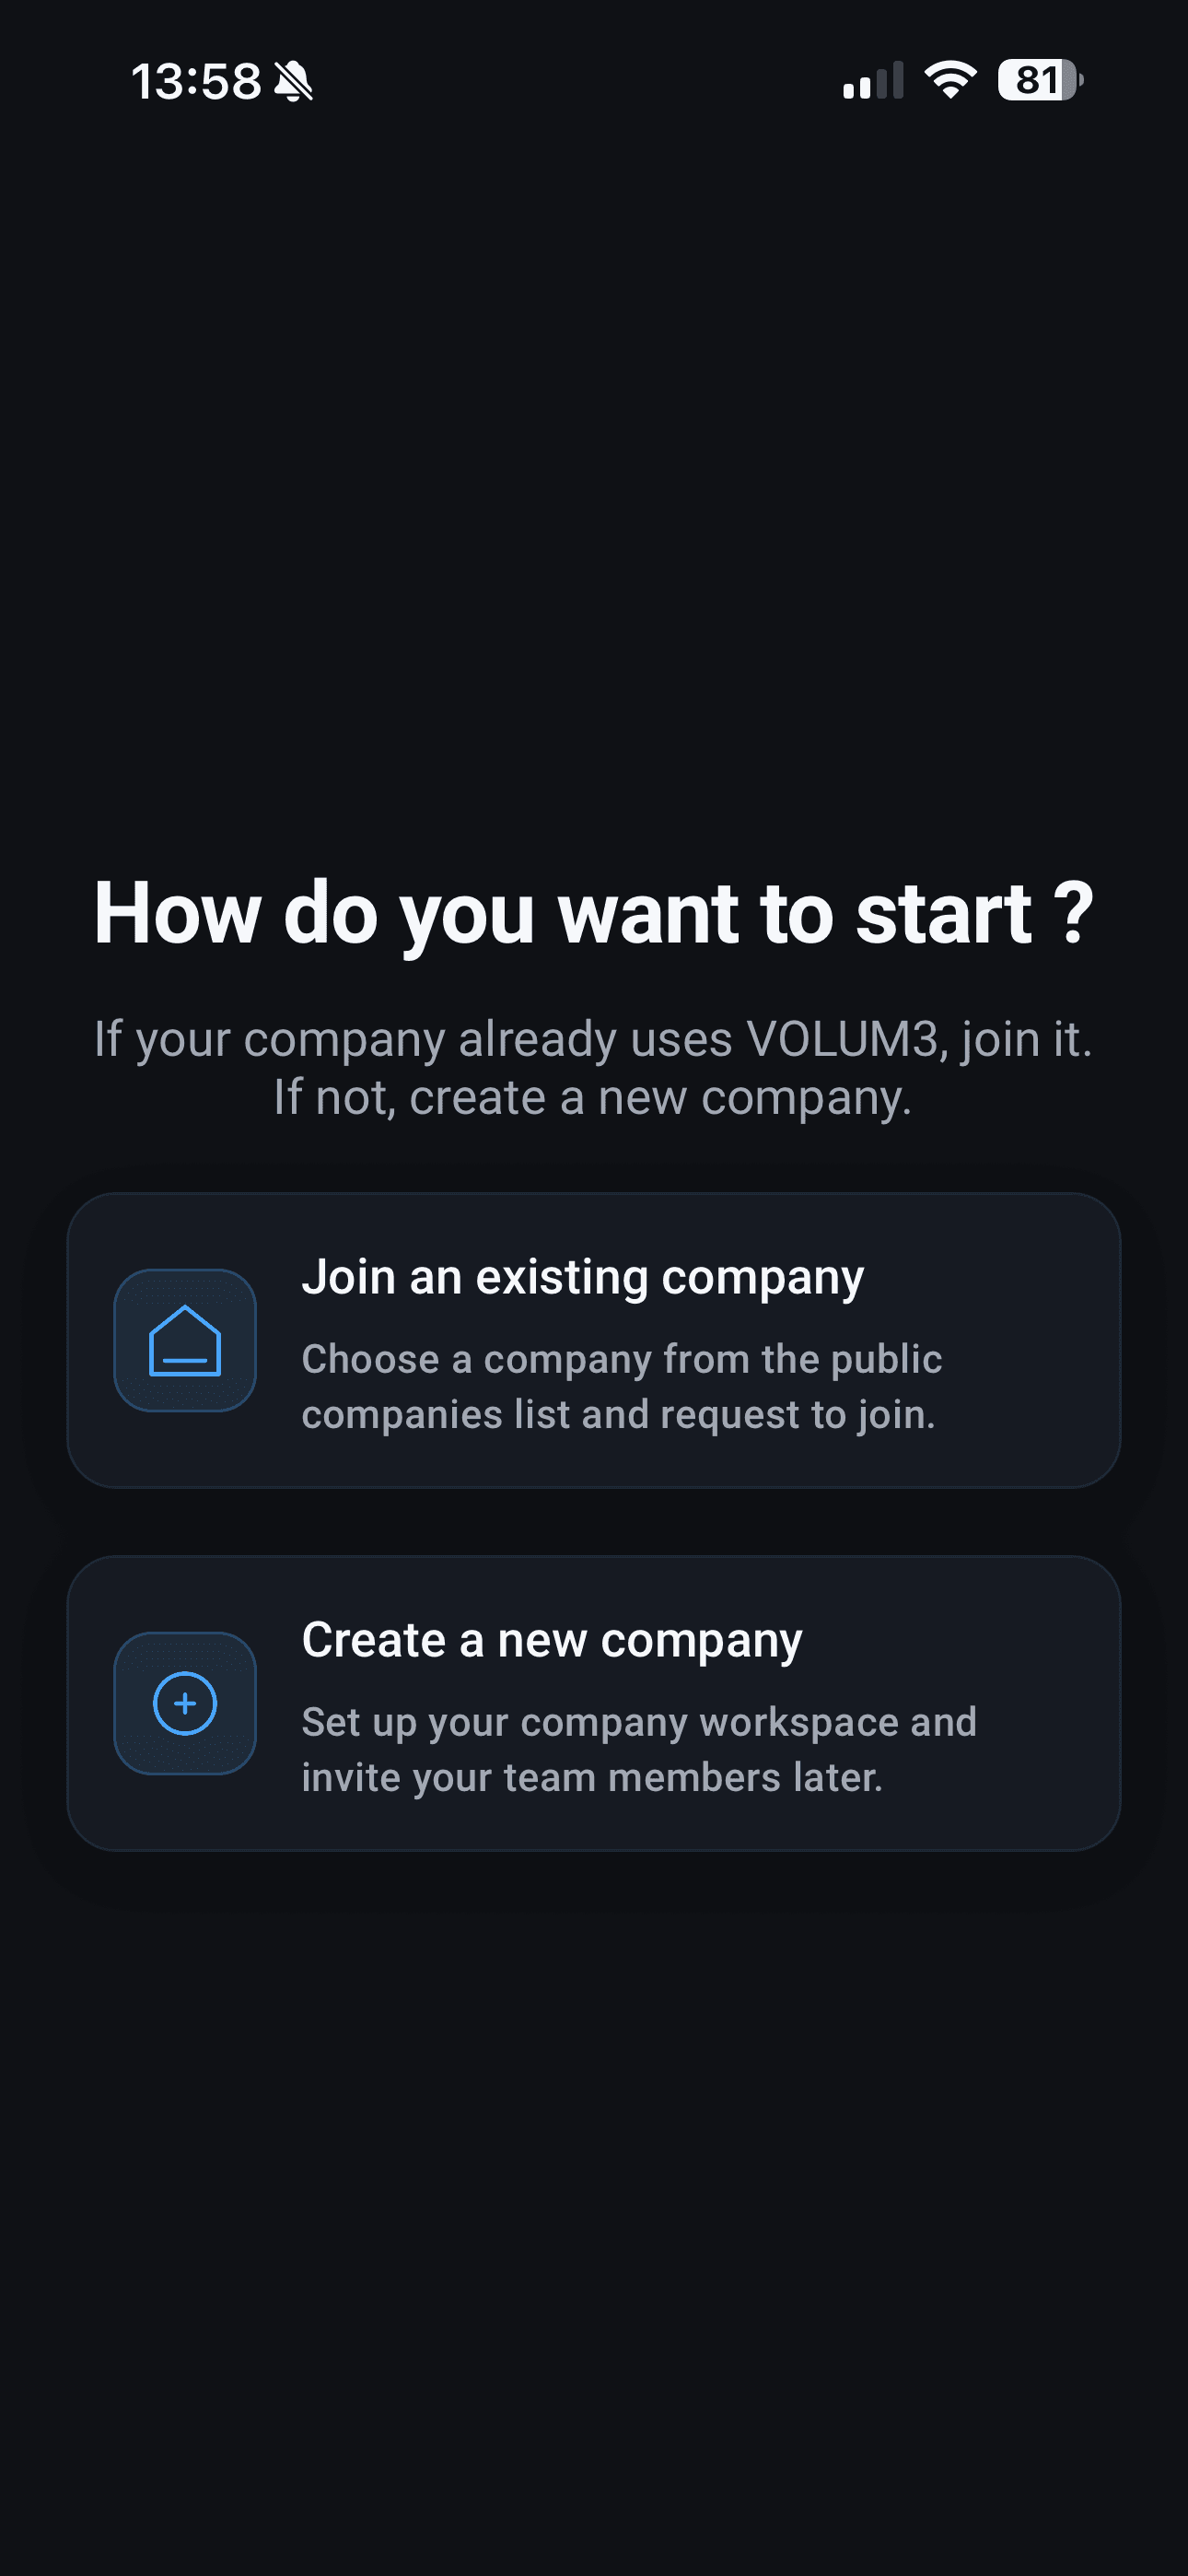
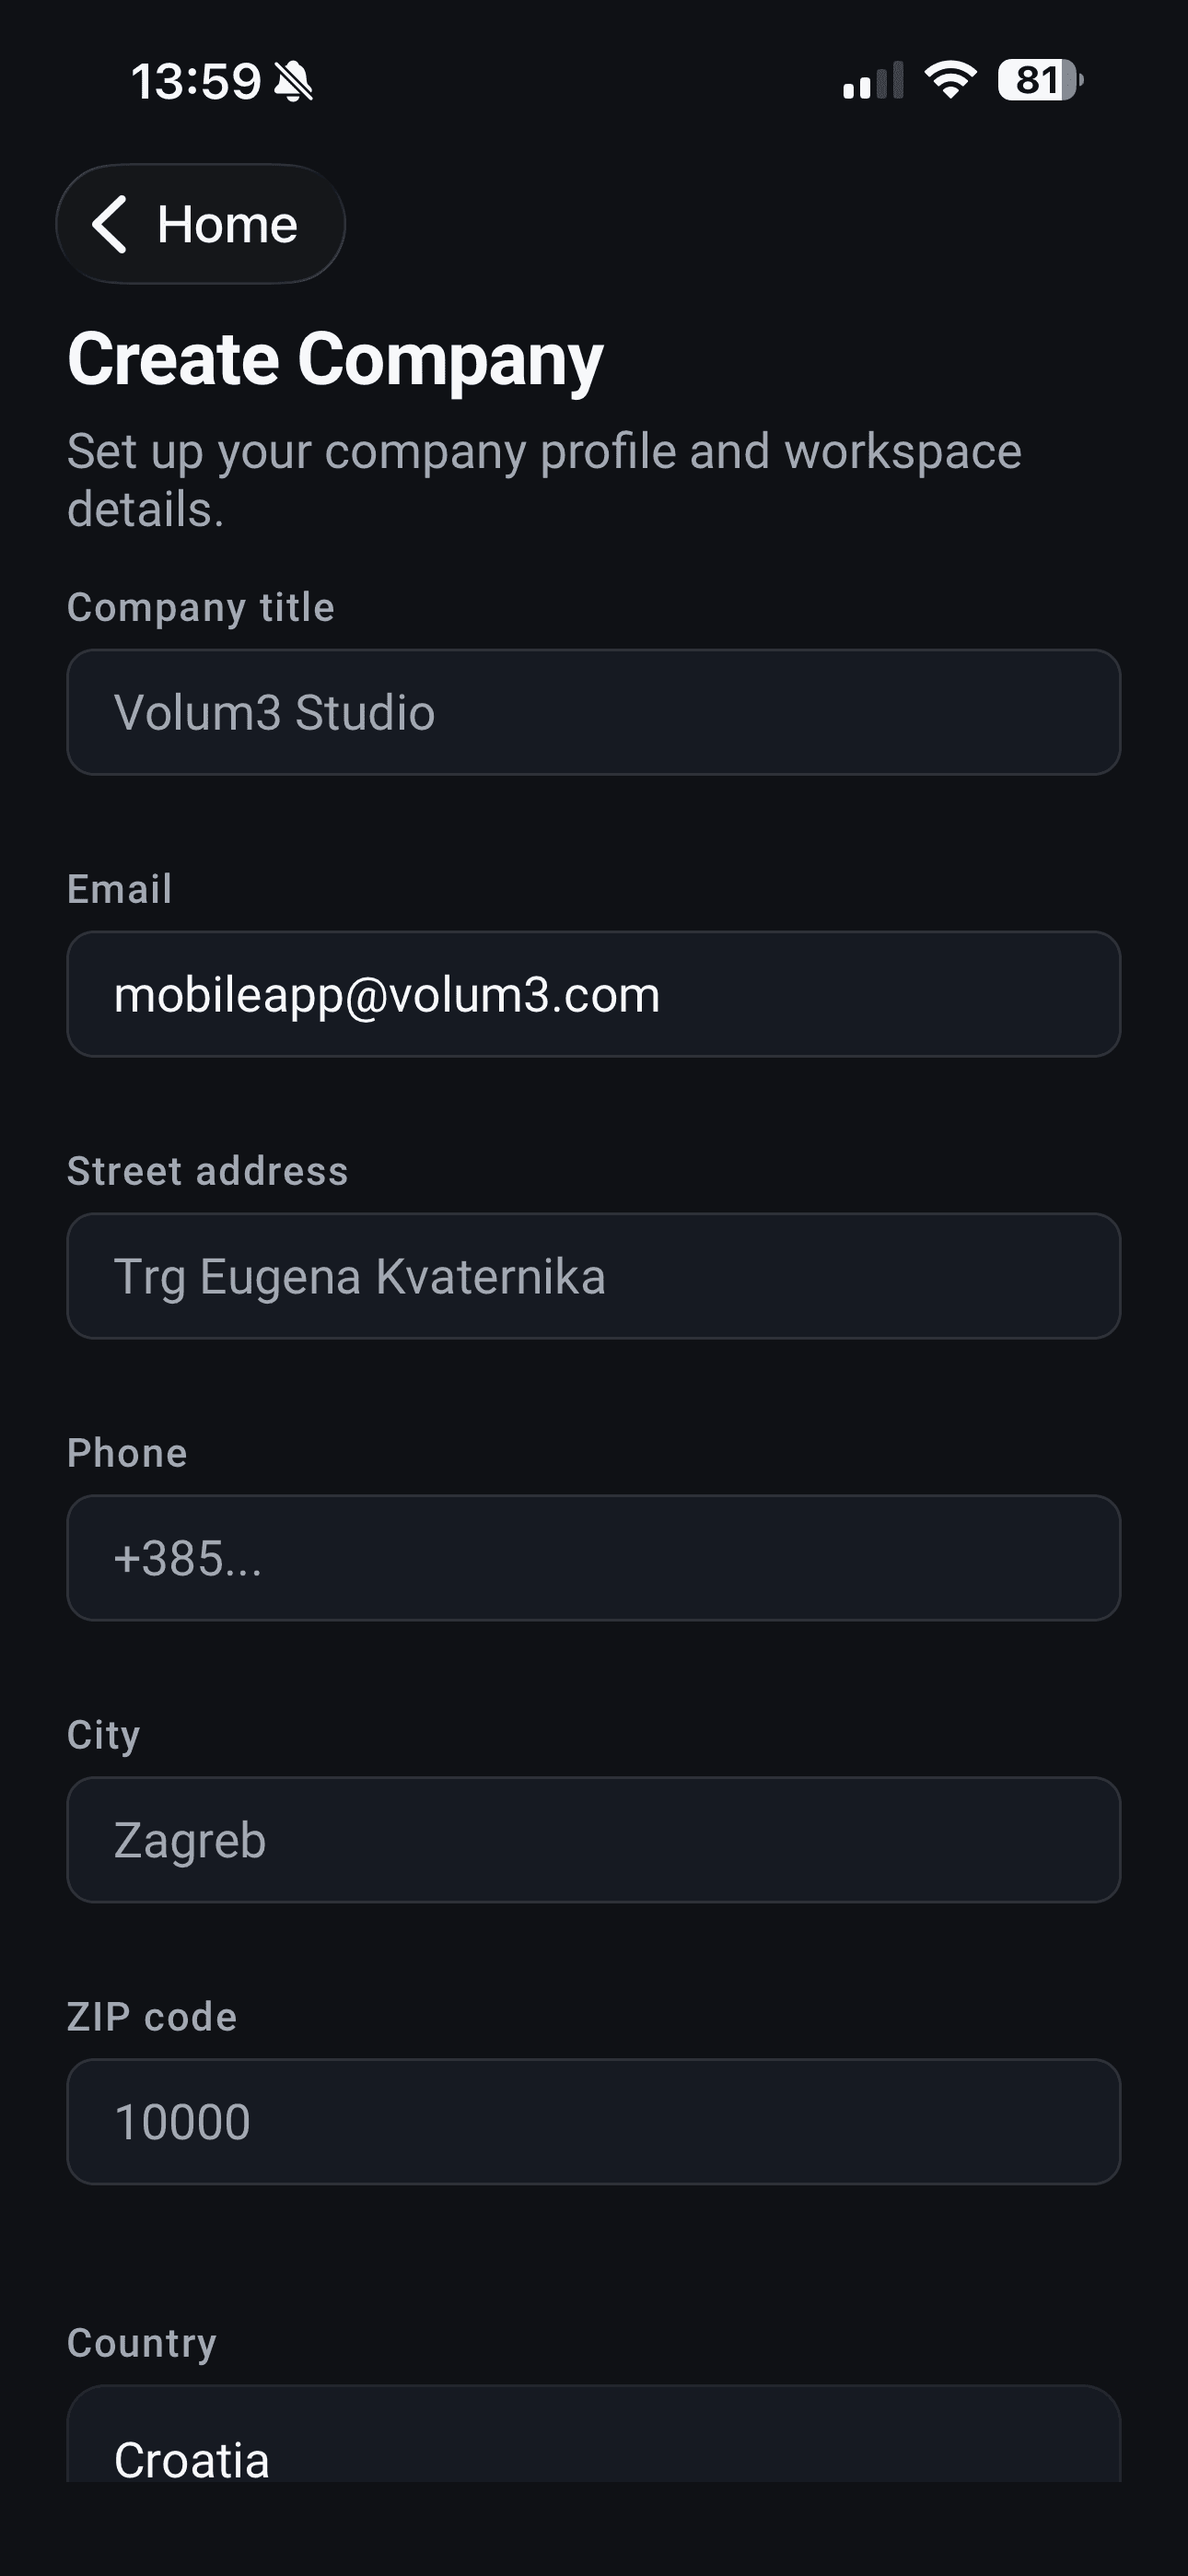
- Create your Company
- Join an existing Company
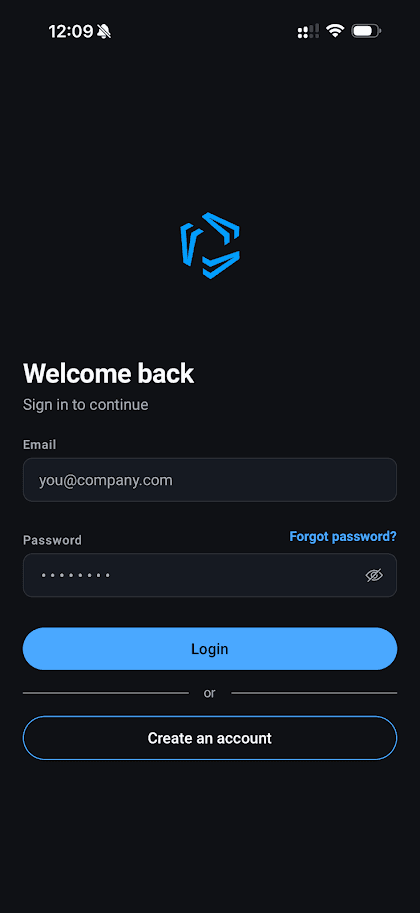
Login
If you are already a VOLUM3 platform user, after downloading the VOLUM3 app, use your web platform login details to enter the app or create your account if you don't already have one.
When you log into the app you will be put in the Tasks module of the last Project you have worked on.
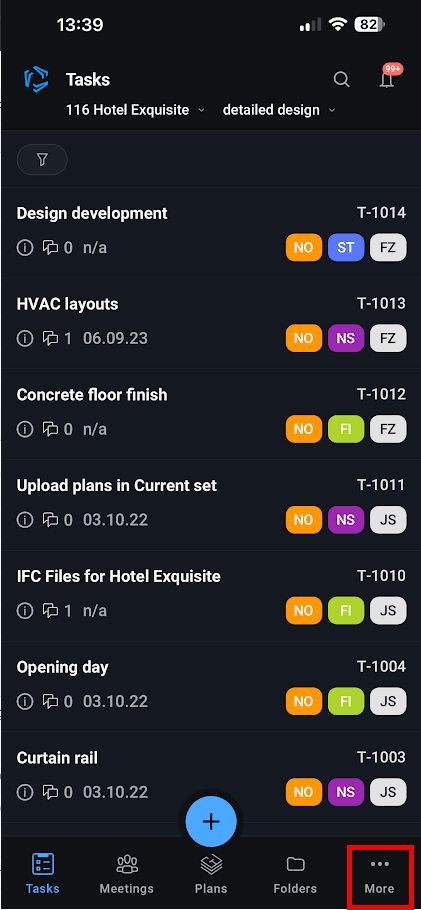
Projects
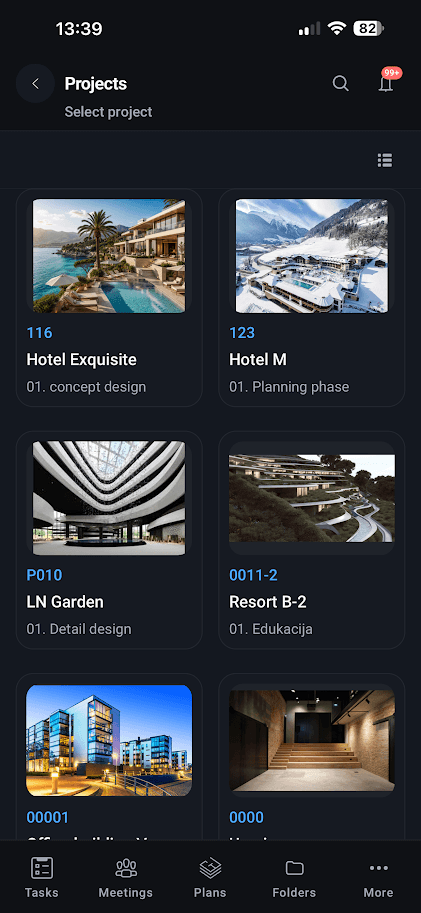
To access the Project list click on the VOLUM3 icon in the top left corner or click on more in the bottom right of the screen and then click on Projects.
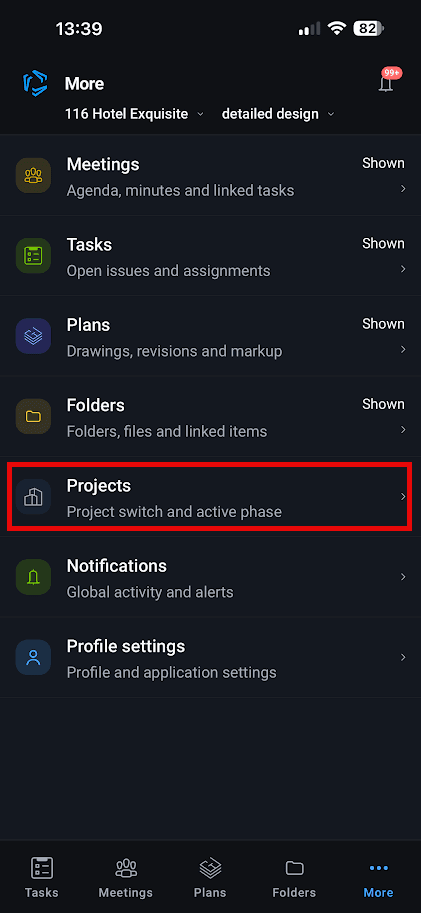
Select the Project and the Phase you want to work on by clicking on the desired project.
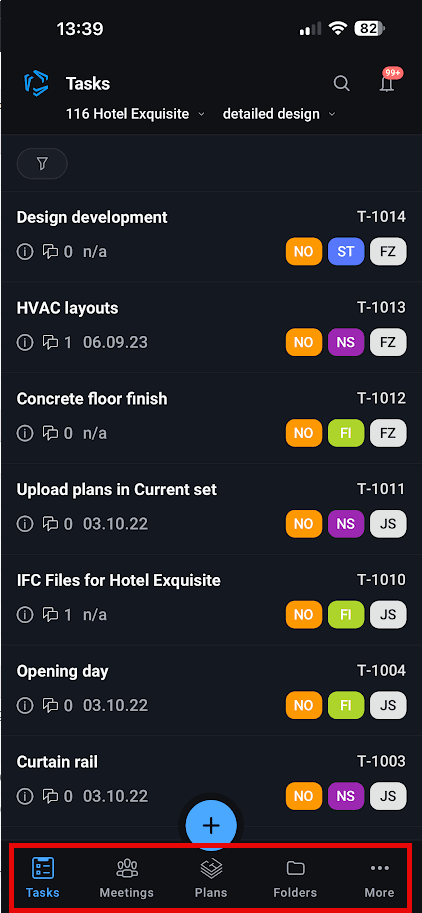
Navigation toolbar
The navigation toolbar is located on the bottom of the screen. There you can move between tasks, meetings, plans and folders modules.
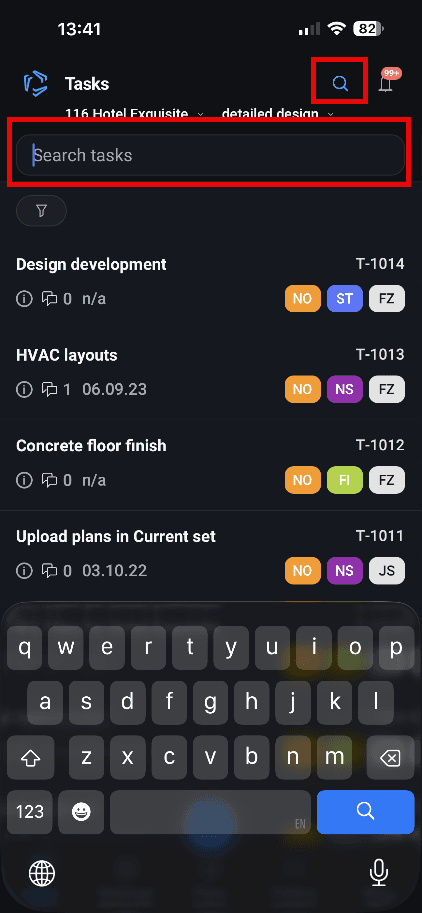
Search Bar
You can search for your projects, tasks and plans by keyword or part of a word. Click the magnifying glass icon in the top right corner to enter the necessary data.
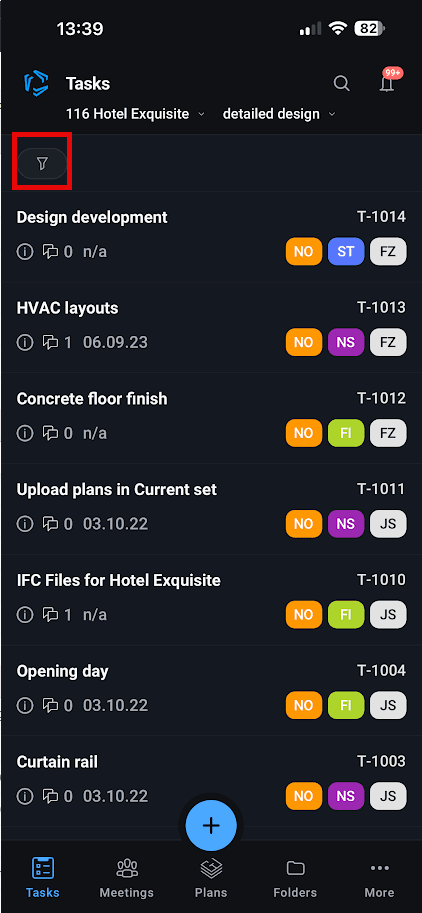
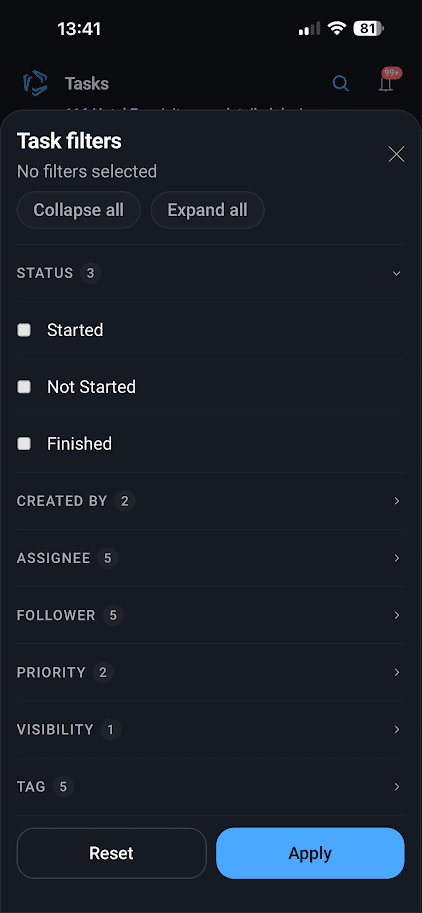
Filters
Filters in VOLUM3 help you quickly find what you're looking for—whether it’s a task, plan or something else. Instead of scrolling through long lists, you can apply filters to narrow things down and focus only on what matters to you.
Access them by clicking on the funnel icon in the top left corner.
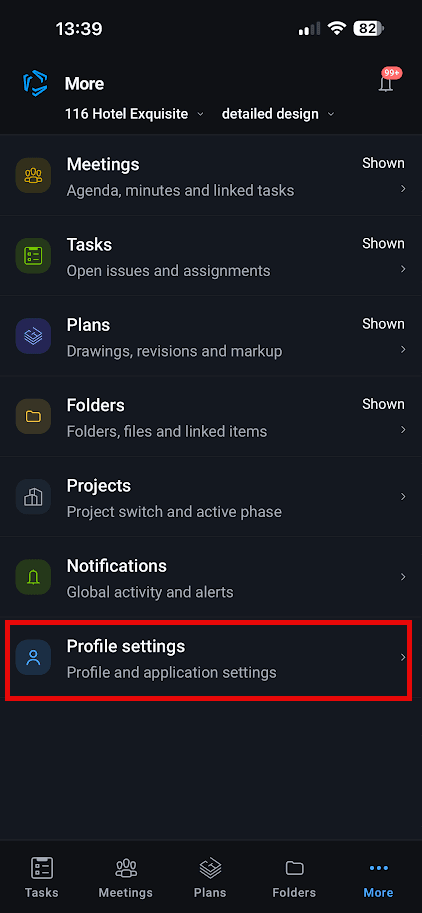
Profile settings
Click on the More button (three dots icon) in the bottom right corner and go to Profie settings on the bottom of the screen to manage your profile settings or log out.
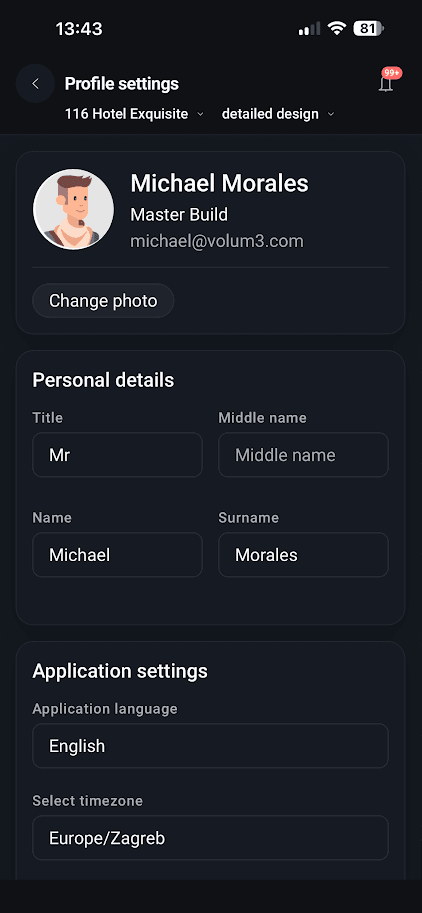
In the Profile settings page, edit your profile details (name, phone number, password..) and set the language you want to use VOLUM3 on.
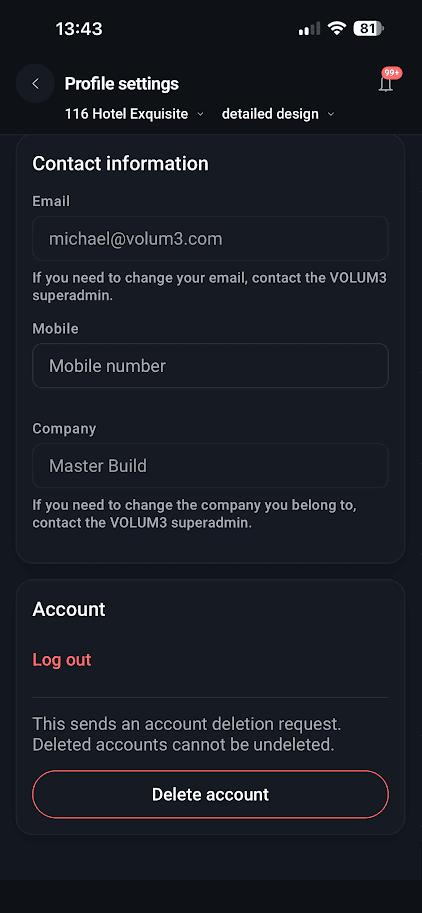
Also, on the bottom of the screen you can log out or delete your account by clicking on the “delete account” button.
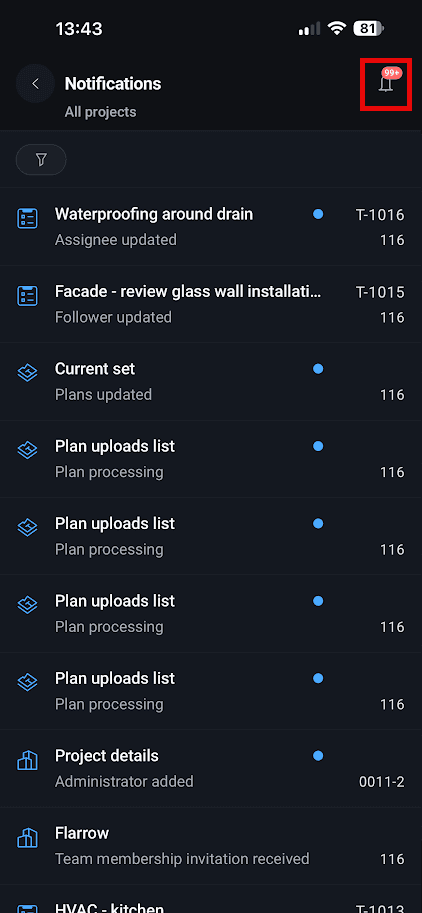
Notifications
Click on the bell icon to access your notifications and keep up to date with everything that is happening on the projects you are working on.
Your notification settings cannot be changed in the app - they stay the same as they are on the web platform.
Stage selector
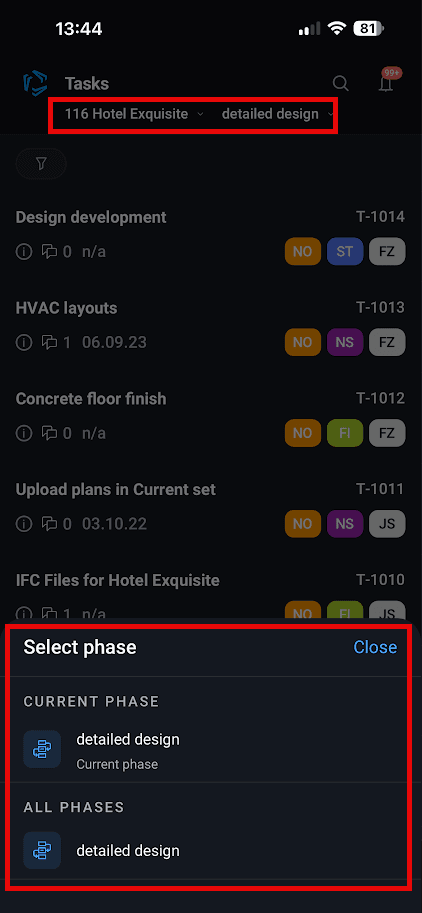
To change the stage of the project, click on the stage on the top of the screen and the dropdown menu will open showing you all the stages of the project you are currently working on. Then, just select the stage you want to see.
Tasks
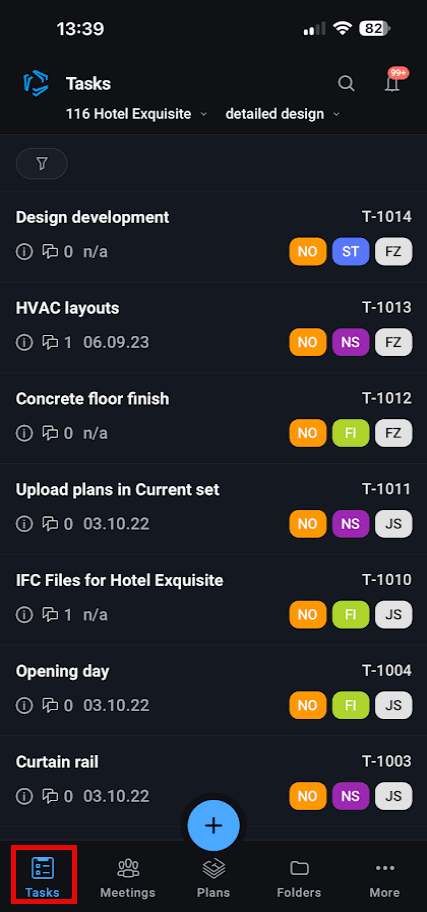
Accessing
Click on the Tasks module icon on the toolbar located on the bottom of your screen to access Tasks.
List
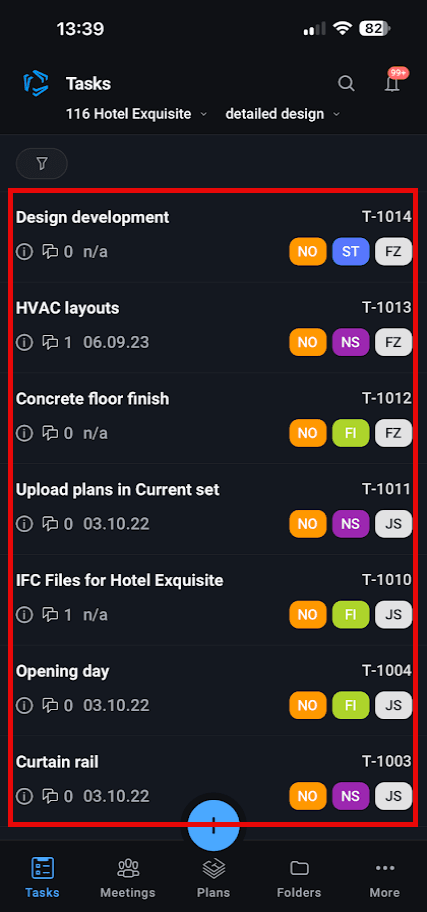
The task list is your central hub for all tasks on the project. From the list you can see the id and title, priority, status and the owner of each task.
The status is shown by the color of the rectagle and the two letters under the task ID and priority is written under it.
Filters
Filters are one of the most powerful features in VOLUM3, allowing users to quickly find relevant tasks as task lists grow. Users can filter tasks based on status, assigned users, deadline date, tags, general date ranges etc. ensuring efficient navigation and task management. Multiple filters can be applied simultaneously, and the filtering logic is additive, meaning a larger set of data is displayed when multiple filters are used together.
Available filters in task list are:
- Status – Filters tasks based on their current progress, such as Not Started, Started, Finished, Closed or Canceled
- Created By – Filters tasks by the user who originally created them.
- Assignee – Shows tasks assigned to a specific user, helping track individual responsibilities.
- Follower – Filters tasks where a user is listed as a follower, ensuring they stay updated on relevant work.
- Priority – Allows filtering tasks by urgency, including Low, Normal, High, and Urgent.
- Visibility – Filters tasks based on whether they are Public (visible to all project participants) or Private (restricted to task owners, assignees, and followers).
- Tag – Enables filtering by tags assigned to tasks, improving categorization across projects.
- Meeting – Shows tasks that are linked to a specific meeting, ensuring related discussions and actions are easily accessible.
- Discipline – Filters tasks based on predefined project disciplines, such as Architecture, Structural, or MEP, for better organization.
- Environment – Allows filtering tasks based on environmental conditions or specific project-related settings.
- Sites – Filters tasks by specific project sites, useful for multi-site projects or phased developments.
- Buildings – Displays tasks related to specific buildings within a project, useful for large developments with multiple structures.
- Storeys – Filters tasks by building floors or levels, making it easier to track work per floor.
- Rooms – Allows filtering of tasks linked to specific rooms, useful for detailed project coordination.
- Room Types – Filters tasks by room categories such as offices, bathrooms, or storage spaces.
- Room Groups – Groups tasks by room clusters or predefined categories, aiding in large-scale organization.
- Zones – Filters tasks by designated project zones, such as residential, commercial, or service areas.
- Entrances – Displays tasks related to specific building or site entrances.
- Expansion Joints – Filters tasks concerning expansion joints, ensuring structural considerations are tracked.
- Start / Due – Allows filtering based on task start and due dates to track scheduling and deadlines.
- Finished Date – Filters tasks by their completion date for reviewing past work.
- Created At – Shows tasks based on when they were initially created, helping with project history tracking.
- Last Changed – Filters tasks based on the most recent updates or modifications.
Search
Users in VOLUM3 can search for tasks using keywords, making it easier to locate specific items. The search function looks through key fields, including Task Title, Task Description, comments and Task number (task ID)
Search works in combination with filters, allowing users to refine results and quickly find relevant tasks within large lists.
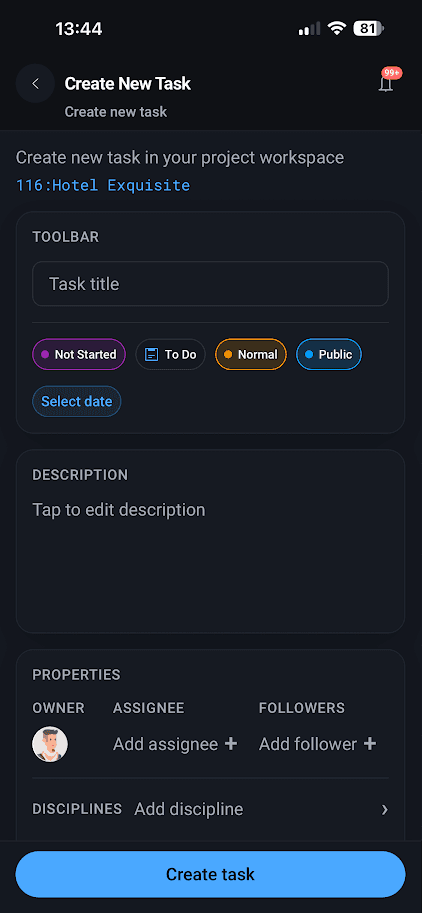
Creating a Task
Tasks in VOLUM3 can be created through multiple entry points for better workflow integration:
- Tasks Module – Click the + button within the Tasks module.
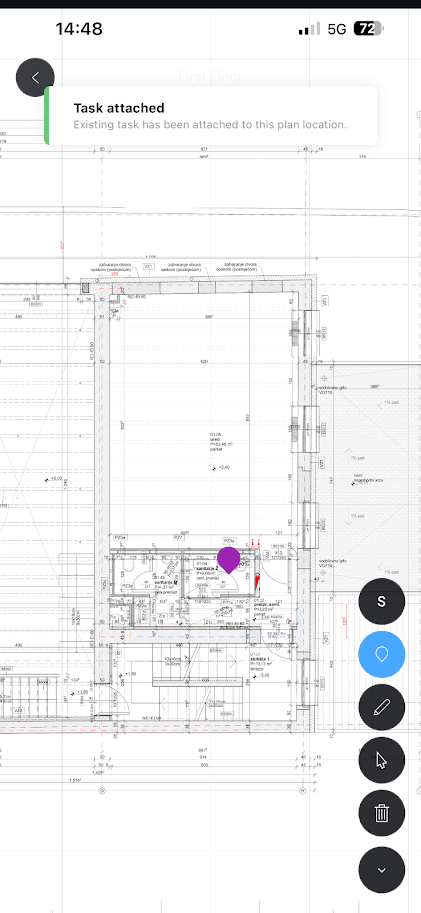
- Plans Module – To create a task, click on the pin icon located on the toolbar, then place the task directly onto your desired position
Task Flyout
The Task Flyout on the mobile app appears when you click on a Task. It is a central place for editing all Task details.
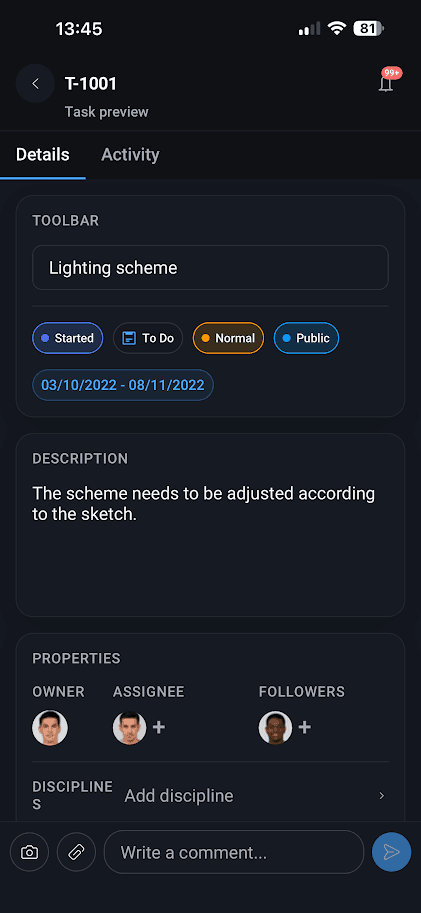
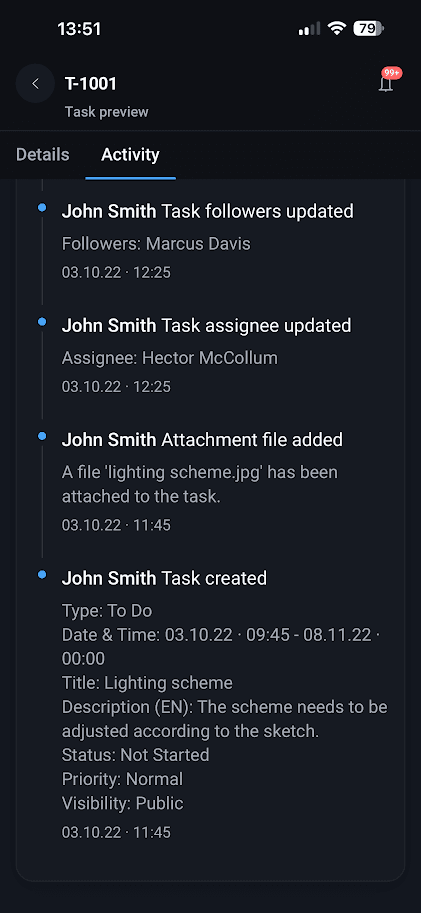
Flyout Tabs
The Task Flyout Window in VOLUM3 consists of 2 tabs, Details and Activity, each designed to manage different aspects of a task efficiently:
Details tab consists of:
- Toolbar - for managing task status, type, priority, and privacy settings — allowing users to organize and update tasks faster
- Description - allows for a detailed explanation, including specific instructions and relevant details. The description has a 2000-character limit.
- Properties – Displays and allows editing of essential task properties (e.g., type, priority, due date).
- Files – See all files attached to the Task
- Comments – See all comments on the Task
- Checklist – Facilitates creating and managing checklist items for task completion.
- History – Maintains an activity log of all changes made to the task.
- Relations– Enables linking related tasks for better workflow organization.
The Activity tab serves as a history tab on the platform and helps you track every change made on the Task.
Toolbar
The task toolbar provides quick access to the most important task management controls, allowing users to organize, update, and review tasks more efficiently without opening additional menus.
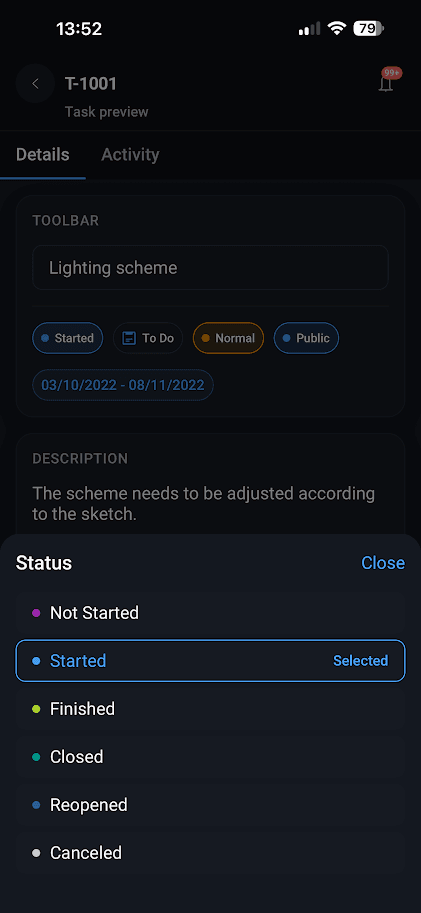
Task Status
Easily update and track the current progress of a task by clicking on the status.Quickly switch between statuses:
- Not Started
- Started
- Finished
- Closed
- Reopened
- Cancelled
to keep the team aligned on project progress in real time.
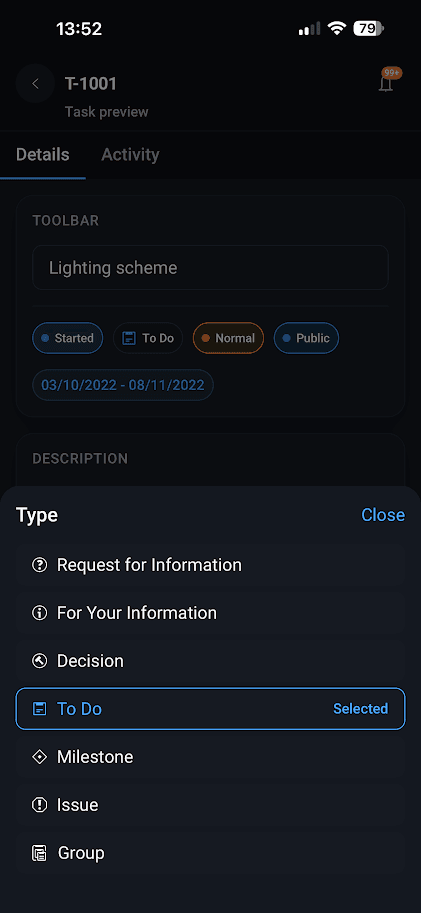
Task Type
Define the category or purpose of the task for better organization and filtering. Task types can represent different workflows such as:
- Request for information - Used for asking questions to project participants
- For Your Information - Purely informational tasks that do not require any action.
- Decision - Tasks with a clear decision from stakeholders
- To Do - Standard work items that need to be completed
- Milestone - Represents key project checkpoints or crucial deadlines
- Issue - Captures problems that need resolution
- Group - Used to group multiple related tasks into a single logical unit, making them easier to organize and track as part of the same group.
Task Priority
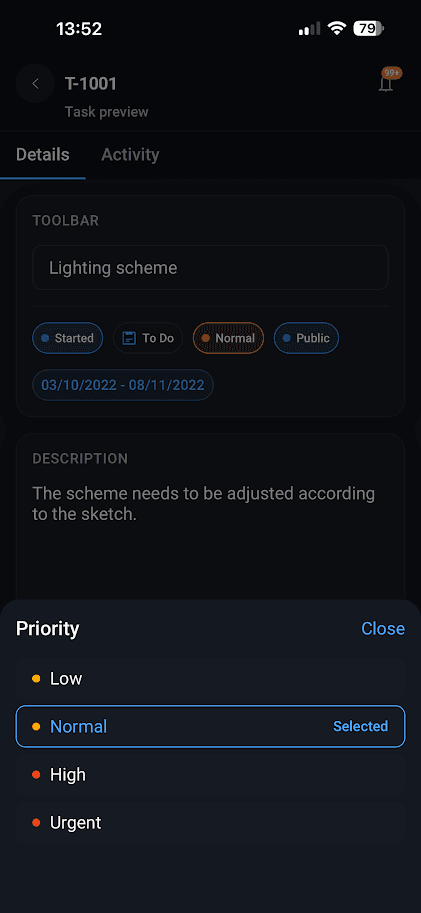
Set the importance level of a task to help teams focus on critical activities first. Priority levels:
- Low
- Normal
- High
- Urgent
Task Privacy
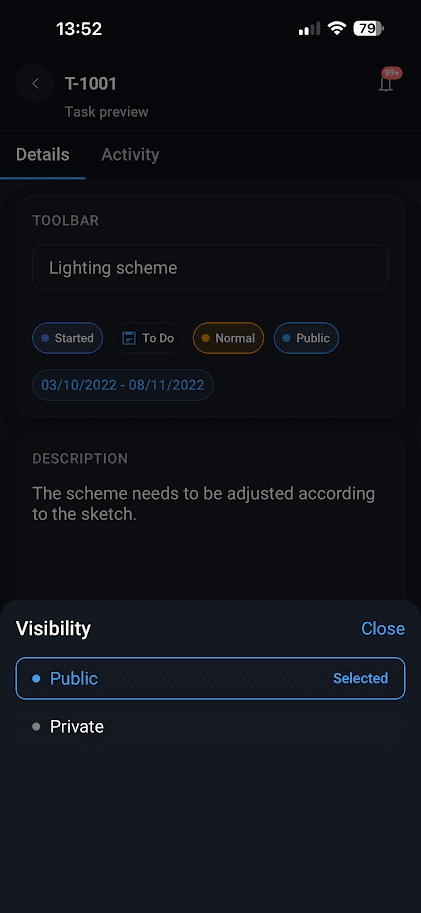
Control who can access and view specific tasks.
- Public - everyone on the project can see the Task
- Private - only people added to the Task as assignees or followers can see it
Properties
Task Roles
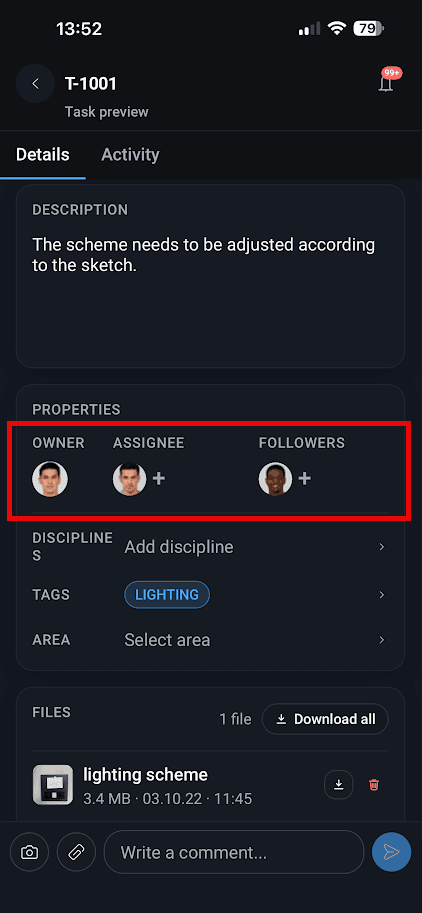
Each task in VOLUM3 has three predefined roles to ensure clear responsibility and communication:
- Owner – The user who created the task. This role is non-editable.
- Assignee – The person responsible for completing the task. Ideally, only one should be assigned for clarity.
- Followers – Users who need to stay informed about the task's progress but are not responsible for its completion.
Tasks can be assigned to individuals or teams. Users can reassign tasks if responsibilities change.
Discipline
Each task in VOLUM3 can be assigned a discipline (such as Architecture, Structural, or HVAC) to improve filtering, organization, and retrieval within the project. Each project has a predefined set of disciplines that are set in Project Settings.
The disciplines appear as different teams join on the project, for example if only architecture and HVAC teams are on the project, only they will be visible in this section.
Tags
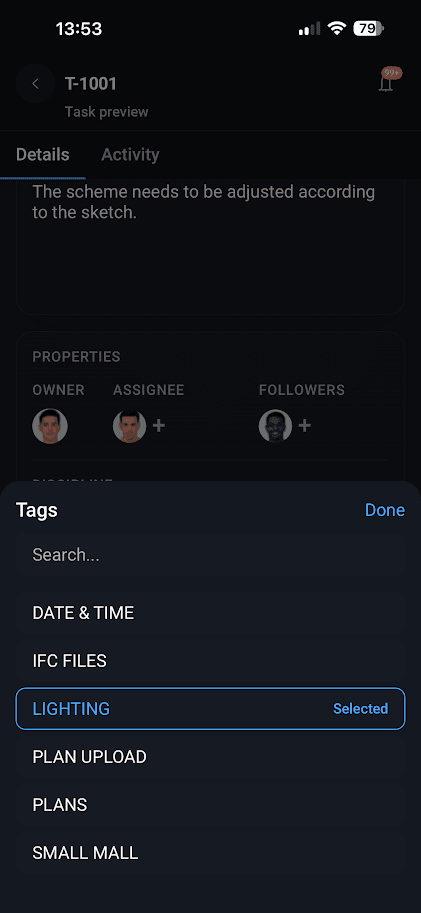
Tags in VOLUM3 are labels used to categorize items across all modules, including tasks, plans, and specifications.
They can be searched, filtered, and customized to improve workflow and organization.
Users can assign multiple tags to a single item for better categorization and retrieval.
Area
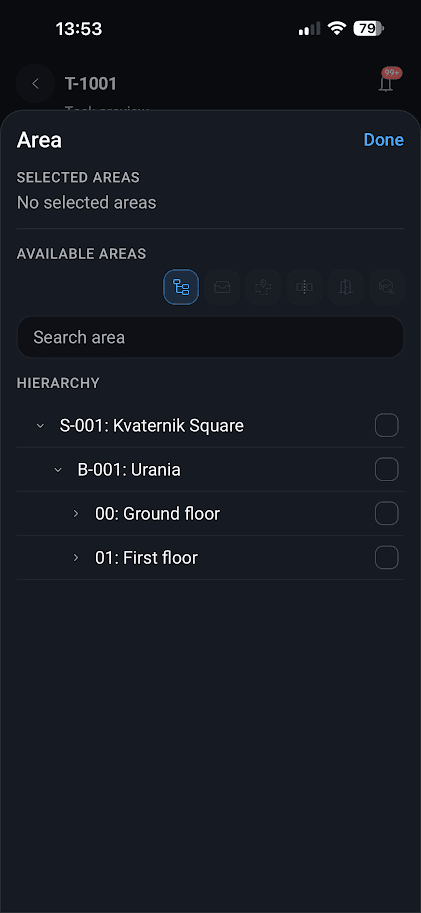
The Area field in VOLUM3 tasks Window allows users to assign tasks to specific locations within a project for better organization and tracking.
Areas are predefined in the Areas module and can be assigned to one or multiple tasks if they span different locations. Users can filter tasks by area for quick access, ensuring better spatial organization and efficient task management.
Relations
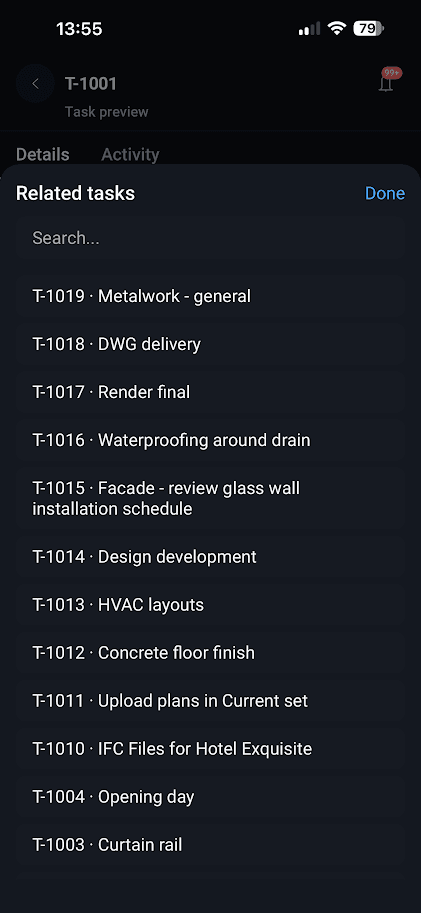
Related Tasks allow users to connect tasks that are linked or dependent on each other.
Add Related Tasks by clicking on the “+Add” button on the right.
Checklist
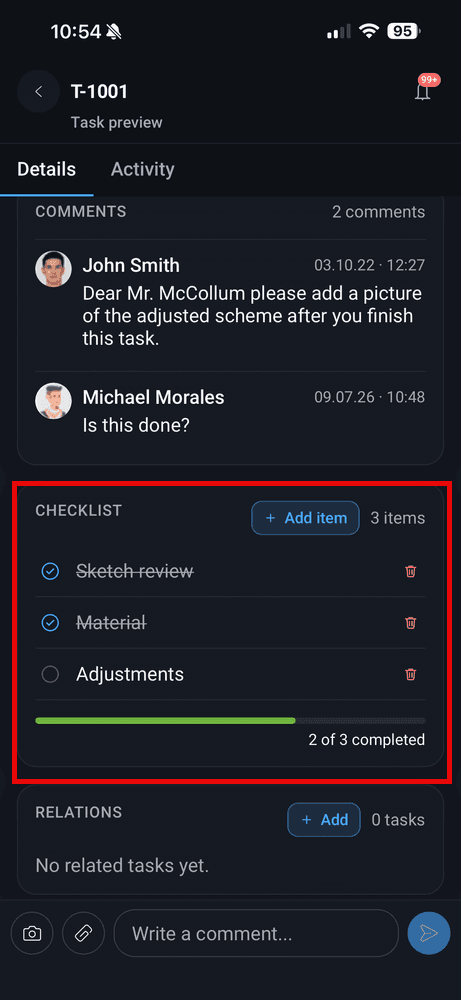
Tasks in VOLUM3 can include a checklist to track subtasks and monitor progress on detailed work items. Users can create an unlimited number of checklist items, ensuring flexibility in task management. When an item is checked off, the date, time, and user who completed it are recorded, providing clear accountability. Checklists help break down complex tasks into smaller, trackable actions, improving workflow efficiency and task completion tracking.
Comments
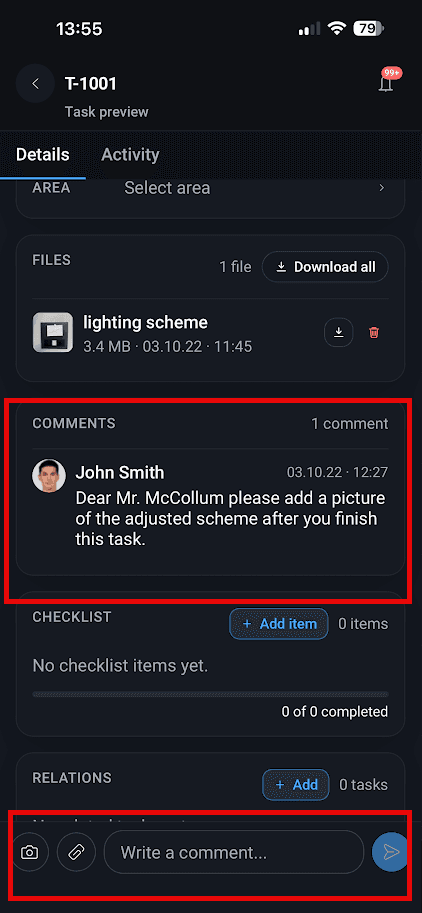
Users can comment on tasks for better collaboration. Each comment can trigger notification depending on your personal settings. Add comments by writing in the comment box on the bottom of your screen.
Files
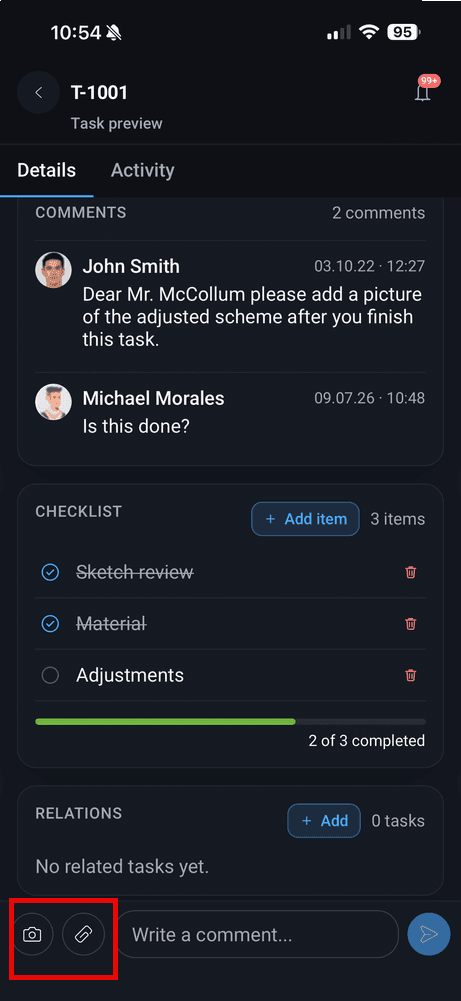
You can also upload Files on a Task by clicking on the attach button in the bottom left and selecting the file you want to upload. Take photos in the moment and attach them to the Task by clicking on the camera icon.
Also, you can take a photo on your phone directly from the VOLUM3 app by clicking on the camera icon.
Notifications
Notifications in VOLUM3 are triggered by various task activities, ensuring users stay informed about updates and changes. Each user can individually configure their preferred notification settings, choosing between in-app notifications, email alerts, or a daily digest.
Users receive notifications when:
- A task is assigned to them or they are added as a follower.
- Someone comments on the task or uploads a file.
- The task status is updated.
- Task dates change, or a deadline is approaching.
- A checklist item’s status is updated.
- A PDF report is generated and ready for download.
Meetings
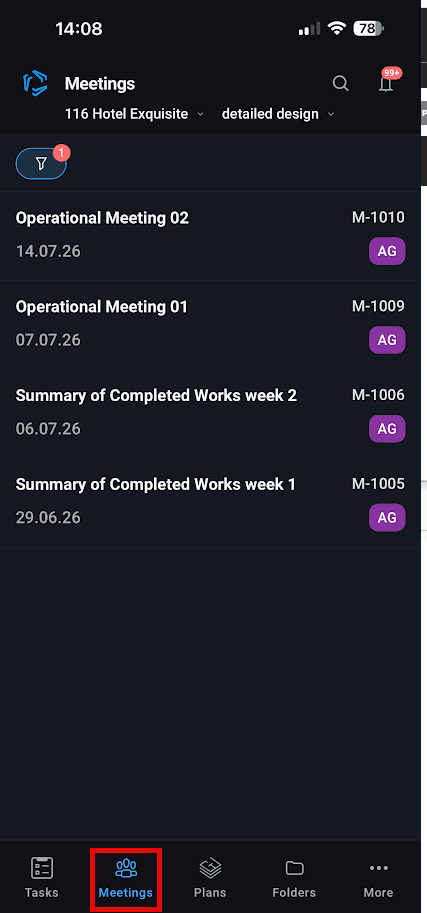
The Meetings screen in the mobile app lets you quickly review meeting content while on the go. You can browse meeting groups and tasks, view task details, and see the number of attached comments and files.
Unlike the web platform, the mobile app is designed for viewing meeting content and does not include the full meeting editing functionality.
Meeting View Levels
Use the Level button in the upper-left corner to control how much information is displayed.
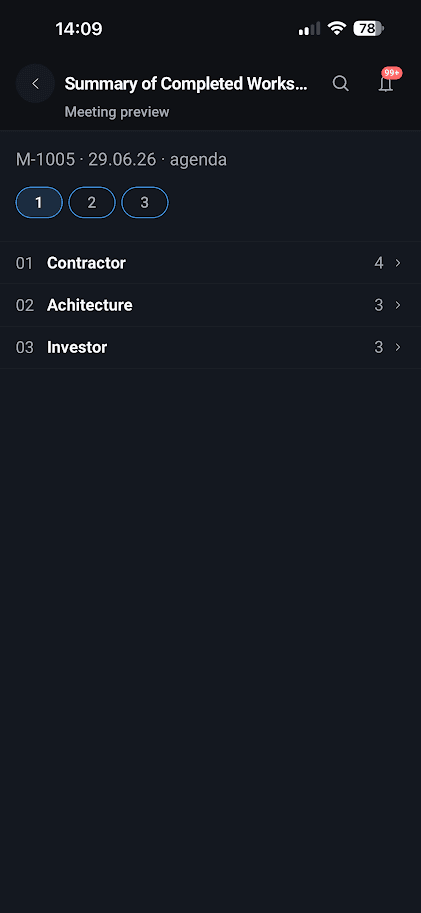
Level 1 – Groups
Displays only the meeting groups, providing a simple overview of the meeting structure.
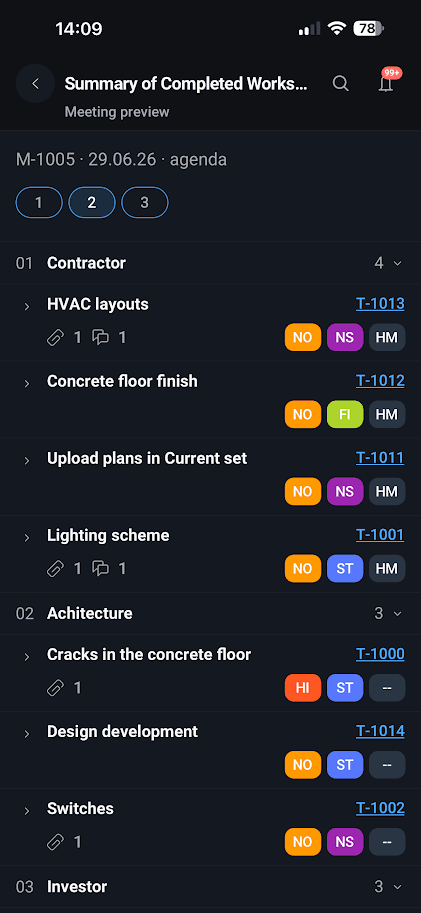
Level 2 – Groups and Tasks
Displays all groups with their tasks. Each task shows:
- Task status
- Task Priority
- Number of comments
- Number of attached files
This level is ideal for quickly identifying tasks that require attention.
Level 3 – Task Details
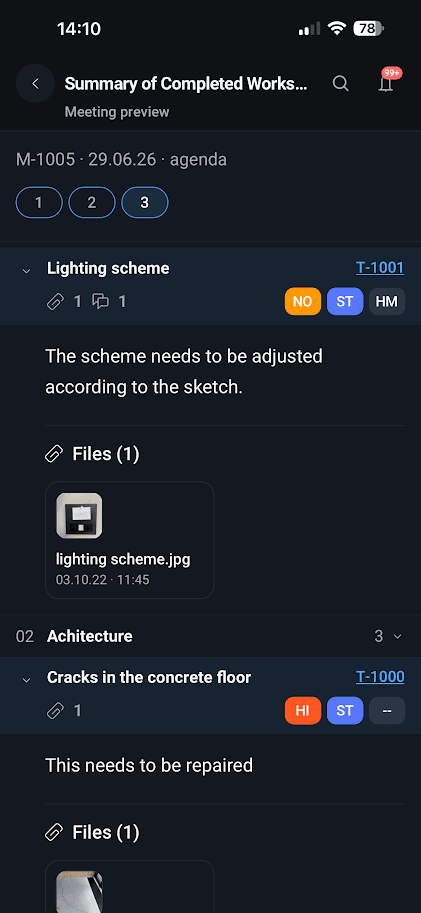
Displays groups, tasks, and task descriptions. Each task also shows:
- Full task description
- Comments
- Attached files
Use this level when you need to review the complete meeting content without opening individual tasks.
Opening and Editing Tasks
Tap a Task to see the full description and its attachments. To open a Task flyout, click on the Task ID on the right side of the screen. Tasks can be viewed and edited in the same way as in the Tasks module. You can update task details, add comments, attach files, change the task status, and perform other available task actions directly from the meeting.
Plans
Accessing the module
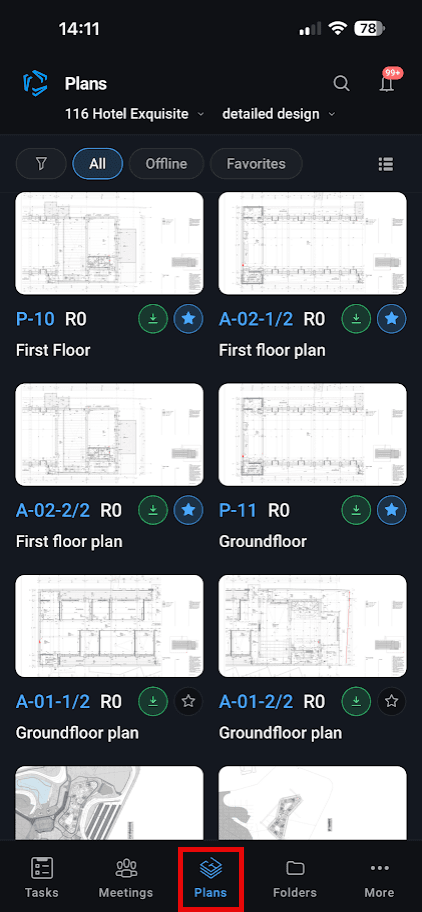
To access the Plans module, click on the Plans icon in the toolbar.
Current Set
On the mobile app, only the current set is available.
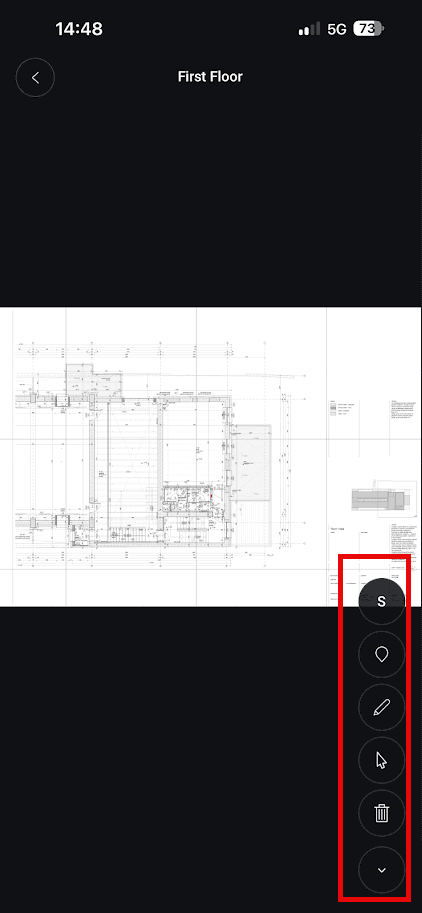
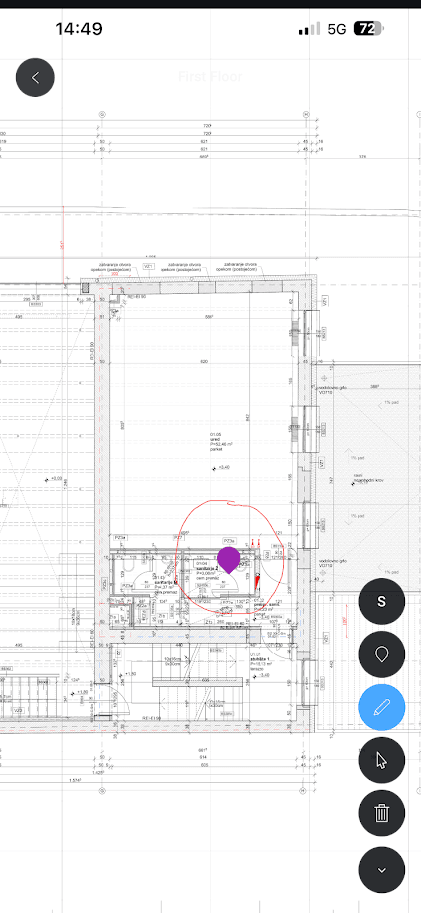
Click on the Plan thumbnail to open it. You can add markups and tasks to your Plans. By clicking on arrow in bottom left corner of the screen, the markup toolbar will open.
You can:
- Use freehand markers if you want to point something or mark up
- Create or add an existing task that is private (or public) and link it to the plan. Click on the pin to open the Task flyout
You can also:
- Change the size of your Markups by selecting the S,M,L or XL size in the Toolbar.
- Delete the markups by selecting them and clicking on the Trash icon
List/Grid view
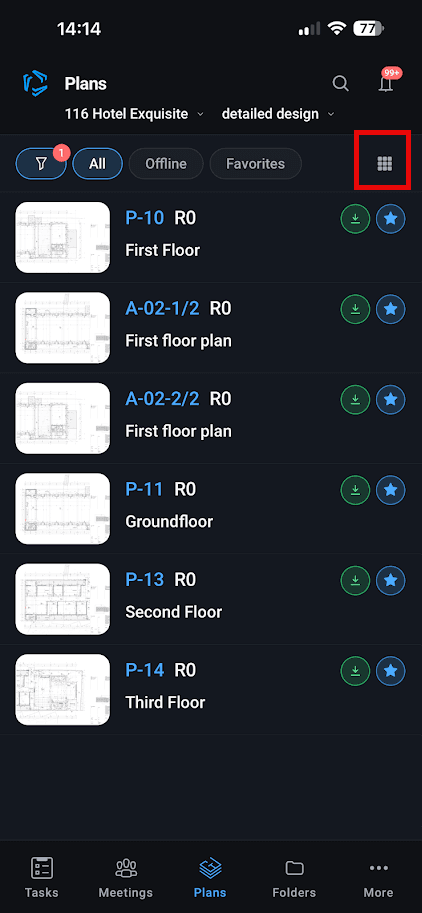
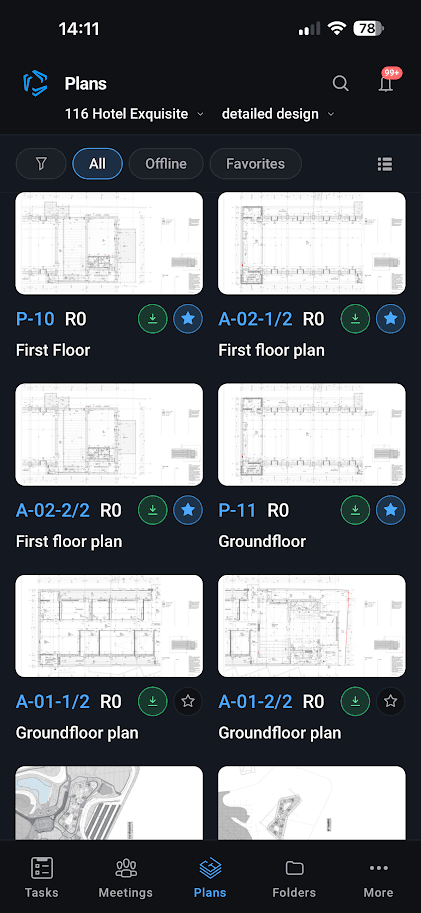
You can switch between Grid view and List view by tapping the icon in the top-right corner.
List View
Displays plans in a structured list with detailed information for easier navigation, sorting, and document management.
Grid View
Displays plans as visual thumbnails for faster browsing and easier recognition of drawings and layouts.
Search
Use the search bar to find plans by their title.
Filters
Use different filters to easily find your wanted plans:
- Team – Filter items by the responsible team or company.
- Added by – Show who created or added the item.
- Tag – Filter items using labels or keywords.
- Status – Show the current state of an item.
- Favourites – Display only items marked as favourites.
- Revision Number – Filter items by their revision or version.
- Date range – Show items within a selected time period.
- Delivery – Filter items by delivery or submission package.
- Rooms – Filter items by individual rooms.
- Room Types – Group or filter rooms by their type.
- Room groups – Filter by custom groups of rooms.
- Zones – Filter items by project zones.
- Entrances – Filter items by building entrances.
- Expansion joints – Filter items by expansion joints.
- Storeys – Filter items by building floor or level.
- Buildings – Filter items by building.
- Sites – Filter items by project site or location.
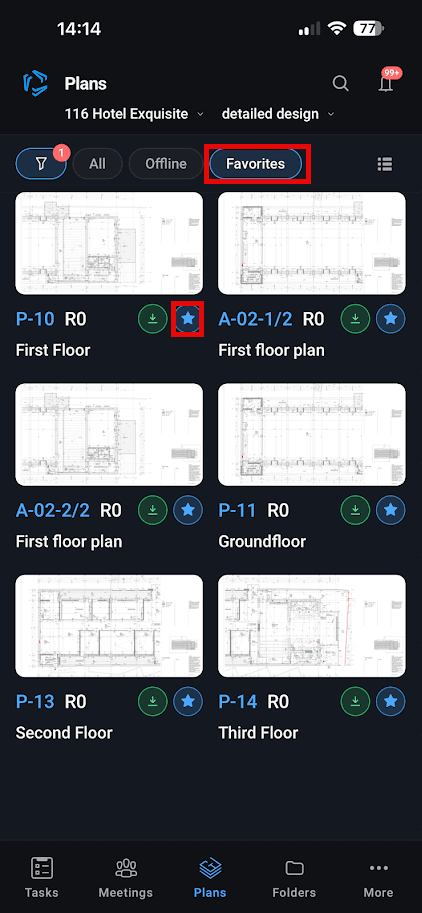
Favorites
Mark the star next to the plan to add it to your favorites.
Access you favorite plans by clicking on the Favorites tab on the top of the screen or through filters.
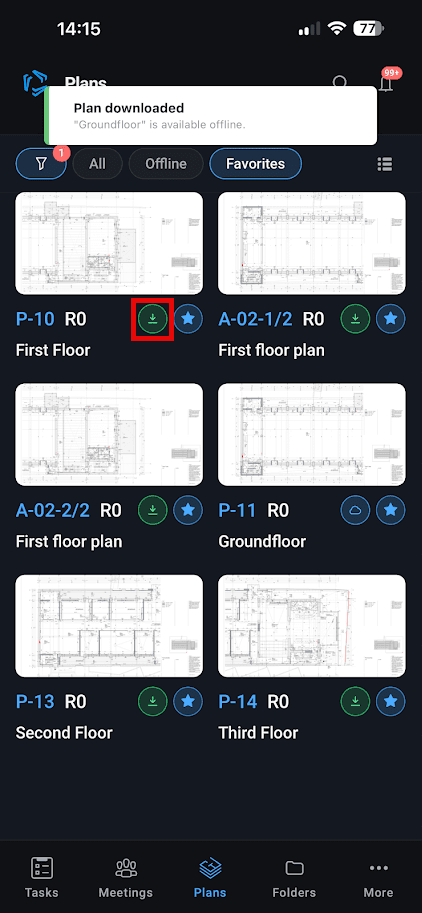
Download
On the mobile app you can download the plans from the current set on your phone and then work on them without internet connection in the offline mode.
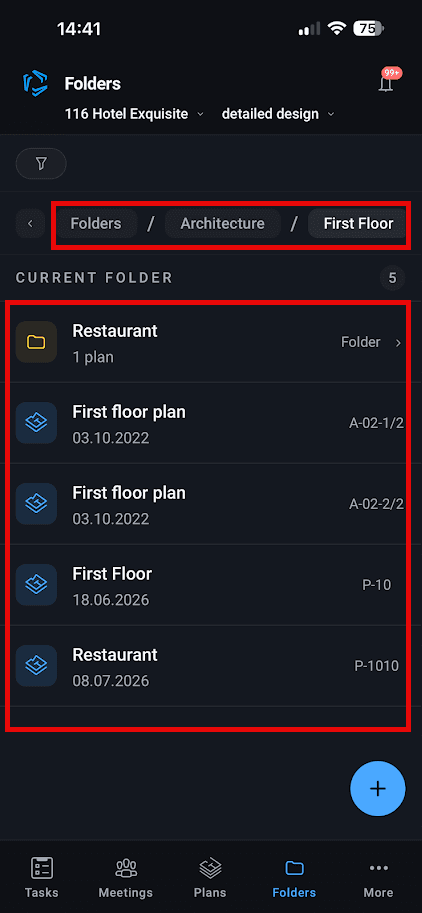
Folders
Organize plans, files and photos into folders and subfolders for easier navigation. You can create up to 3 folder levels and add plans where they belong.
Tap the plus icon in the bottom-right corner to create a new folder or add items to an existing one.
At the top of the screen, you can see the full folder path and move between opened folder levels.
Offline Mode
Introduction
Offline Mode allows users to access project data even without an internet connection, making VOLUM3 reliable for construction sites, remote locations, and field work.
Users can download plans and work on tasks directly on their mobile device while offline. All changes, annotations, comments, and task updates are automatically synchronized once the connection is restored.
Offline Mode helps teams stay productive on-site by ensuring uninterrupted access to critical project information anytime and anywhere.
Plans
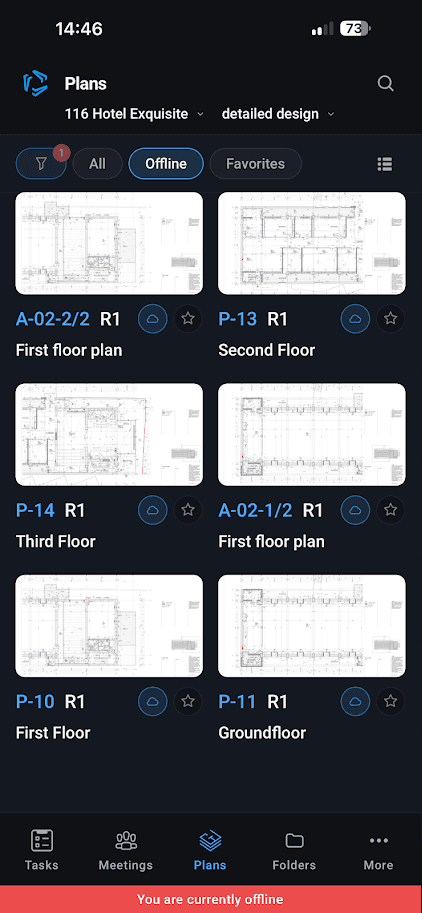
To work on the plans in the offline mode, download them first by clicking on the download button. To download the plan you need to be connected to the internet.
After that, go to the offline tab and there you will see all the plans you have downloaded.
You can work on them just like you are online and when you connect back to the internet all of your work will sync automatically.
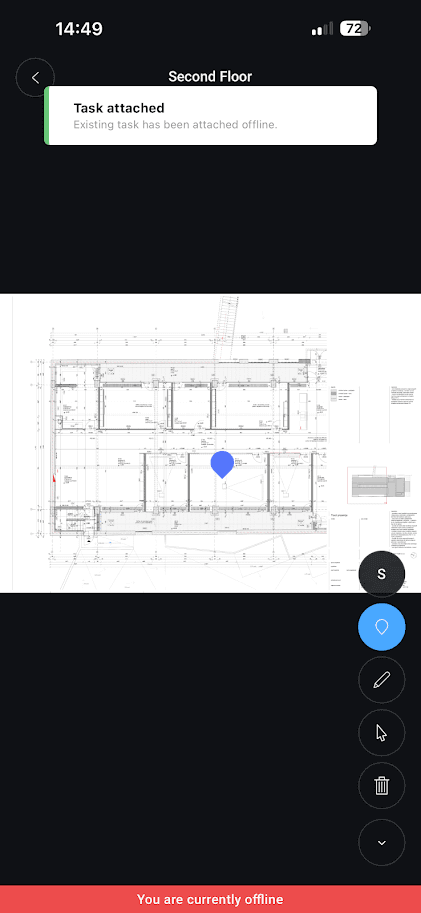
Tasks
While offline, users can continue managing tasks normally. Available actions include:
- Creating new tasks
- Updating task statuses
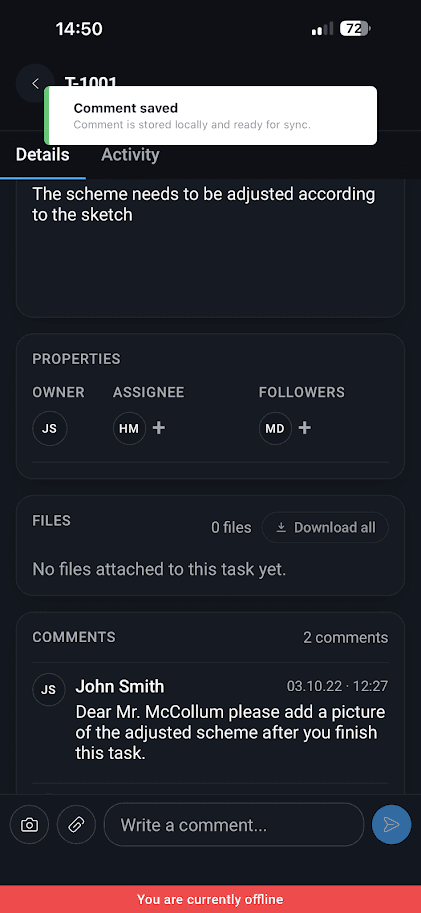
- Adding comments
- Attaching photos from the device camera or gallery
- Editing task information
- Completing or closing tasks
All changes are stored locally on the device until the internet connection becomes available again.
Offline Indicators
The application clearly indicates when the device is working in Offline Mode and which projects or data are available locally on the device.
Benefits of Offline Mode
- Uninterrupted work on-site
- Faster access to project information
- Reduced dependency on unstable internet connections
- Improved productivity for field teams
- Reliable access to critical project documentation anytime and anywhere

Trg E. Kvaternika 3/3, 10 000 Zagreb, Croatia
+ 385 1 333 1909 info@volum3.com