
Bill of Quantities
The Bill of Quantities (BoQ) module in VOLUM3 is meticulously crafted to provide real-time tracking of project costs. Seamlessly integrated with your project specifications, it offers a unique feature: utilizing specifications for precise descriptions and directly integrating the entire BoQ into tender processes. This collaborative tool allows multiple consultants to simultaneously contribute to and refine the BoQ, ensuring comprehensive and efficient project management. Below, discover comprehensive instructions and insightful tips for leveraging the BoQ module effectively.
Accessing the BoQ module
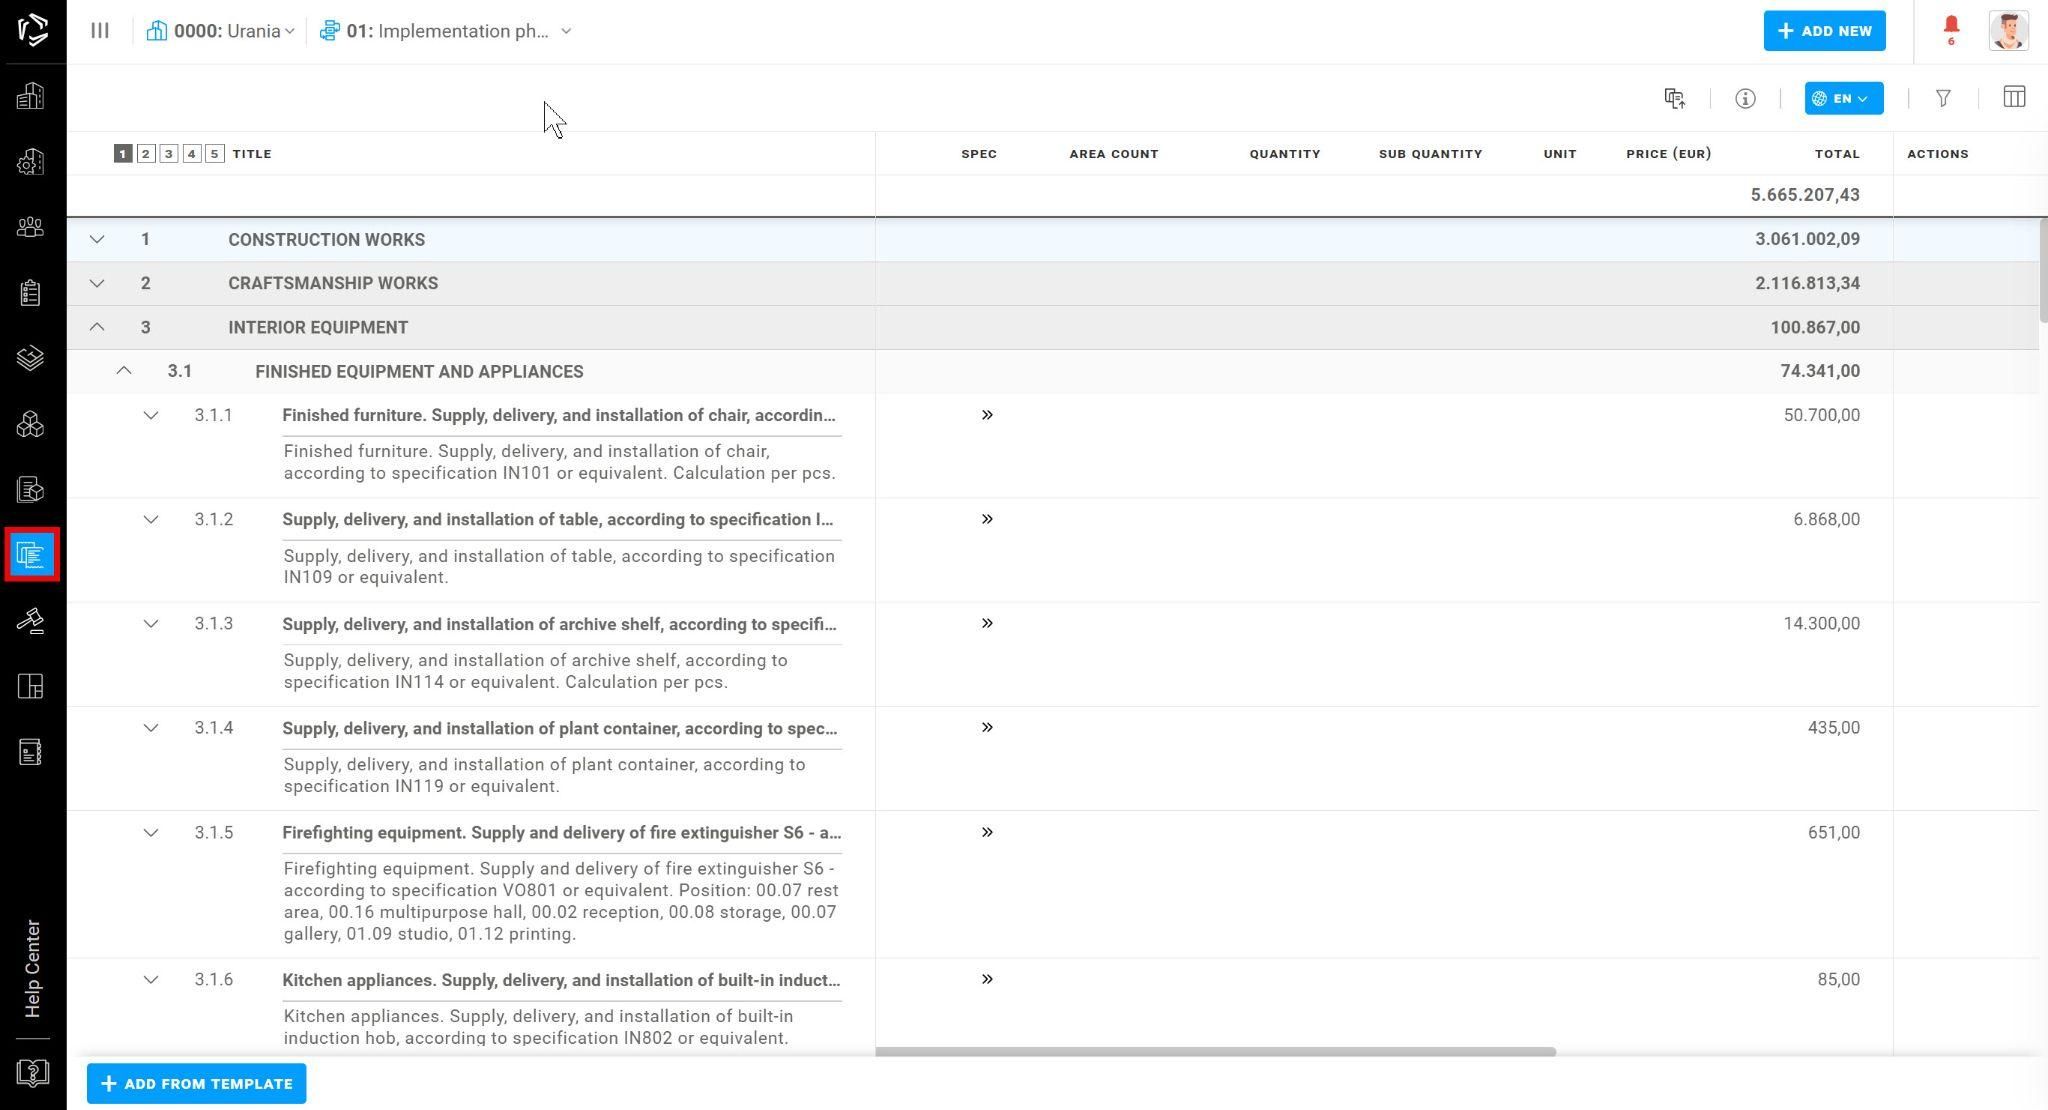
The Bill of Quantities (BoQ) is integrated as a module in VOLUM3. To open the BoQ module, click on the BoQ icon located in the vertical menu bar on the left side of the screen.
Hierarchy of BoQ Table items
BoQ Table items hierarchy
In VOLUM3, the Bill of Quantities (BoQ) is structured with five hierarchical levels, each serving a distinct role in organizing project data and enhancing cost visibility:
- Category: Main cost categories (e.g., Construction Works, Equipment).
- Type: Specific cost types within each category (e.g., Earthworks, Concrete Works under Construction Works).
- Item Group: Groups of items within subcategories (e.g., Foundation, Wall, Banquet Furniture, Room Equipment).
- Items + Specifications (optional): Detailed descriptions of works, materials, or equipment with quantities, unit prices, and totals.
- Elements: Instances of item contents throughout the project positions.
Collapsing these levels improves readability by presenting a summarized view, making it easier to observe how budget allocations impact overall project costs.
In the top left corner, you will find five boxes labelled with numbers from 1 to 5. For example, pressing box 3 will display the table with levels 1 to 3, hiding levels 4 and 5. This feature allows you to customize your view and focus on specific levels of detail as needed.

Detailed description of levels
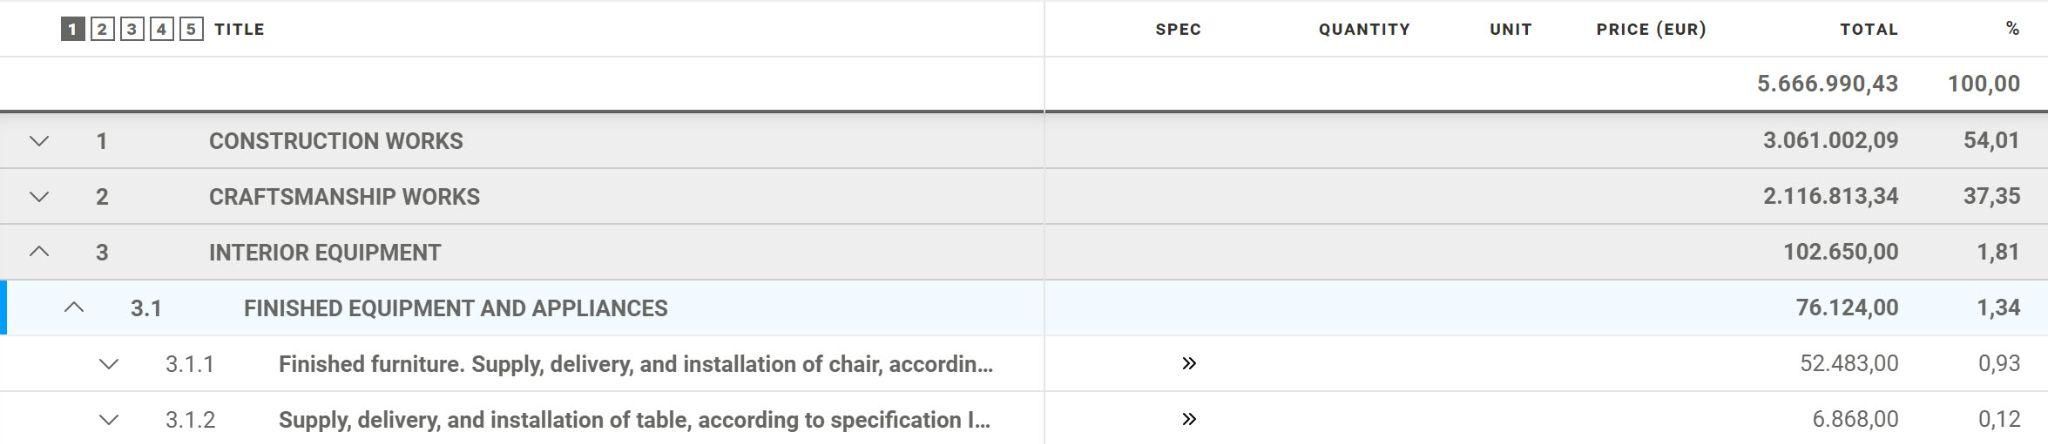
Category (level 1)
The "Category" level represents the main cost categories within the Bill of Quantities (BoQ). These categories are broad classifications that encompass all the major aspects of the construction project. They provide a high-level view of the project's scope and summarizing the overall budget and work requirements.
The "Total" value is not editable, as it automatically calculates the combined value of all Type items within the group.
Type (level 2)
The "Type" level provides a more detailed breakdown within each Category. It specifies the types of work or materials required for each major category, offering a finer level of detail that helps in understanding the specific tasks and resources needed for the project.
The "Total" value is not editable, as it automatically calculates the combined value of all item groups below it.
Item Group (level 3)
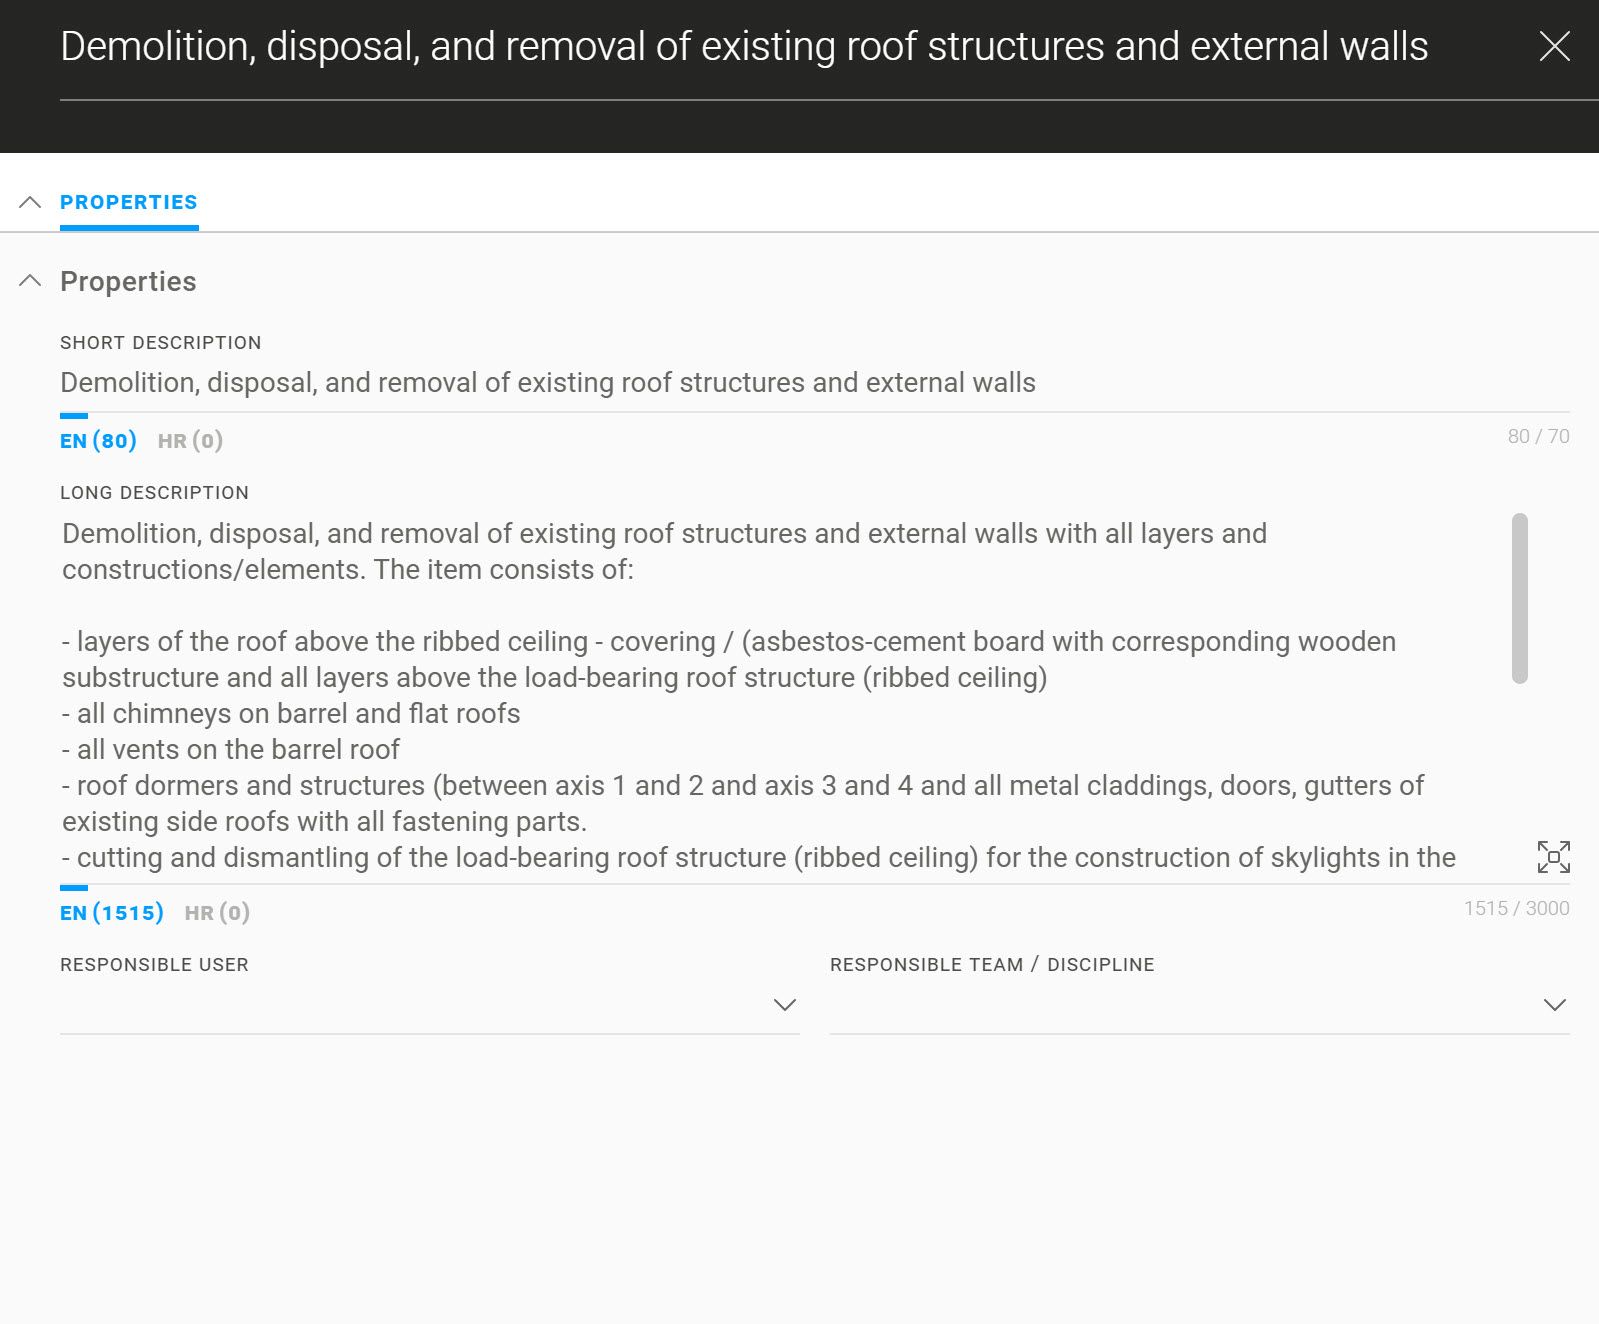
The "Item Group" section provides an in-depth breakdown of items within a specific category. Each item group includes both a brief description (short description) and an extensive description (long description). Users can edit these descriptions directly on the screen in Detailed View or via the flyout menu.
Short Description: A concise name limited to 70 characters.
Long Description: Detailed information up to 3,000 characters.
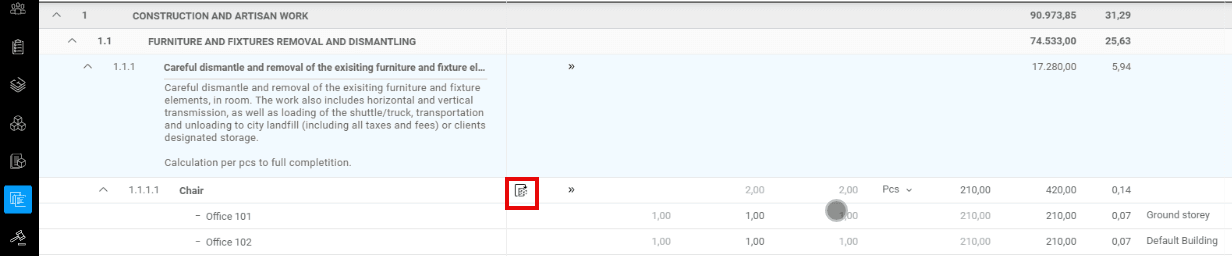
Edit the detailed description by clicking the pen icon or double-clicking the description. This allows updates to the descriptions exclusively in the Detailed View.
Total field in the table is not editable as it automatically calculates the combined value of all items in the group.
Item group Flyout Window: In the flyout menu, you can edit the following: Short Description, Long Description, Responsible Company, Responsible User, Tags
An item in a Bill of Quantities (BOQ) is a detailed description of specific labour, material, or work components required for a construction project. Each work item includes a description, quantity, and unit of measurement. Users can enter the price per unit, and the total cost is automatically calculated.
BoQ Table Details:
Quantity: Users can directly enter the quantity unless 5-level elements are added. When elements are added, the quantity is locked and auto-calculated from the elements.
Unit of Measurement: Selectable from a dropdown menu with preset options (e.g., pieces, kilograms, meters).
Price: Enter the price per unit, which is used to calculate the total cost.
Total: Automatically calculated by multiplying the quantity by the price per unit.
Percentage (%): Automatically calculated to show the item's total cost as a percentage of the largest budget item, helping to identify major budget contributors.
Item Flyout Window
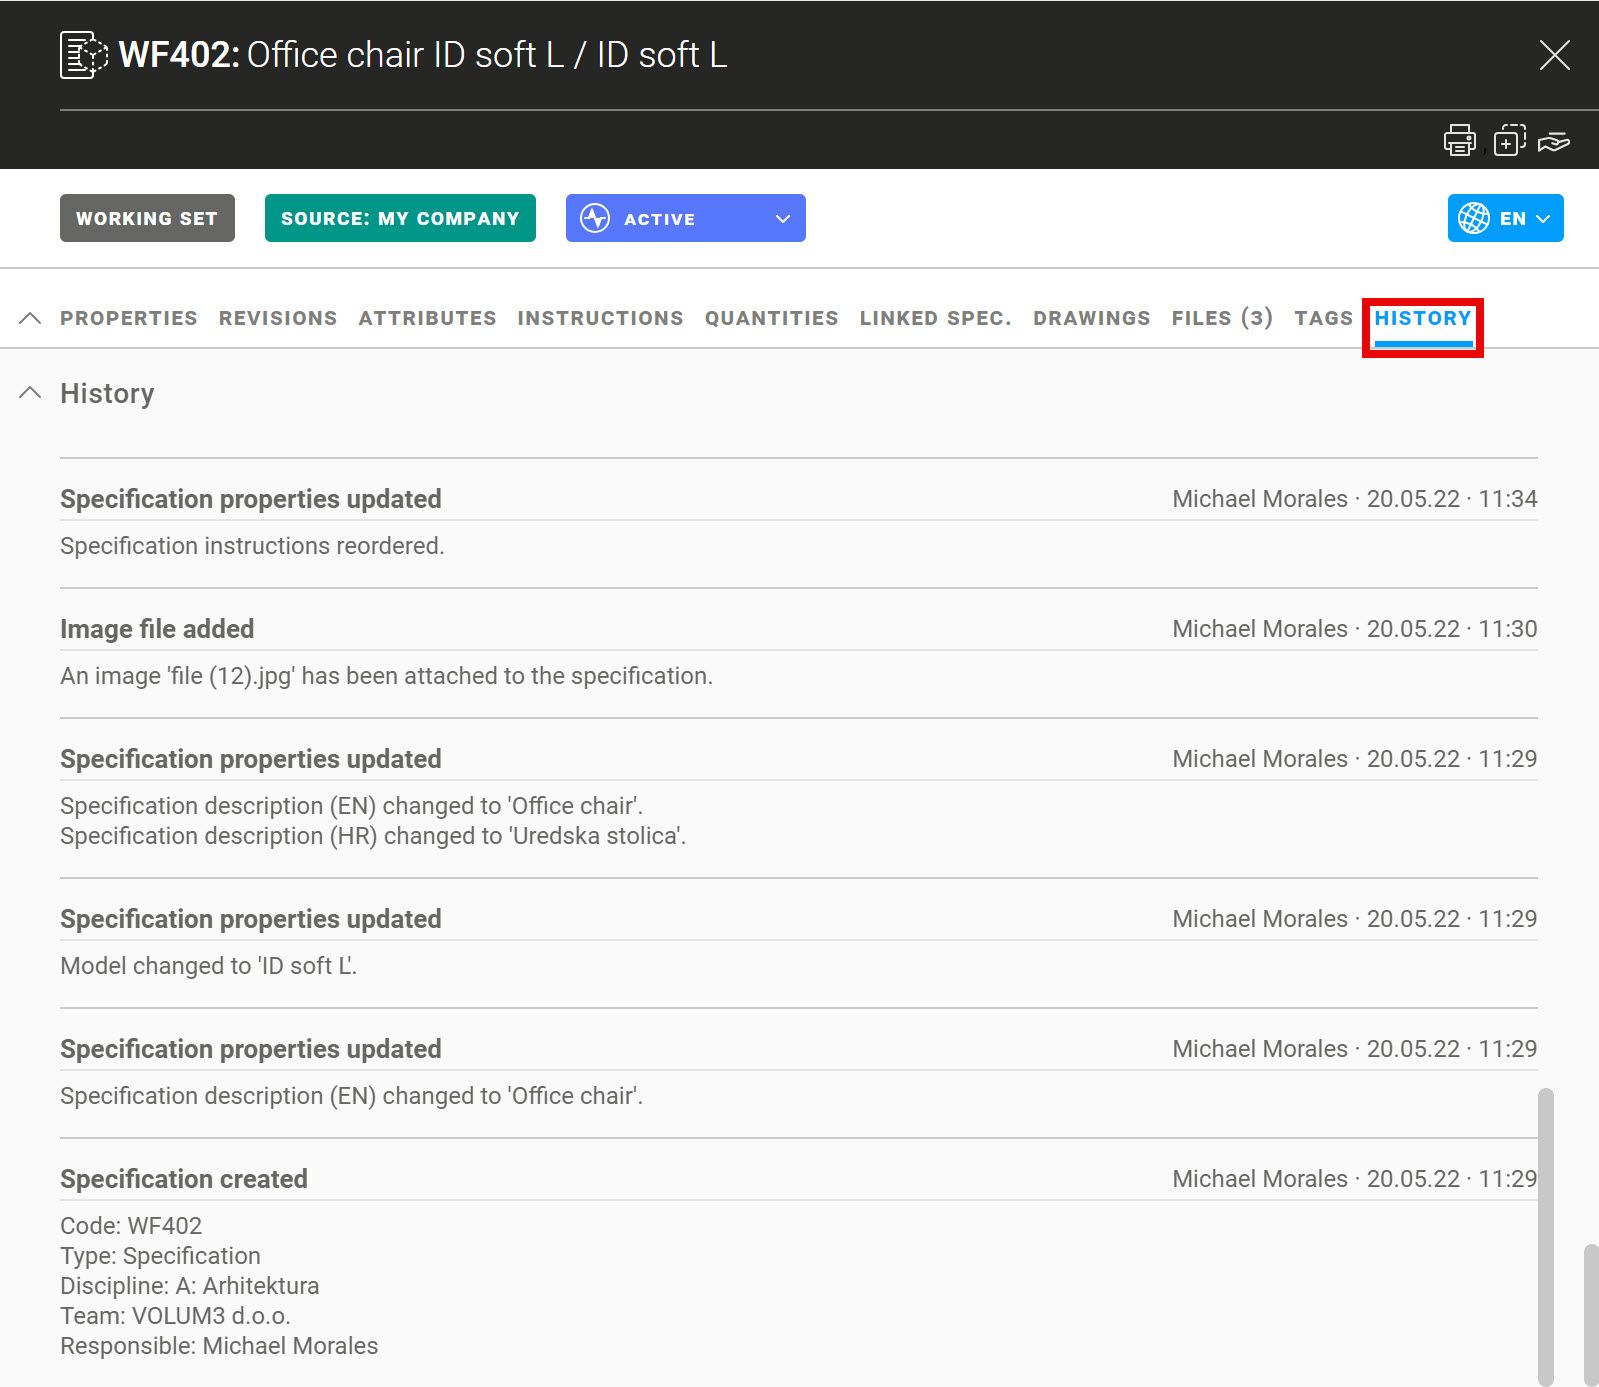
The flyout window on the right side provides a streamlined interface for accessing and editing item details in the Bill of Quantities (BOQ). It consolidates all relevant information and actions into a single, easily accessible location. Flyout Window is divided in several Tabs:
Property Tab: Includes fields for Short Description, Long Description, Responsible Company, and Responsible User.
Quantities Tab: Allows editing of Price, Unit of Measurement, and Quantity.
Tags Tab: Enables adding existing tags or creating new ones for better categorization.
History Tab: Displays a log of all changes made to the item for tracking modifications.
Available Actions:
Save Item as Template: Save the current item for future use.
Load Item from Template: Load a saved template item and overwrite the current item.
Convert to Specification: Convert the item into a detailed specification.
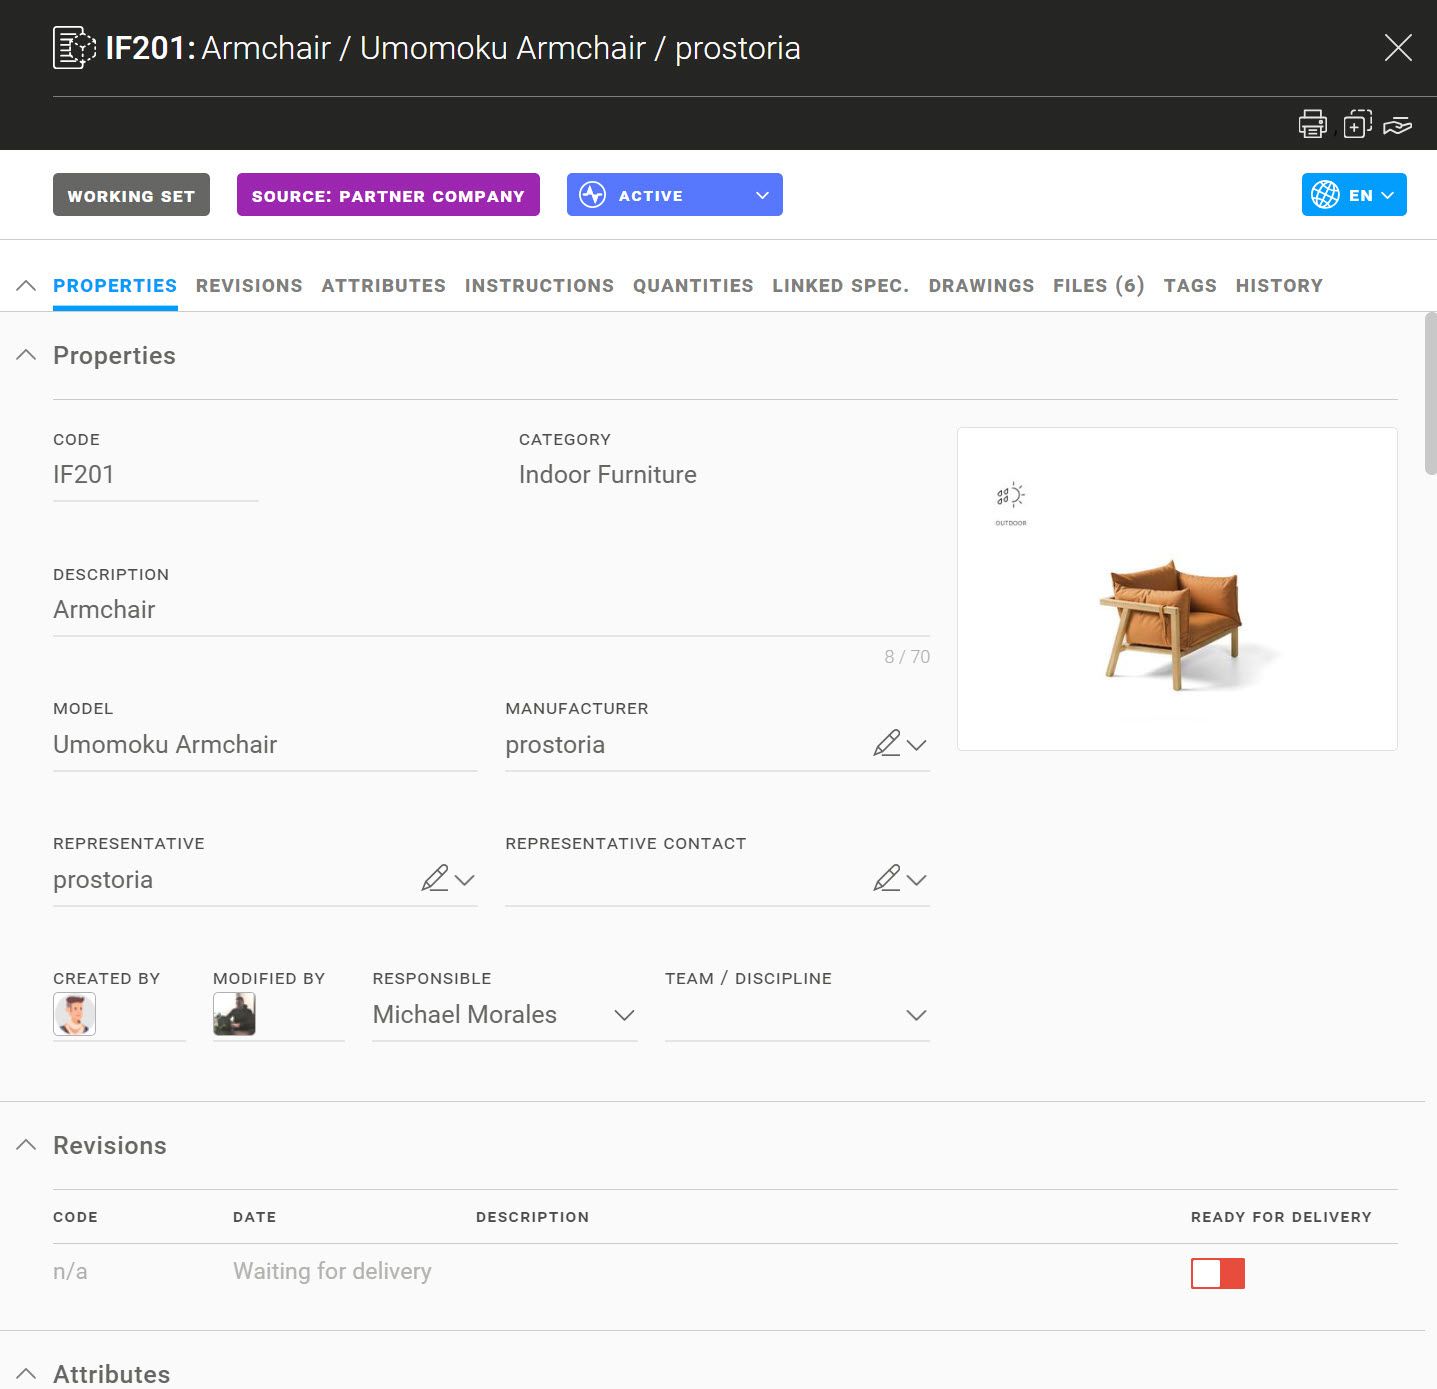
Specifications (level 4)
Specifications are detailed descriptions of products or materials required for a project, defining their essential characteristics. They substitute items in the BoQ for materials and products that need more precise attention. Specifications include additional data such as attributes to describe physical properties, instructions to ensure quality standards, performance criteria, compliance measures, and plans for aesthetics and precise execution.
Note: Specifications are described in detail in the help section "Specifications".
Specifications can be edited in flyout, additionally to items they have several tabs.
Revisions Tab: Tracking of changes.
Attributes Tab: Detailed attributes covering physical properties.
Instructions Tab: Detailed instructions on what needs to be taken care of.
Linked Specifications Tab: Child specifications needed for completion.
Plans Tab: Detailed drawings that elaborate on finishing complex products.
Files Tab: All necessary attachments.
For more information, refer to the Specifications help section
Element (level 5)
The "Element" represents sub-components of an item with the same description as the parent. While optional, elements provide granular tracking crucial for managing construction completion. They can be edited in Detailed and Compact Views or via the flyout window in the quantity table.
- Quantity: Indicates the amount of work or material required for each element, all quantities are automatically summed at the parent item level.
Area: Each element is listed on a new line. Connecting elements with areas like building floors or rooms ensures precise location tracking. Ensure the Area column is visible with a show/hide column switcher.
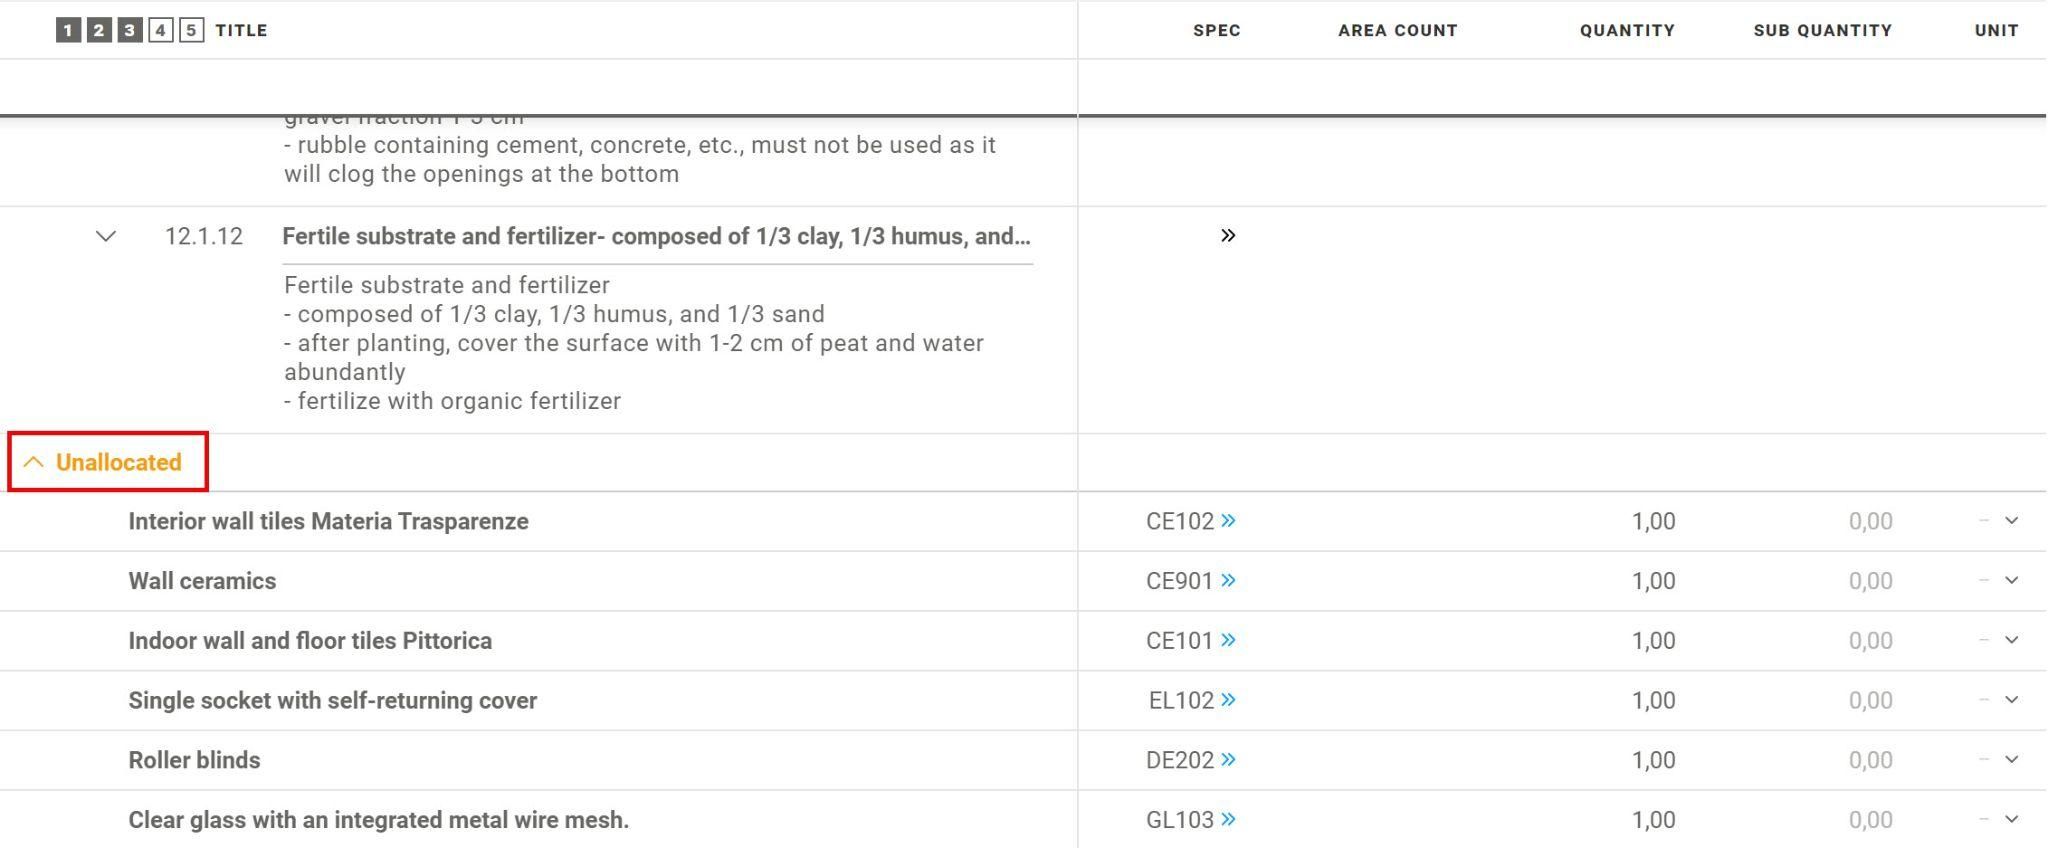
Unallocated Specifications
These are specifications within the BoQ that have not yet been assigned to any specific Group of items. They are located at the bottom of the BoQ and are collapsed behind an orange label titled "Unallocated Specs."
Assigning these specifications to Item Groups is essential to ensure they are included in the overall project budget. To do this, use the Move action located on the right-hand side of each Unallocated Spec entry (represented by the three dots). This action allows you to organize and integrate these specifications into the appropriate sections of the BoQ.
BoQ Display Options
VOLUM3 offers two distinct modes for viewing and editing the Bill of Quantities (BoQ): Compact and Detailed view. Each mode serves specific purposes and enhances usability based on different user needs. To switch between these modes, users need to select the icons located in the right part of the toolbar.
1. Compact View
In the Compact view, each item in the BoQ is represented by a single line. This streamlined display facilitates easier sorting, moving, and copying of items.
Special Features:
- Single-Line Display: Each item is displayed in a condensed format, making the table less cluttered and easier to navigate.
- Hidden Long Descriptions: Long descriptions for level 3 item groups and level 4 items are not visible in this mode. To view or edit long descriptions, users can open the flyout, which provides additional details without leaving the compact view.
- Drag and Drop: On the left side of the screen, three lines represent a tool to move and reorder all items in the BoQ.
- Right-Click Menu: Opens a context menu with multiple options for quick actions.
2. Detailed View
The Detailed view is designed for comprehensive editing, allowing users to directly edit long descriptions on the screen for BoQ item groups, items, or specifications.
Special Features:
- Full Visibility: Long descriptions for level 3 and level 4 items are fully visible, providing detailed information at a glance.
- Direct Editing: This mode allows for direct editing of long descriptions, facilitating easier data entry and modifications.
- Ideal for Large Entries: Detailed view is particularly useful for entering and managing a large number of items, ensuring all details are accurately captured.
- Limitations: In this view, users cannot use drag and drop and the context menu.
By offering these two modes, VOLUM3 ensures flexibility and efficiency, catering to different stages of the project management process and user preferences.
Columns
Default Columns visibility
- Spec: This column contains the specifications for each item, detailing the requirements and standards.
- Quantity: Indicates the total amount of the item required for the project.
- Unit: Specifies the unit of measurement for the quantity (e.g., meters, square meters, units).
- Price : The price is quoted in the currency designated within the project properties.
- Total: Shows the calculated total cost for the item by multiplying the quantity by the unit price.
- %: Indicates the percentage of the total project cost that this item represents.
Customizing additional Columns
You can customize the display of additional columns for your BoQ table according to your needs. Use the icon in the top right corner to select which columns appear. Hide unnecessary columns to declutter the view and simplify editing. To return to default settings, press "Reset to Default."

- Area Count: Displays the number of distinct rooms or areas where the materials and products will be installed.
- Sub Quantity: Sub Quantity indicates the total quantity derived by multiplying the Area Count of a specific section by the number of products required in that section.
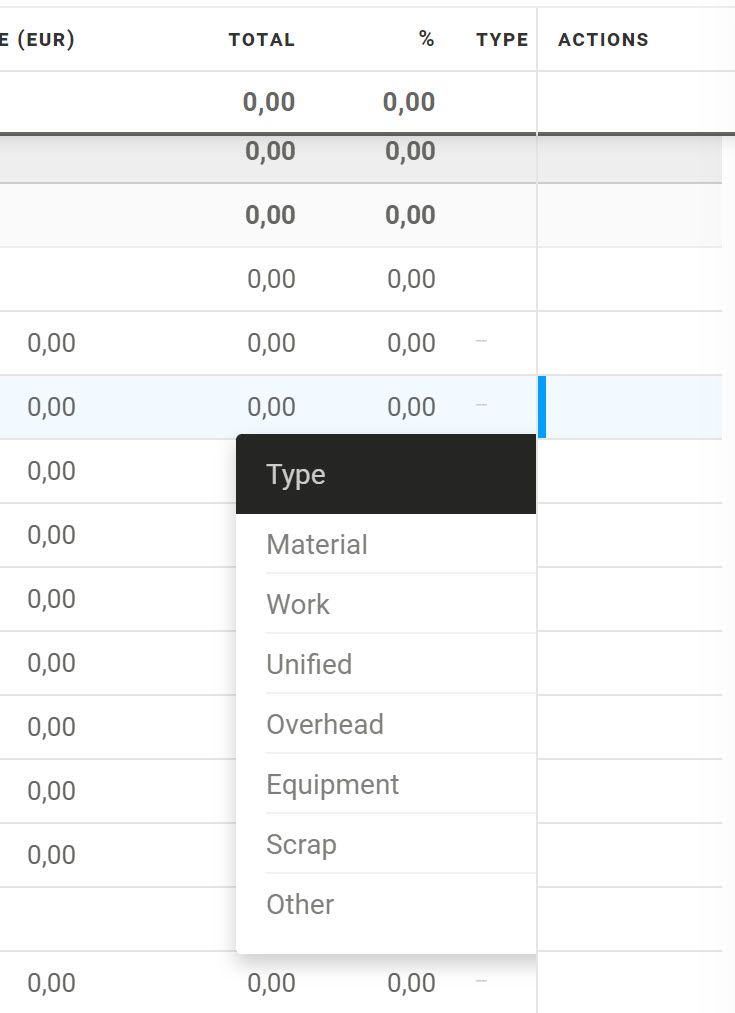
Type (cost) Label
Categorize BoQ items using the type dropdown (optional) to enhance organization and streamline data filtering within projects.
- Material: Items related to materials or products used in construction.
- Labour: Items related to the work required, such as installation.
- Unified: Combines labor and work items into a single category. (Note: it will be impossible to separate work and materials later on).
- Scrap: Accounts for wasted materials during construction (e.g., ceramics, stone).
- Equipment: Tools and machinery needed forthe project (e.g., cranes, bulldozers).
- Overhead: Costs associated with project management, design, or rentals.
- Other: Covers various miscellaneous project costs.
These features support a thorough Cost Breakdown, ensuring clear separation of labor and material costs for effective cost management, and streamline the creation of the Bill of Materials (BoM) by simplifying the identification of required materials for the project.
Area Label
The Area dropdown allows users to select the physical location (e.g., building, floor, or room) of elements within an item or specification. Note that the area can only be assigned to elements (5th level of BoQ).
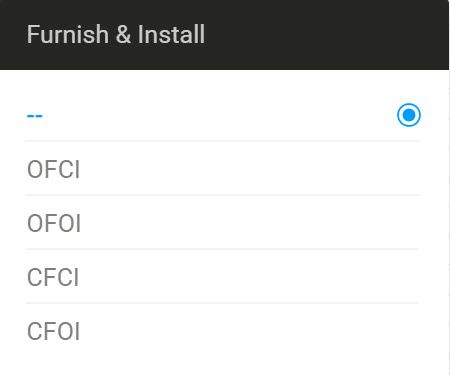
Furnish and Install Label (F/I)
VOLUM3 allows you to label items and specifications in the Bill of Quantities (BoQ) based on who supplies (procures) and installs them. There are four classification options available:
- OFCI (Owner Furnished, Contractor Installed): The owner supplies the item, and the contractor installs it. An example of this is light fixtures.
- OFOI (Owner Furnished, Owner Installed): The owner supplies and installs the item. An example of this is loose furniture.
- CFCI (Contractor Furnished, Contractor Installed): The contractor supplies and installs the item. An example of this is plumbing fixtures.
- CFOI (Contractor Furnished, Owner Installed): The contractor supplies the item, and the owner installs it. This is less common.
These procurement and installation labels help ensure clear communication and management of responsibilities for the supply and installation of items in the project.
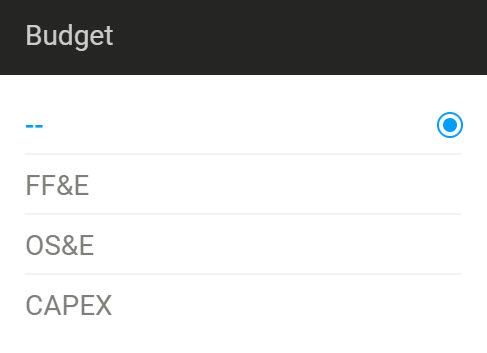
Budget Label
Volum3 allows you to label items and specifications according to Budget categories: CAPEX, FF&E, and OS&E.
- CAPEX: Capital Expenditures (CAPEX) are items that are fixed and serve as long-term assets for the company, such as infrastructure buildings and major equipment.
- FF&E: Furniture, Fixtures, and Equipment (FF&E) are movable items that furnish a space, such as chairs, tables, and lamps.
- OS&E: Operating Supplies and Equipment (OS&E) include consumable items and small equipment necessary for daily operations, such as linens, cutlery, and cleaning supplies or daily operations, such as linens, utensils, and cleaning supplies.
Bill of Quantity Actions
Bill of Quantity Actions
Move action : lets you reorganize items in your BoQ. Select an item, click the move button, and a pop-up will appear. Choose whether to move the item before or after another item from a dropdown menu. Confirm by clicking "Move," and the item will be repositioned to maintain your project plan's structure.

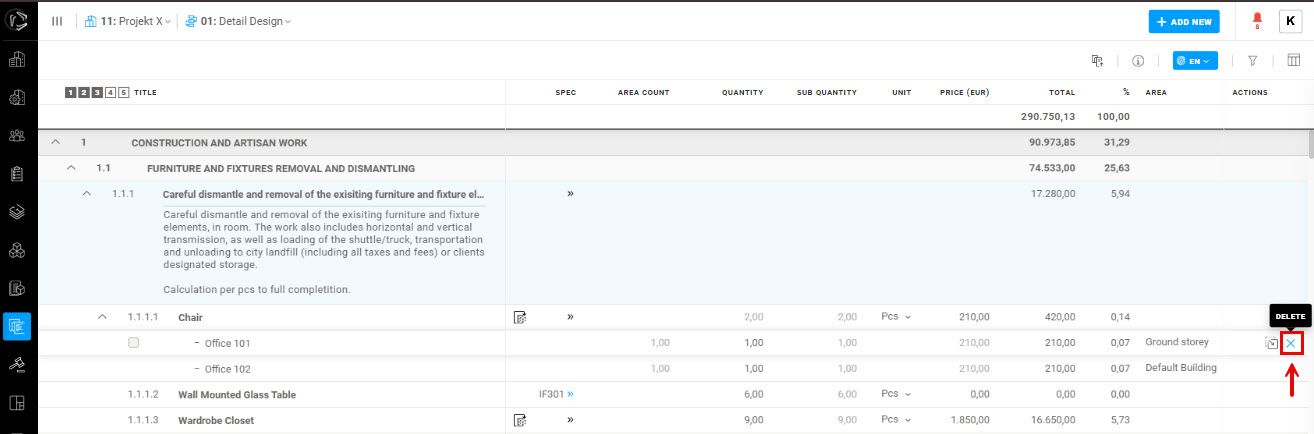
Delete: The delete action removes an item from your BoQ. This is useful for erasing entries that are no longer needed or were added by mistake, helping to keep your BoQ clean and relevant.
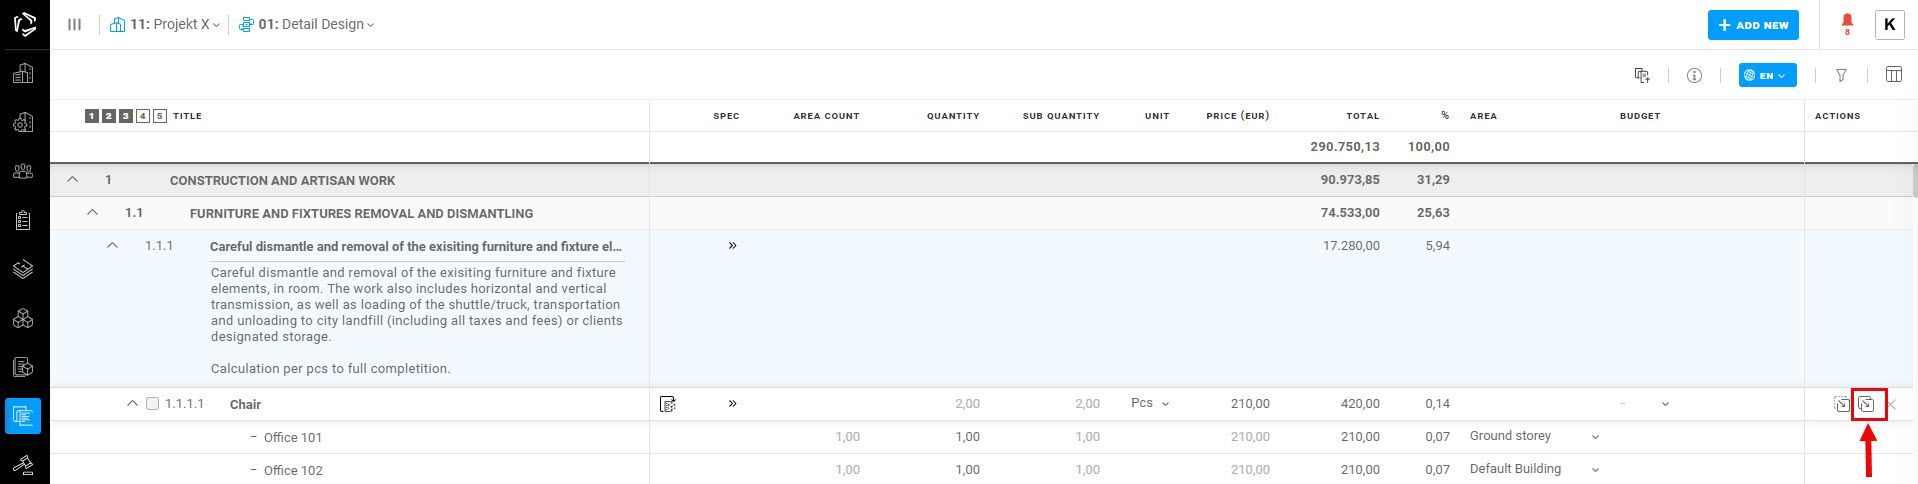
Convert to Spec: The convert to spec action changes a selected item into a specification. This is useful when you need to detail specific requirements or standards for an item, ensuring clear and precise project guidelines.
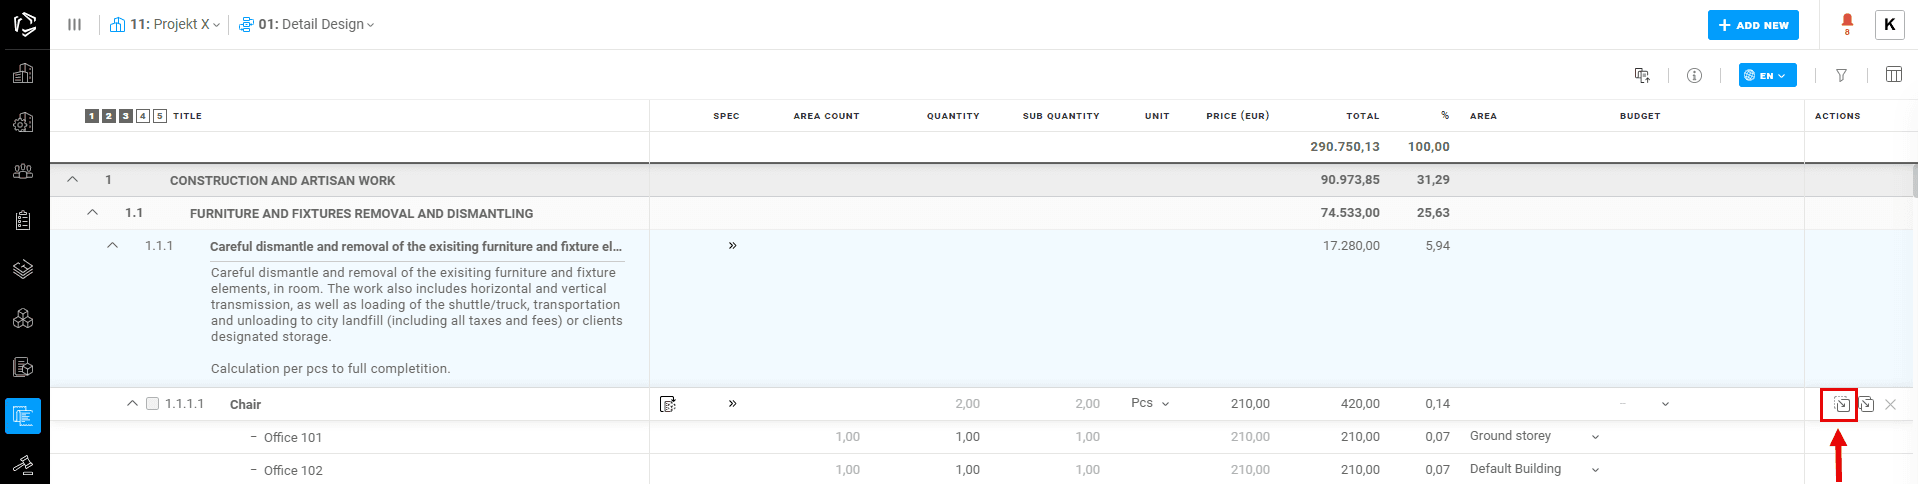
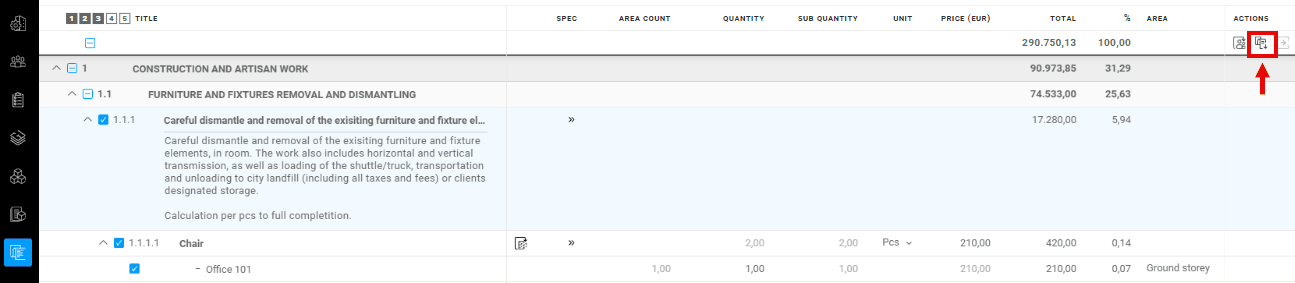
Copy: The copy action creates a duplicate of a selected item in your BoQ. This allows you to easily allocate the same specification to different groups/subgroups.
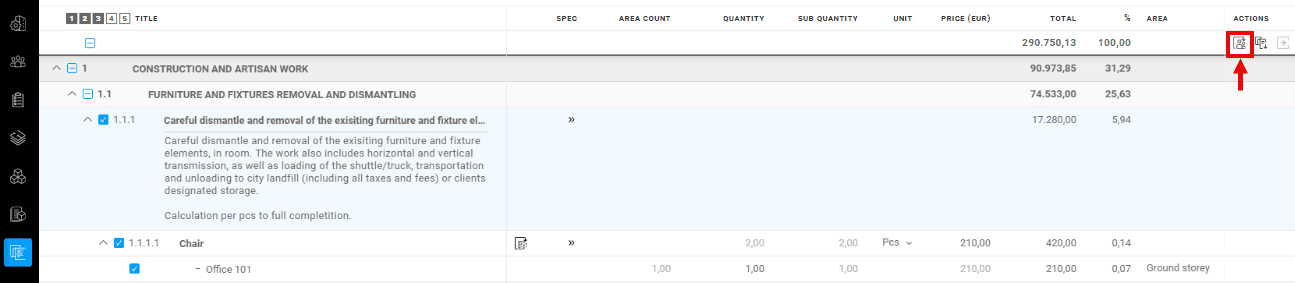
Save BoQ as Template: The save as template action lets you save a selected set of items or an entire BoQ as a template. This is useful for creating standardized formats that can be reused in future projects.
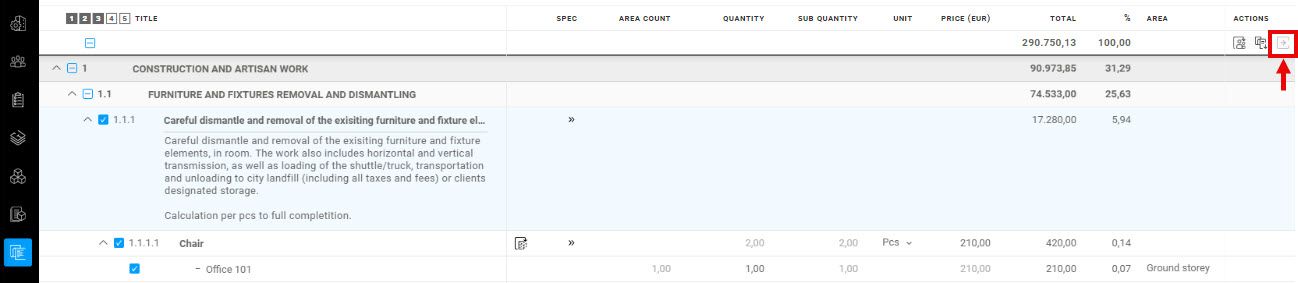
Add to Tender: The add to tender action includes selected items in a tender document. This helps in preparing comprehensive tender packages by ensuring all necessary items are accounted for in the bidding process.
Export: The export action will allow you to export your BoQ or specific items into various formats. This feature will enable easier sharing.
Resize: The resize feature enables you to adjust the width of the columns in the BoQ table. By clicking and dragging the edge of a column header, you can make the column wider or narrower to better fit the content or to improve readability. This customization ensures that you can optimize the table layout to suit your viewing preferences.
Creating new BoQ
There are three ways to create BoQ in Volum3:
- Create BoQ manually from scratch
- Creat using templates
- Create using xls
Create BoQ Manually (from Scratch)
This feature allows you to create new items in your BoQ from scratch. To use it, click the "Add New" button in the top right corner, which will display a dropdown menu with several options:
- Add Category: Create a new main section in your BoQ.
- Add Type: Add a Type section under an existing Category.
- Add Item Group: Insert a specific item group.
- Add Item: Create an item with quantity, unit of measurement, and price.
- Add Item From Template: Load a predefined item from a template.
- Add Element: Add a detailed component related to an item.
For a quicker workflow, six buttons with the same functionality are provided at the bottom of the screen.
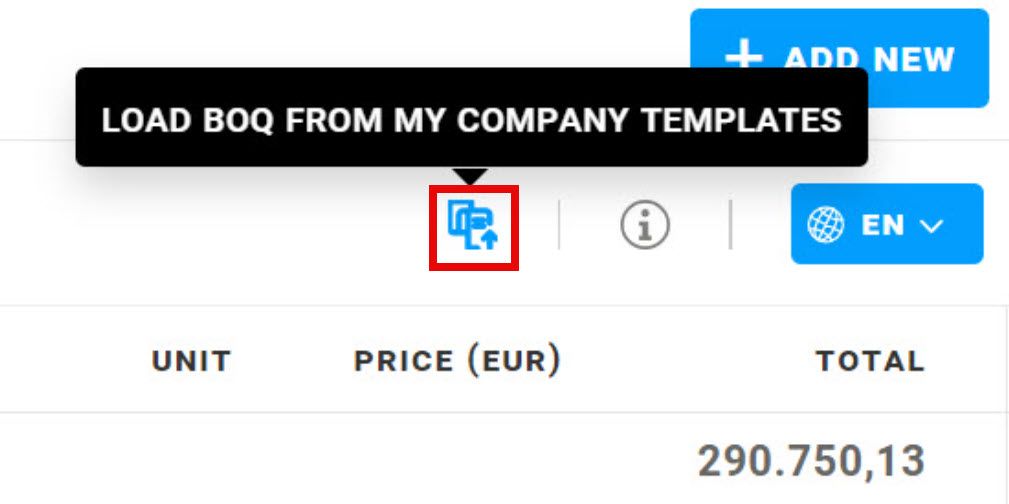
Load BoQ from Template
This feature allows you to load Bill of Quantities (BoQ) templates. To use it, click the "Load BoQ from Templates" button to open a list of available templates. Select the template you want to add.
There are two types of templates:
- System Templates: These are preset templates provided by VOLUM3.
- My Company Templates: These are templates saved by your company.
This action will load the entire BoQ structure with descriptions. This feature is particularly useful for saving time and maintaining consistency across projects by reusing standard item templates.
Import -BoQ
With VOLUM3, you can easily import a Bill of Quantities prepared in Excel. To make the process easier, we have prepared a template with all the necessary columns, ensuring that your Bill of Quantities perfectly matches our platform's requirements. You can download this template here.
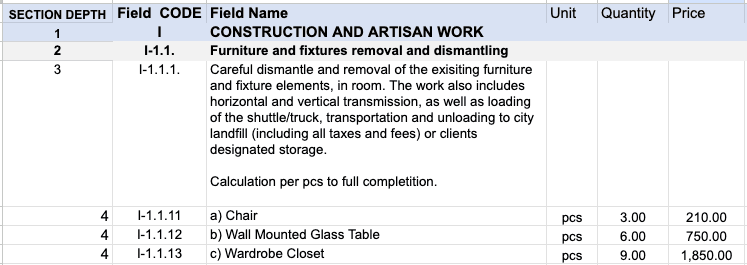
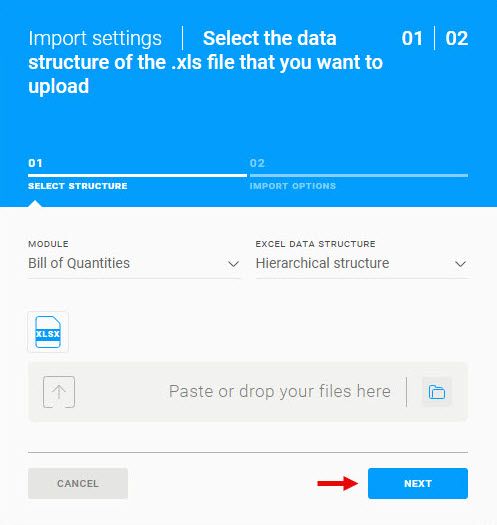
Step 1: Create a Bill of Quantities in Excel
Create a Bill of Quantities with the necessary columns in Excel that match the VOLUM3 data structure.
Step 2: Save the Excel File
Save your Bill of Quantities as an Excel file on your computer.
Step 3: Import the Excel File into VOLUM3
- Open VOLUM3.
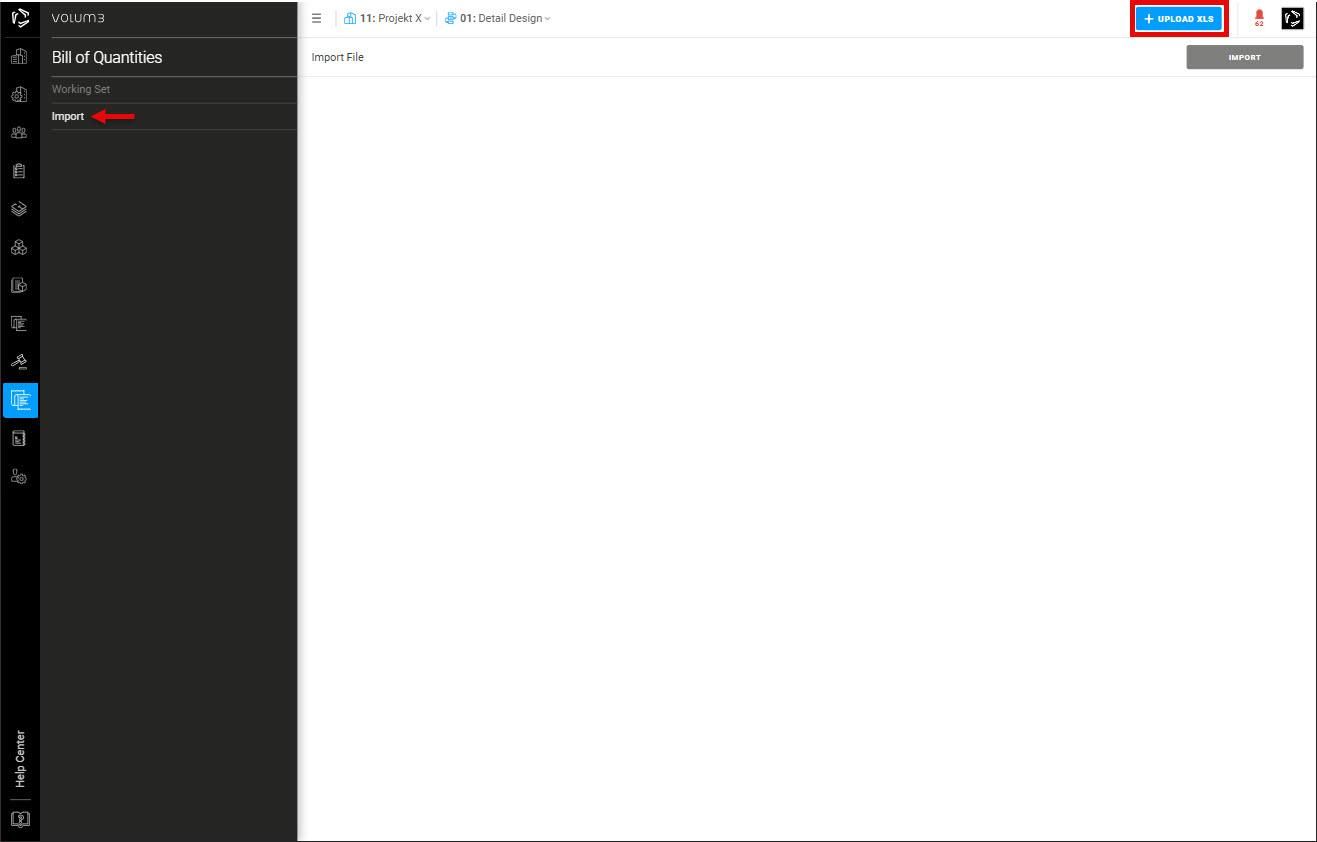
- Go to the Bill of Quantities module.
- Click on the Import option in the main menu on the left side.
- Click "Upload XLS" in the upper right corner.
- Select the Excel file you just edited and saved.
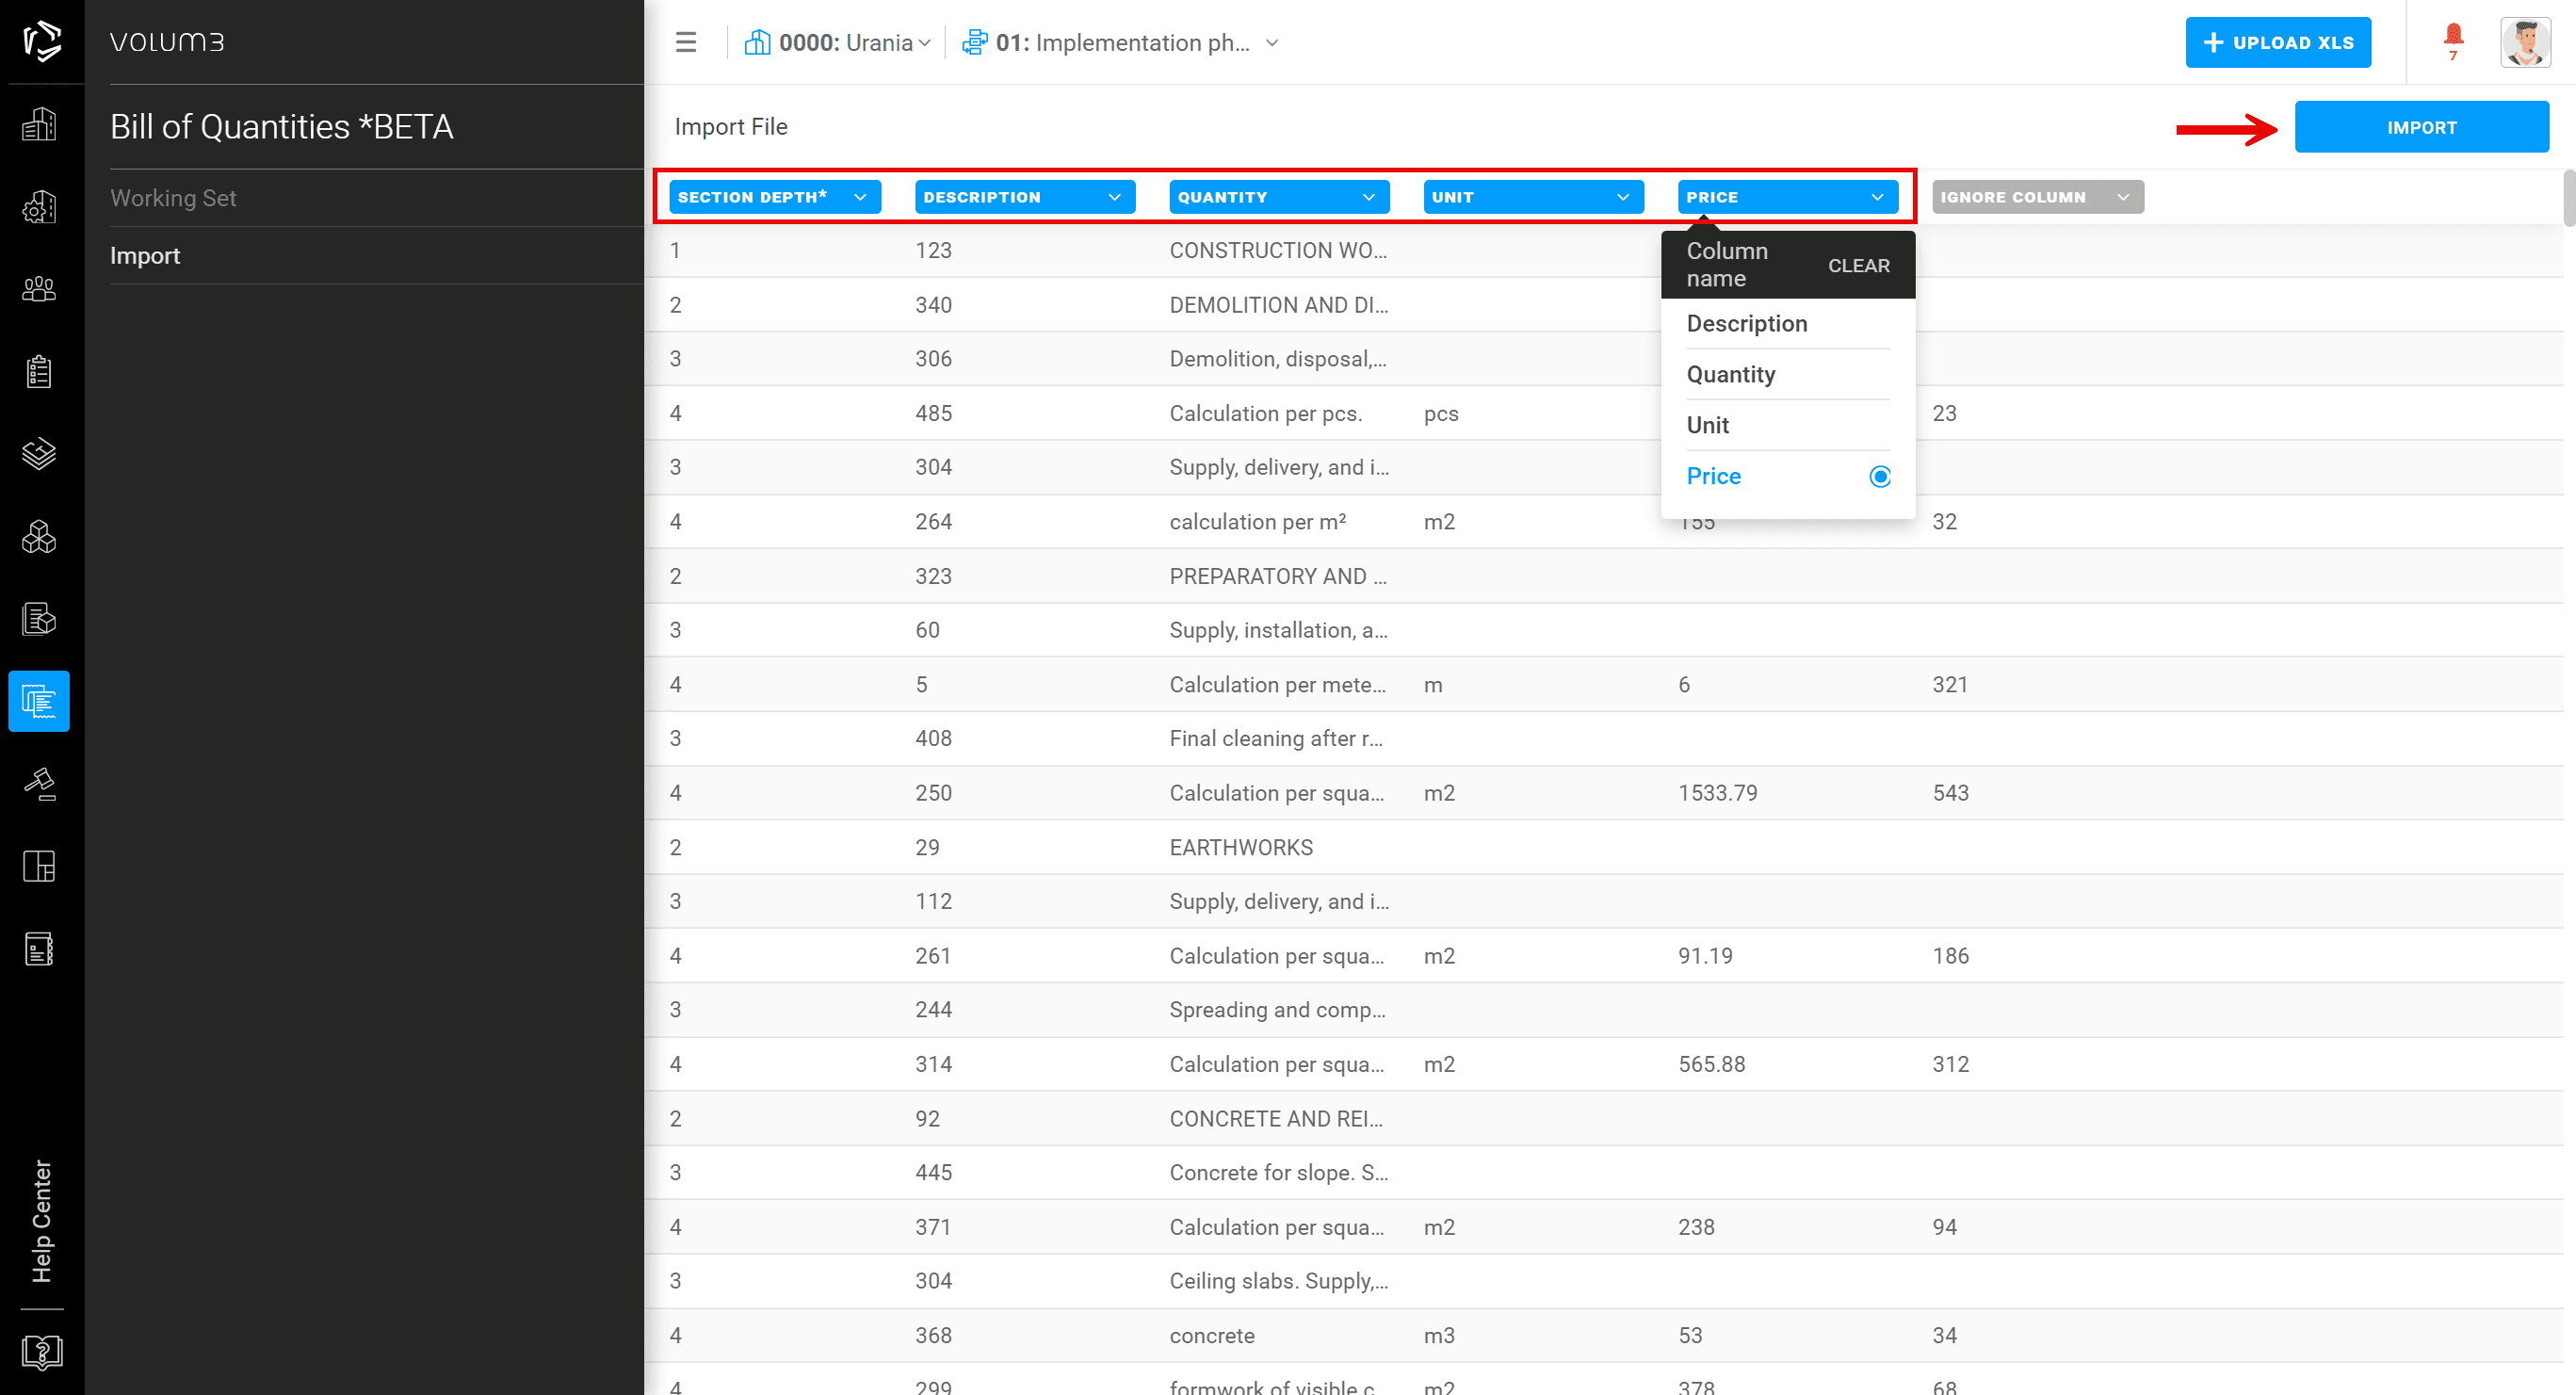
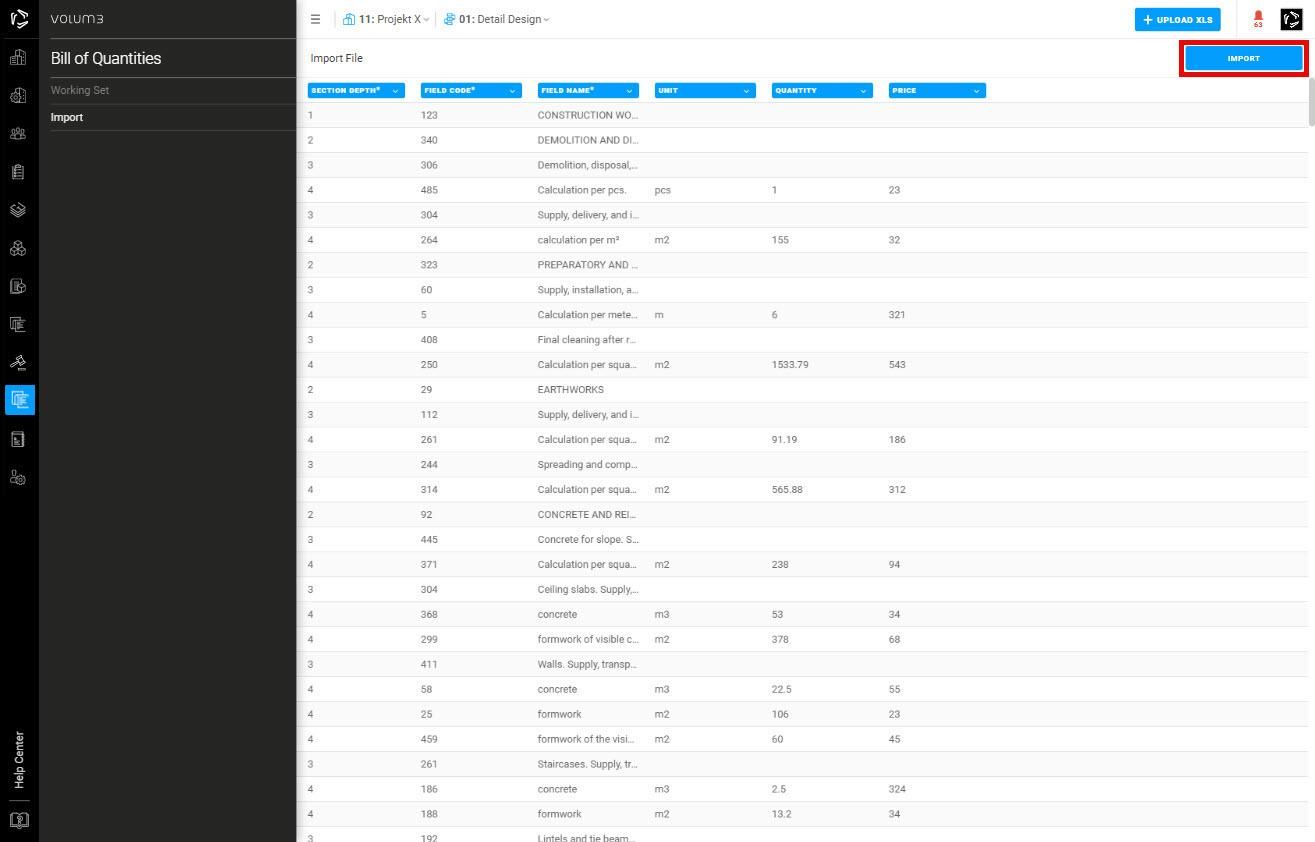
Step 4: Matching Columns
After uploading the Excel Bill of Quantities into VOLUM3, you need to match the columns in your Excel file with the corresponding columns in VOLUM3.
Once you have matched all the necessary columns, the Import button will change from gray to blue, indicating that the table is ready for import.
Click the Import button.
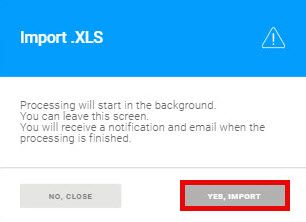
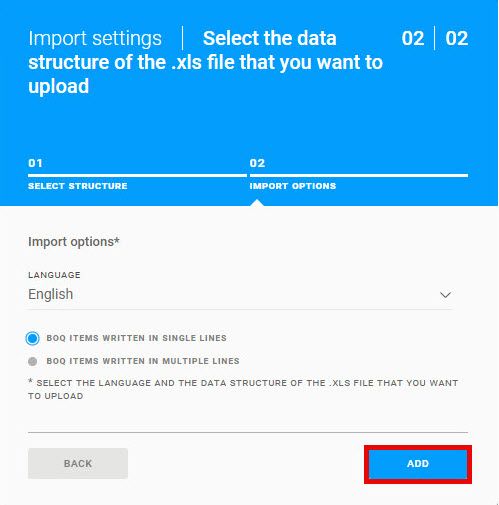
Step 5: Import Data into VOLUM3
VOLUM3 will start the import and data validation process in the background. After validation is complete, you will receive one of two notifications:
- Import Successful:
"The file has been successfully imported. Data has been transferred."
If the import is successful, skip all below and continue to Step 8. - Import Failed:
"We are sorry, the recent Excel file import was unsuccessful. To assist you, we have prepared an Excel file with color-coded cells indicating issues. Click here to download the .XLS report. Open the report file in Excel, correct the highlighted errors in the file, save it, and try importing it again into VOLUM3. Note: the above link is only valid for 7 days."
If the import fails, the notification will contain a link to an Excel report file with highlighted data errors and additional information about them. Click "Download Report" to open the Excel file and review all the errors.
Step 6: Resolving Data Errors
Open the report in Excel. You will notice that some cells have different background colors. These colors indicate types of errors:
- Orange: Missing data - Data items must not be empty; these fields are mandatory and must not be left blank.
- Red: Invalid data - Data with an invalid format cannot be imported. Review the data format to ensure it corresponds to the selected column, such as numbers, dates, etc.

Note: The same explanations can be found in the "Legend" sheet (second tab) within the Excel table for additional guidance on error color indications.
Once you have corrected all errors, save the updated Excel file.
Step 7: Import the Corrected Excel File into VOLUM3
Import the corrected Bill of Quantities table back into VOLUM3. Repeat steps 4 and 5.
Step 8: Import the Bill of Quantities into VOLUM3
Click the Import button to start the process.
If the validation is successful, VOLUM3 will import the cost estimates/Bill of Quantities from the spreadsheet into the BoQ module.
Note: If there were validation errors, return to Step 6.
By following these steps, you can efficiently import Bills of Quantities created in Excel into VOLUM3.
BoQ Languages
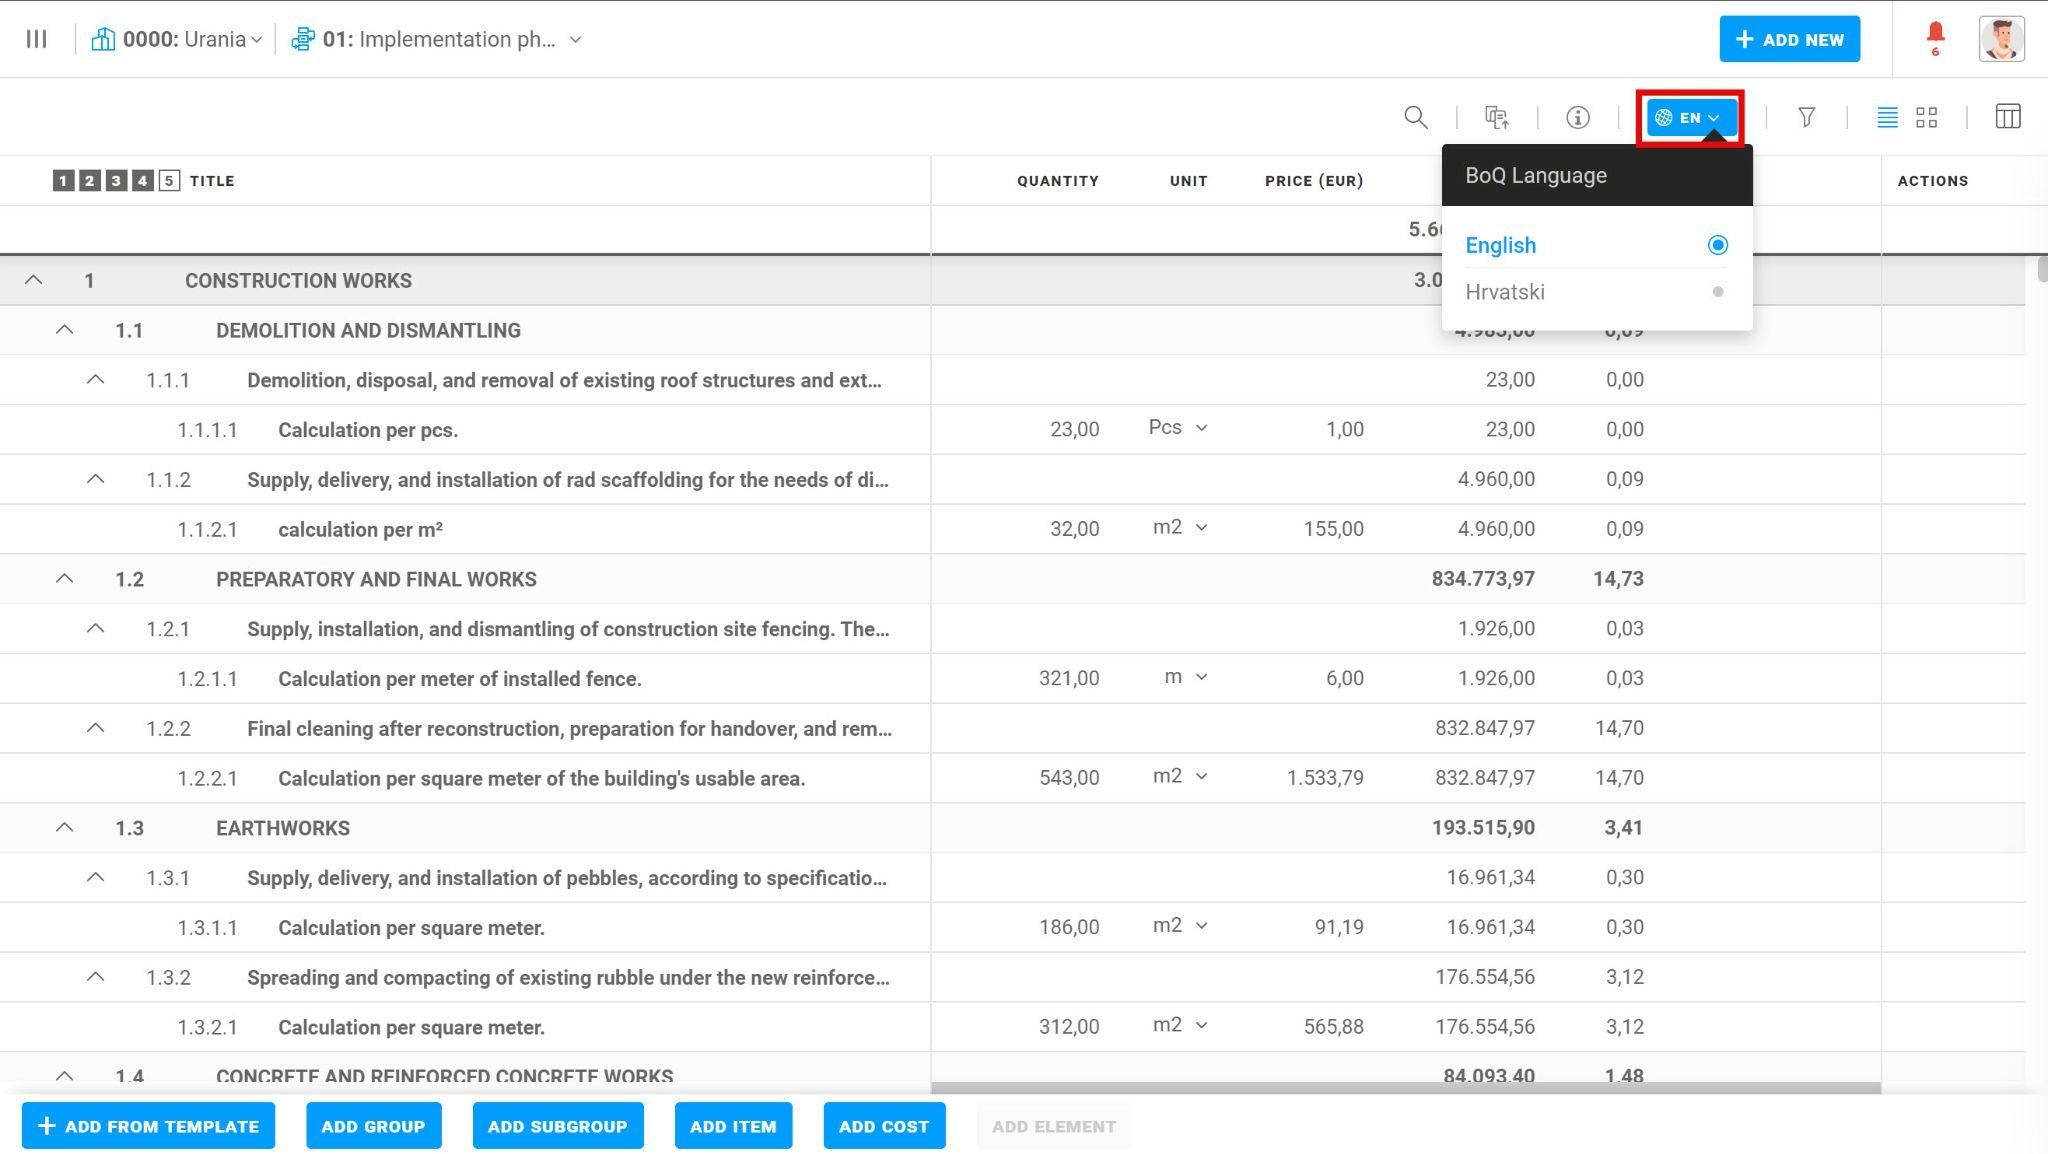
Language of the BoQ: The language of the Bill of Quantities (BoQ) is primarily set to the main language used in the project. The BoQ can also be translated into any other language as needed, allowing easier communication for international teams.
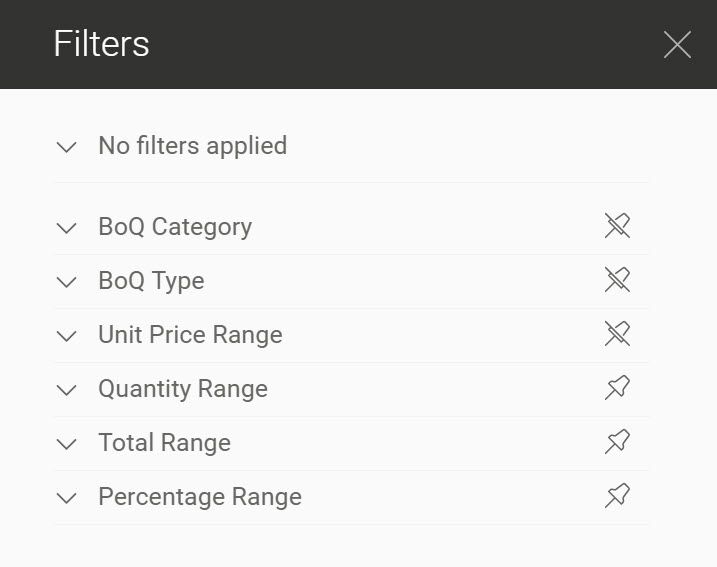
Filters
Filters are a cornerstone feature in VOLUM3, designed to empower users by revealing otherwise hidden and difficult-to-access data, enabling informed decisions on project costs.
Hierarchical filters
- Filters by BoQ Category (Level 1): Allows selection of the main work categories (e.g., Civil Works, Electrical Works) within your BoQ, providing a broad overview.
- Filters by BoQ Type (Level 2): Refines the view to specific sections (e.g., Foundation Works, Wiring) that belong to the chosen category, enhancing focus and clarity.
Detailed Cost Insights
- Unit Price (Range): Displays all items falling within a specified price range, eliminating the need to set upper or lower limits separately.
- Unit of Measurement: Filters items based on the unit used to measure quantity (e.g., meters, square meters, hours), ensuring precise data retrieval.
- Quantity (Range): Indicates the amount of work/material required for each item, crucial for accurate budgeting and resource allocation.
- Total Price (Range): Provides a comprehensive view of items falling within a specified total price range, facilitating strategic cost management.
- Percentage (Range): Displays items falling within a percentage range (e.g., 10% to 40%), aiding in budget analysis and optimization.
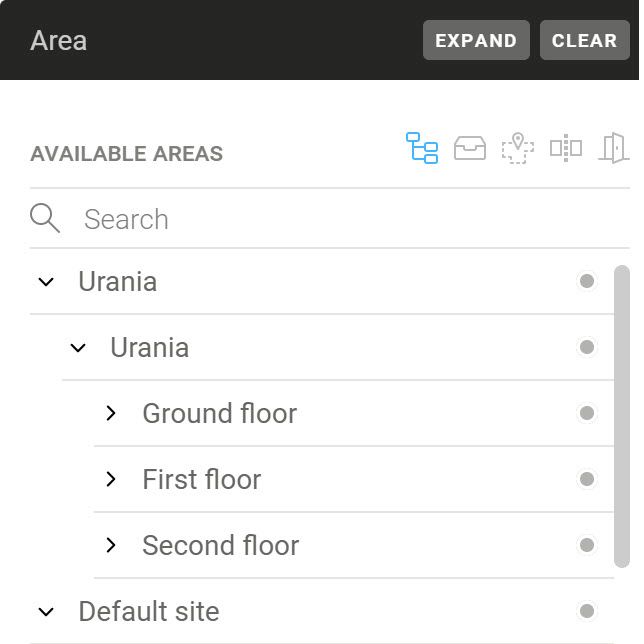
Area Filters: Illustrate how BoQ elements are spatially distributed within a building:
- Site: Pertains to items without a specific physical location within the project.
- Building: Relates to items applicable across an entire building without specific placement.
- Storey: Filters items according to their association with a particular floor or level.
- Room: Specifies items tied to specific rooms, particularly useful for FF&E and detailed project planning.
These filters collectively enhance visibility, streamline data management, and support efficient decision-making throughout project lifecycles.
BoQ

Trg E. Kvaternika 3/3, 10 000 Zagreb, Croatia
+ 385 1 333 1909 info@volum3.com


